
New users often find it difficult to add a Facebook pixel to their WordPress website mainly because they don’t know where to start. Facebook pixel helps you optimize your Facebook ad campaigns by gathering information about your visitors and then generating an audience that is more relevant to your business.
In simpler words, Facebook Pixel helps you target your ads better and get better click-through rates and conversion rates.
There are two ways you can add Facebook Pixel to your WordPress website, manually and through a Facebook pixel plugin.
In this article, I will take you through both the methods and show you how you can add a Facebook pixel to your WordPress website.
How to Add Facebook Plugin Manually
When you add a Facebook Pixel manually, you just copy the pixel code and paste it on the header of your WordPress website.
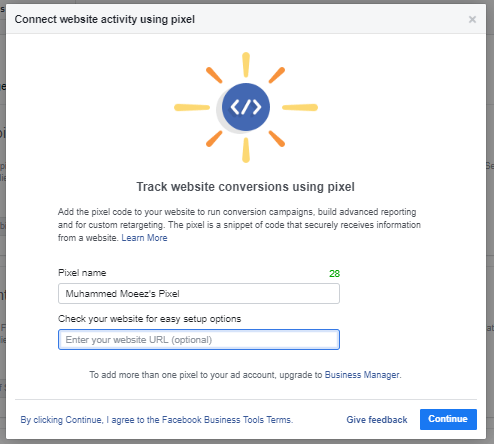
To get started with this method, you need to create a Facebook Pixel ID first. If you haven’t created one, you can do that from here.
Once you’re on this page, click on the Get Started button.

You will be asked to enter your name and website.
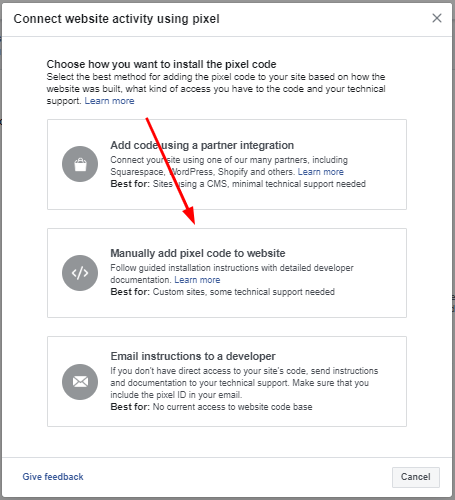
Click Continue and then click Manually add pixel code to your website
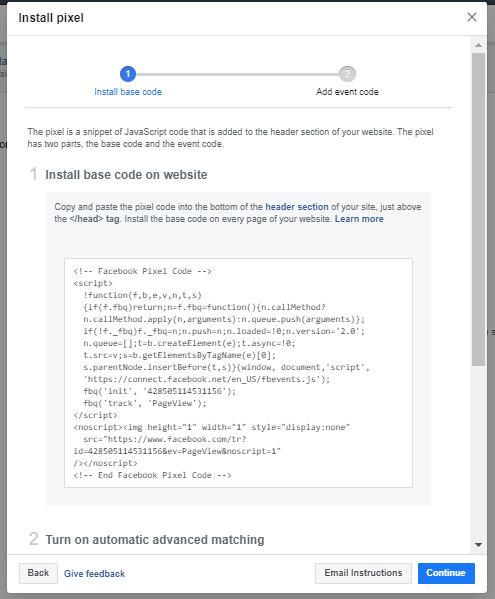
Once you move forward, you will see the Pixel code that you will have to copy and paste on your WordPress website’s header.
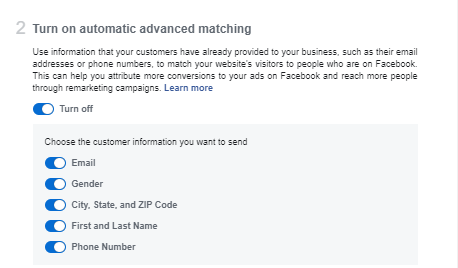
If you scroll down this page, you will see some more options to help you collect more information about your visitors.
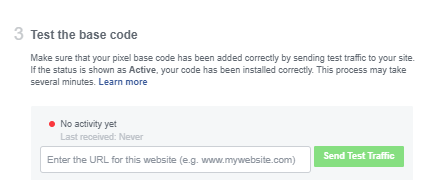
There is also an option to test your code to see if it’s working properly or not.
Adding Facebook Pixel Plugin to Your WordPress Website Via a Plugin
Facebook pixel plugins give you more than just the ability to add the pixel code to your website; they also let you create custom audiences.
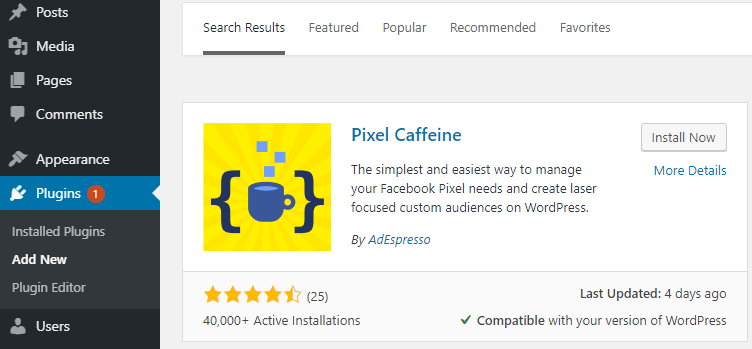
For this tutorial we will be using Pixel Caffeine, a popular Facebook pixel plugin, to add a pixel to your WordPress website.
Start by installing the plugin on your WordPress website.
Once you have installed and activated the plugin, you will see this page.
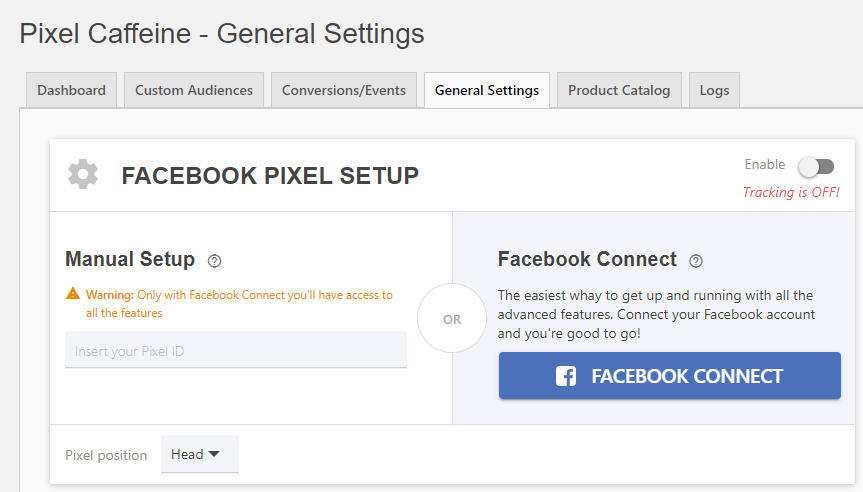
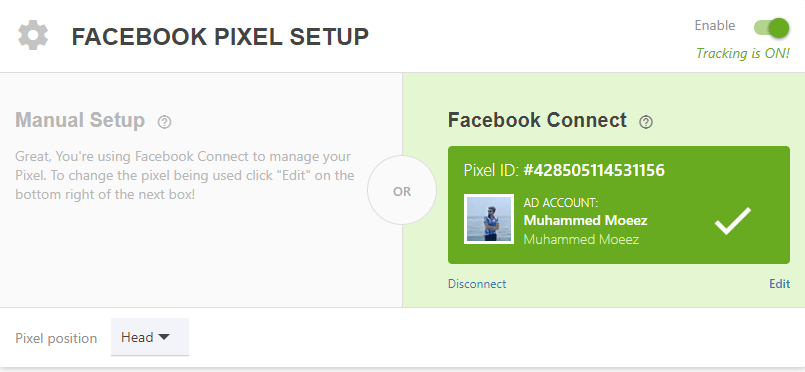
You can either start by entering your pixel ID or you can connect your Facebook account, in which case it will be easier to install the Pixel and you will get all the advanced features as well.
For this tutorial, we will use Facebook Connect. Once you allow the plugin to connect with your Facebook account, you will have to choose the ad account that you want to connect to.
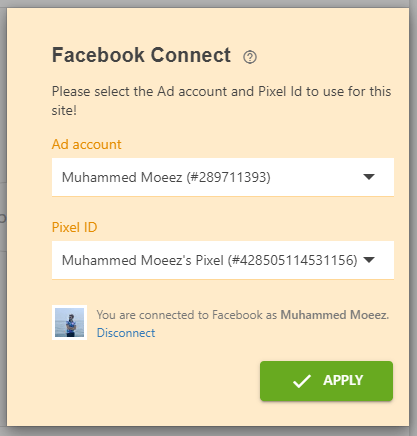
Once you have selected the ad account, click on Apply to set up your Pixel.
Pretty simple, isn’t it?
Now that you have installed the pixel, click on the Dashboard tab to track the activity on your Pixel.
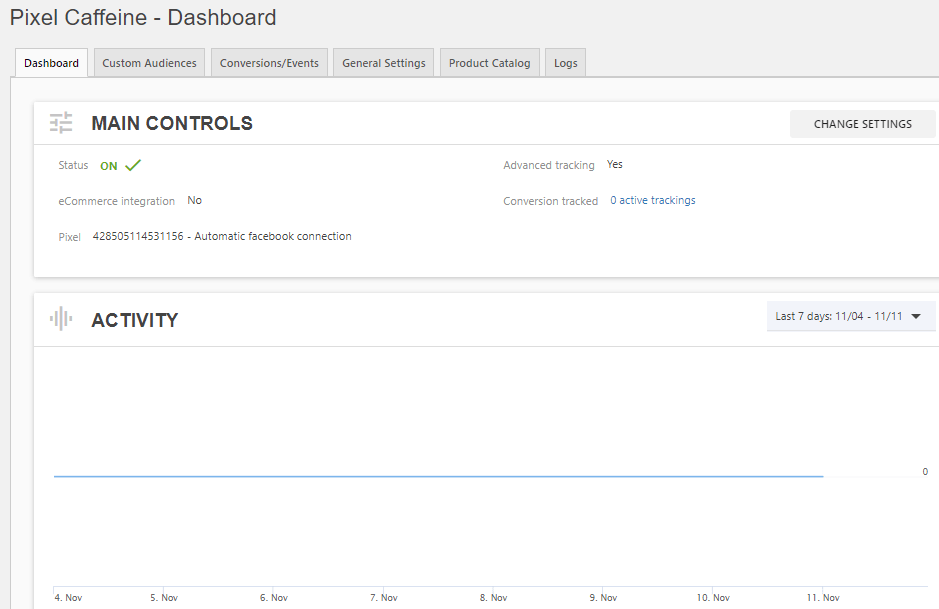
You can also set up Custom Audiences and Conversion Events directly from your WordPress dashboard.
Final Words
Now that you know how to set up Facebook Pixel to your WordPress website, you will be able to filter out your audiences and better optimize your Facebook ads. Your ads will now be more targeted and will reach the right people which will improve their click-through and conversion rates.
If you think the plugin I used in this article is not the right one for you, you can also check out this list of the best WordPress Facebook pixel plugins to choose from.


from Quick Sprout https://ift.tt/2XORcjX
via IFTTT
