So you have made the leap to use WordPress as the place to build your website. Though you’ve made a great decision, you may feel a bit confused about what to do next and how you can make changes to your website.
Don’t worry, this a common problem for people new to WordPress.
The first thing you want to do is log into your admin dashboard. The dashboard is the control center of your website. Here is where you will make changes to your site ranging from the font you use to the plugins you add to the URLs you build into your site.
You may find yourself using this dashboard daily, so it is essential to learn how to access it and use it. Without access to the admin dashboard, you will find it extremely difficult to fully control your website.
To access your WordPress login page, simply add /wp-admin or /wp-login to the end of your site’s URL. For example, https://ift.tt/2R8GRAM will get you to the page where you can log in to the dashboard.
However, because of the massive amounts of users on WordPress (409 million people per month, in fact), there is room for problems that often come in the form of people hacking your site. All the bots and hackers in the world can scan for the standard URL with /wp-admin at the end of it, making it much more vulnerable to attacks.
That’s why it’s a good idea to change your login URL to something else. This will cut down on the number of unwanted login attempts and keep you from being a major target for brute force attacks. In addition to that, changing your login URL decreases the strength that the bots have who are scanning /wp-admin WordPress login URLs over and over again.
Since this is such an important piece of having your website, we are dedicating an entire post to talking about why it’s crucial that you change your WordPress login URL, as well as a step-by-step guide on how you can do it in almost no time.
What to Expect When Changing Your WordPress Login URL
Though changing your login URL sounds like a complicated process, this guide will show you that it is a quick and painless experience that will have your site more safe and protected from malicious hackers trying to get in.
You can change your login URL a few different ways, but the best and easiest way to do this is by using a plugin. And there are multiple options for plugins, but the most tried and true plugin is WPS Hide Login.
Thus, today we teach you how to get the WPS Hide Login plugin on your site to protect it from hackers.
Here is a quick overview of the steps in the process, with more detailed information below.
- Backup your site
- Download and activate the WPS Hide Login plugin
- Set up the WPS Hide Login plugin
- Test it out
The Good
Brute force attacks are the most common type of security breach. These types of attacks are not performed by people but rather by bots. These bots are able to try thousands of combinations of usernames and passwords in a matter of minutes in an attempt to get into your site.
So, rather than keep your login page a URL hackers can guess, it’s a good idea to make it something harder to find.
The WordPress login URL defaults to https://ift.tt/2R8GRAM, which is why hacking can happen. These bots can scan website after website ending in /wp-admin and try countless combinations of login information to get in.
This can be even easier because often, people use the same usernames for multiple things and pick the easiest passwords. These include things such as:
- 123456
- Password
- admin
- 12345
- 123456789
- qwerty
- And more
To remember all their passwords, people often default to something easy. While that will make it easier for you to remember, it will likely make it easier for someone to hack into your website and possibly other accounts of yours if you’re using the same username/password combinations.
It is not a good idea to use the same password for your login to different accounts. It may take more time and organization to have different passwords for each site, but it is well worth keeping unwanted hackers out. You might want to consider a password manager to keep track of everything.
In addition to making different passwords, you also want to create a unique custom login URL. By doing that and moving it away from /wp-admin, you make it harder for attackers to find. This means your site is more protected and less likely to have issues.
Thankfully, the process of changing your WordPress login URL can be smooth as long as you choose to go the route of installing a plugin versus the other options out there. This is especially true if you are still somewhat new to WordPress
The Bad
If you are looking to minimize the number of plugins you have on your WordPress site, we understand. It can be overwhelming to have so many different plugins that need to be updated consistently, which can slow your site down.
Thus, some people opt to change their WordPress login URL manually rather than installing yet another plugin on their site. While this is an option, it is one that we highly suggest you don’t take.
A manual change of your login URL can be done using File Transfer Protocol (FTP) or an alternative method of accessing your website’s files. However, this means you are getting into the WP Core files, and that is a place where a lot can go wrong, especially if you are not well-versed in WordPress and code.
Additionally, changing the login URL manually means that every time you update WordPress (which you should do regularly to keep things running smoothly), your login page file will be recreated. Every time. Which means that you will have to change the URL again. And again. And again.
On top of that, manually changing the login page URL opens up room for errors when you log out.
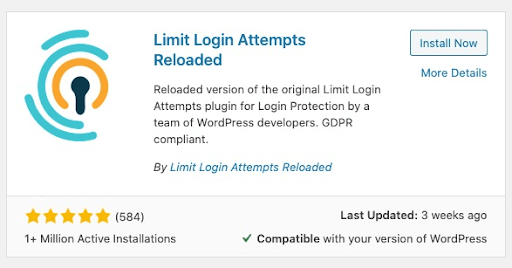
Another way that you can keep your admin site safe from hackers is to limit the number of login attempts on your site. The best way to do this is with a plugin called Limit Login Attempts Reloaded.
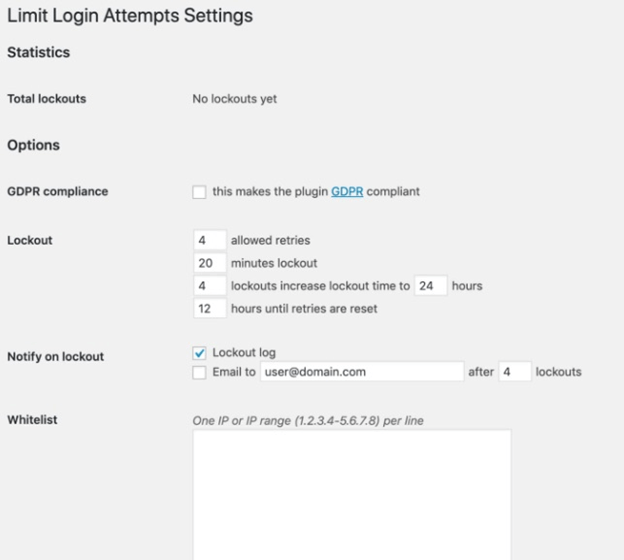
This plugin allows you to see a couple of different things:
- Total lockouts: The number of times people tried to hack into your website but were blocked
- Lockout: You can choose how many times people are allowed to try to log in before getting locked out, how long a lockout lasts, how many hours until retries are reset, and more.
We suggest you set your retry count to four since there are times that you or an approved person who has access to your site forgets the password and keeps trying to log in.
Using this Limit Login Attempts Reloaded plugin is a less popular route but is one that works.
However, to err on the safe side and ensure you don’t risk your site facing additional issues, stick to changing your login URL with a plugin. Today, we are focusing on using the WPS Hide Login plugin, as this is the most popular and user-friendly plugin to do so.
Step 1 – Backup Your Site
The very first thing you need to do before you start messing with your login URL at all is to backup your website.
This ensures that in the rare case something happens while you’re installing the plugin, the version of your website where everything was running perfectly still exists, and you’ll be able to find it again.
To back up your website, you need three things:
- The WordPress code
- The wp-content folder that holds your themes, plugins, and any uploads
- Your database
Understand Why Backing Up Is Important
The database is the most crucial piece of your website. This is where all your pages, posts, users, and anything else you’ve entered into the admin lives.
The content folder is home to any themes, plugins, images, and files you have uploaded. If you happen to lose what is in the content folder, it is possible to re-upload, though it just tacks on additional time to the process. And the code is important but not a huge deal as it is publicly available via a download.
Which Plugin to Use
Many people find that the easiest way to back up their WordPress site is by using a plugin such as BackWPup. This plugin backs up your entire database and all of your files and stores them either on your server or outside storage locations such as Dropbox.
BackWPup is a free plugin that will get the job done quickly and with minimal effort on your end and put your mind at ease.
And if you need to restore a backup you created with BackWPup, you can easily do so.
Bluehost
If you choose to host your WordPress website through Bluehost (which two million websites do), then you won’t have to back up your site manually. Bluehost secured the #1 spot on our list of Best Web Hosting for WordPress for a number of different reasons. One of them is the fact that the Site Backup and Restore tool on Bluehost automatically makes a daily backup of your site to ensure that no data is lost. This means you can recover and access files in no time and restore them with just one click.
Step 2 – Download and Activate the WPS Hide Login Plugin
Once you have the backup completed, you can start the process of changing the login URL.
You first want to download the plugin you’ll use to do this: WPS Hide Login.
Install the Plugin
Log in to your WordPress site and head to the plugins directory. Here, search for ‘WPS Hide Login.’
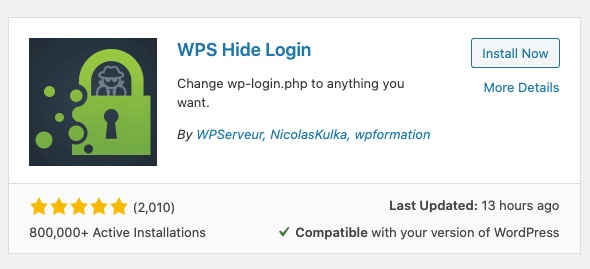
Once you find it, click Install Now to begin the installation.
Active the Plugin
When the plugin has finished installing, click Activate to get it ready for use. You can also activate it from the list of plugins on the Plugin page in your admin dashboard.
Step 3 – Set Up the WPS Hide Login Plugin
Now that you have the plugin on your site, it is time to set it up to get you a new login URL and get your site protected.
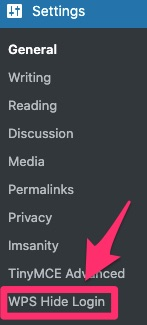
Find the Plugin on Your Dashboard
First, navigate to Settings >> WPS Hide Login on your admin dashboard.
Change the Login URL
Add your new login URL path in the ‘Login URL’ box.
And in the ‘Redirection URL’ box, you can change the redirect for when someone tries to log in to the https://ift.tt/2R8GRAM page, and they are not logged in. The default here is the 404 page that you often find when a URL you entered does not exist or has an error.
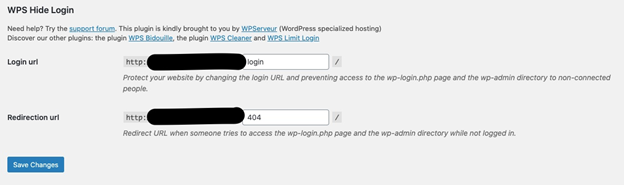
Save the Changes
Once you have completed the above steps and changed the login URL, click Save Changes to make everything official.

Note that once you have clicked the save button, your changes go live immediately, and you will no longer be able to use https://ift.tt/2R8GRAM to login to your website.
If you have any issues or need to go back to the old way of logging in, you can always remove the plugin. However, the installation is a smooth process of using the plugin should cause no issues, so the chances of you needing to remove the plugin are slim.
Step 4 – Test It Out
The final step in changing your WordPress login URL is to test out the new way of logging in.
Try New URL
Enter the new URL into your browser bar, type in your username and password, and you should be taken to your WordPress admin dashboard, where you can log in and make changes to your website.


from Quick Sprout https://ift.tt/3fjnjRY
via IFTTT
