Saturday, July 31, 2021

A Beginner’s Guide to Maintaining Your LLC

Forming an LLC is an exciting accomplishment for any entrepreneur or business owner. 

But the work doesn’t end after the initial business formation process. There are certain steps and requirements to maintain your LLC and ensure the LLC remains in good standing with your state.

Once you’ve identified these requirements, it’s relatively easy to maintain your LLC on an ongoing basis—and this guide will teach you how. 

What is LLC Maintenance?

After the LLC formation, there are various maintenance requirements to protect your LLC and keep everything in good standing with the state and IRS. 

Each state has its own unique rules when it comes to maintaining an LLC. But generally speaking, any requirements, fees, taxes, paperwork, and additional filings are due annually. 

While the majority of LLC maintenance is ongoing, you might need to complete a few one-off tasks to ensure compliance and keep everything organized. 

The Basics of Maintaining Your LLC

Again, LLC requirements vary from state to state. But we’ll take a closer look at the core components of maintaining your LLC that are fairly common across the board. 

Articles of Organization

The articles of organization are a legal component that gets created during the initial LLC formation process. This legal document is formally used to establish limited liability companies at the state level.

Contents of the document include rights, liabilities, duties, obligations, and more for all LLC members (owners).

In many cases, the information on the original articles of organization will stay the same for quite some time. However, there are certain situations when you’ll need to amend the documents and file that amendment with the Secretary of State. 

Examples of an event that would require an amendment to the articles of organization include:

  • LLC name change
  • Registered agent change
  • Registered agent address change
  • Changing the financial structure and taxation of the LLC
  • Changing the management structure of the LLC

Updates to your LLC’s operating agreement typically wouldn’t be required with your amended articles of organization. The operating agreement is more for internal use as opposed to state compliance. 

If you’re unsure whether a specific event or action should trigger an amendment to the articles of organization for your LLC, consult with a legal professional who can give you guidance on your state laws. 

The official process for amending the articles of organization varies by state, but be prepared to incur a small one-time fee for each occurrence.

Annual Report

Many states require an LLC to file an annual report. In some states, this is known as the statement of information (SOI). 

For example, in California, LLCs must file a statement of information using Form LLC-12 with the Secretary of State. The information contains publicly accessible information about your business, like the LLC’s address, member information, and registered agent information. 

California requires SOIs to be filed within 90 after the articles of organization have been filed. Then you’ll need to file a new statement of information every two years, regardless of whether or not the information changes. 

There is usually a filing fee associated with LLC annual reports or SOIs.

Business Licenses and Permits

Most LLCs require one or more licenses to operate. The exact licenses and permits will vary based on industry and location. 

Not all licenses need to be updated on an annual basis. So you need to understand when each permit expires and what the process looks like for renewing each one. Failure to do so will increase the liability for the LLC and potentially land you in some compliance-related trouble. 

In some cases, incorrect or expired permits can result in fines or even business foreclosures. 

Some common examples of licenses and permits that you’d need to maintain include:

  • Liquor licenses
  • Health permits
  • Zoning and land use permits
  • Occupational licenses
  • Reseller licenses
  • Building permits

There are over 150,000 filing jurisdictions nationwide. In addition to the state requirements, certain cities and counties also have rules regarding different business licenses. 

DBAs and Fictitious Business Names

Many LLCs operate under a DBA (doing business as) or a fictitious name. 

For example, the name of an LLC might be something like “Francis John Holdings, Limited Liability Company.” But the LLC could operate as “Frank’s Pizza,” or something much simpler. 

Typically, DBAs are not indefinite. When they expire, you’ll need to go through a DBA renewal process. 

This is usually very straightforward. It’s just a matter of completing the proper paperwork before the name expires and paying any required fees.

The expiration time varies by state. For example, DBAs in Texas must be renewed every ten years. But California requires LLCs using a DBA to renew those names every five years. 

Annual Taxes

Paying your taxes in full and on time helps keep your LLC in good standing with the state and IRS. 

Depending on how your LLC gets taxed, the business itself might not pay any income taxes. For example, sole proprietors with an LLC can use pass-through taxation to pay business income on their personal tax returns. 

However, some states require a minimum LLC tax each year. 

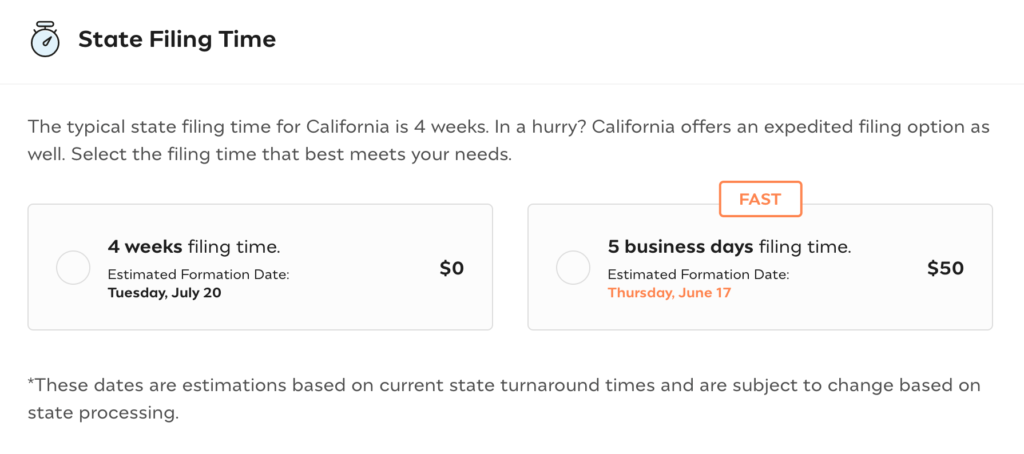
For example, all LLCs in Delaware are required to pay a $300 annual tax. California’s minimum annual LLC tax is $800, but that number increases based on the LLC’s income for the year. 

Annual LLC Meeting

Unlike a corporation, annual meetings are not officially required for LLCs.

With that said, you should follow whatever procedures have been outlined in your LLC operating agreement. If the operating agreement calls for these meetings, then it’s important for you to hold them.

Even though the state won’t necessarily be checking on this, failure to abide by operating agreements could cause your LLC to lose its liability protection if you’re challenged in court by another member. 

3 Tools to Simplify the Way You Maintain Your LLC

Maintaining your LLC alone isn’t always easy. But if you’re using the right tools and resources, the process is much less of a headache. 

#1 — ZenBusiness Registered Agent. 

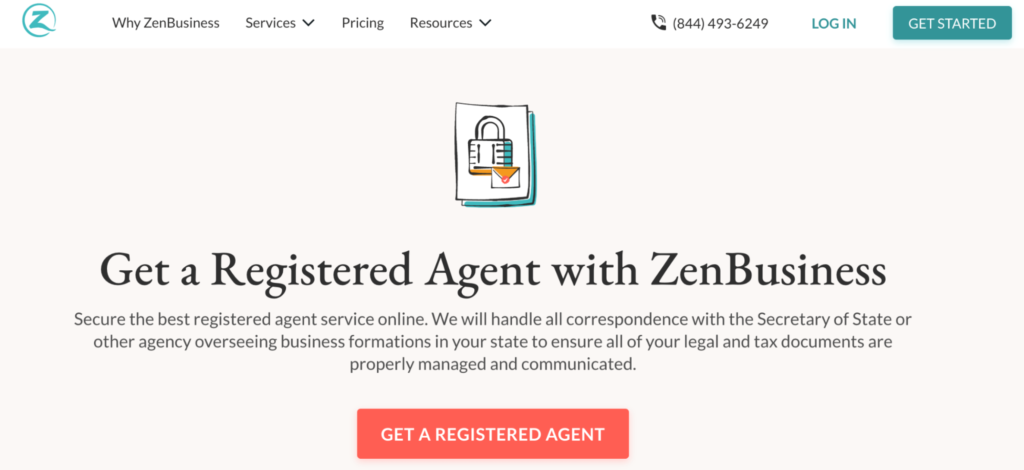
ZenBusiness provides an array of services for business formation, filings, compliance, and more. But when it comes to maintaining your LLC, the ZenBusiness registered agent service will simplify your requirements. There are two packages to choose from, Standard and Complete—starting at $99 and $149 per year.  

In addition to the basic functions of a registered agent, ZenBusiness takes this one step further with lots of extras. All of your LLC files and legal documentation gets stored in an online dashboard, allowing you to view, print, or download them at any time. The ZenBusiness team also handles all ongoing state filings, including an annual report. You’ll also benefit from two annual amendments to ensure your LLC remains in good standing, even if you need to change information. 

#2 — Northwest Registered Agent

Northwest Registered Agent is one of the most reputable and reliable registered agent services in existence. Their customer service is second to none, making them a top choice for any business owner that needs assistance maintaining an LLC. They provide dozens of free legal forms for LLCs, including articles of organization, operating agreement, meeting minutes, resolutions, articles of amendment, capital contributions, and more—all of which makes it easy to stay compliant.  

With Northwest Registered Agent, you’ll benefit from a corporate guide to help you navigate the waters of different state and local requirements. They provide pre-filled state forms, annual report reminders, and phone support with qualified agents. This exceptional registered agent service for LLCs starts at just $125 per year. 

#3 — Incfile

While Incfile is best known for its business formation services, it also provides extensive resources and services beyond the initial LLC filing. They allow you to obtain a certificate of good standing from the Secretary of State to show that your LLC is registered and officially authorized to operate in your state of formation. This document is often required to obtain certain business licenses that you need for maintaining your LLC.

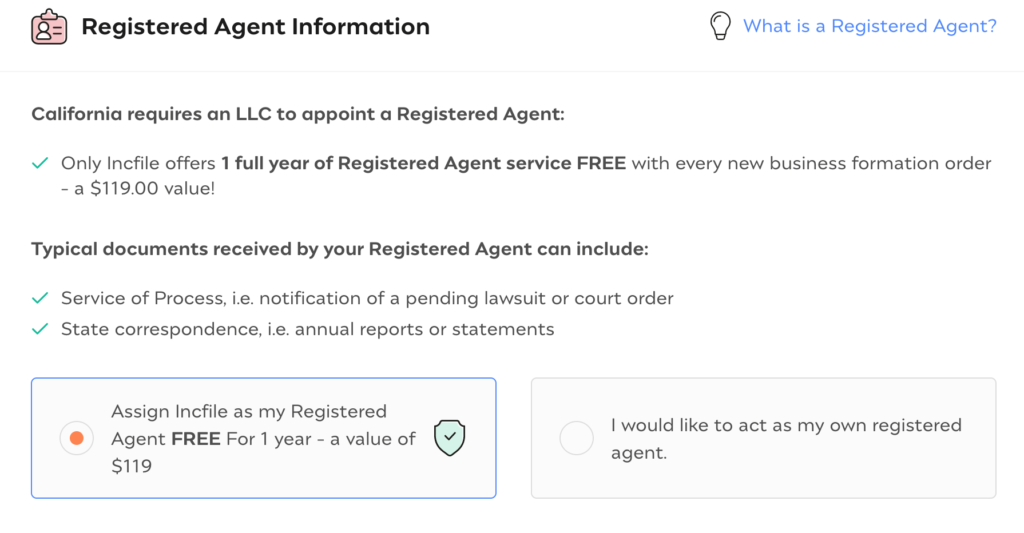
Furthermore, Incfile offers a wide array of additional LLC compliance services. You can use them for annual LLC reports, business license searches, DBAs, fictitious names, IRS filings, registered agent services, and more. The registered agent service starts at just $119 per year, and it’s free for one year if you register your LLC with Incfile.

3 Tricks For Maintaining Your LLC

Maintaining your LLC doesn’t need to be complicated. The following quick tricks and best practices will make your life much easier, so you can sleep easy at night knowing your LLC is in good standing. 

Trick #1: Use a Registered Agent Service

Each state requires LLCs to maintain a registered agent. Technically, you could do this on your own—but we strongly advise against that. 

The primary purpose of a registered agent is to receive government correspondence, service of process, and compliance-related documentation on behalf of your LLC. But if you’re using a registered agent service, you’ll typically benefit from much more than the basics. 

The best registered agents will help you remain compliant and ensure that all of your LLC paperwork is up to date with your state. They might handle the majority of the paperwork on your behalf with pre-filled state forms. Some registered agents will remind you of upcoming annual reports, fees, and other requirements. 

If you use a registered agent service, like the tools listed earlier in this guide, it will make everything easier as you maintain your LLC. 

Trick #2: Separate Business and Personal Expenses

This is a common problem for newly registered LLCs, especially for sole proprietors and single-member LLCs.

States don’t legally require you to open a business bank account. But this is something that you should do immediately after registering your LLC. 

Even if you’re not doing anything wrong or illegal, the idea of using one account for business and personal transactions is a big no-no in the eyes of the IRS. If you’re ever audited, you’d be heavily scrutinized for this.

Additionally, you could lose the liability protection of your LLC if you’re mixing business and personal accounts. To avoid this, just open a business checking account as soon as possible.

Once you have an EIN and a business name, most banks will let you apply. 

Trick #3: Keep All Required Documentation in a Safe Place

Maintaining your LLC is all about staying organized. If you’ve got paperwork, documents, licenses, and everything else all over the place, proper maintenance will be a challenge. 

Your principal place of business or main office should include copies of the following documents:

  • LLC articles of organization (and any amendments)
  • LLC operating agreement (and any amendments)
  • Full list of each LLC member, including their last known address, contribution, and shares
  • Copy of EIN confirmation letter
  • LLC meeting minutes (if required in the operating agreement)
  • All copies of financial statements and tax records
  • All business licenses and permits

In addition to physical copies of these documents, you could also keep them online in cloud storage for safekeeping. 

Quick and easy access to these documents will simplify things as you take the required steps to maintain your LLC. 

What to Do Next

Now that you understand what it takes to maintain your LLC, you should consider a couple of other things. Here at Quick Sprout, our team has put together tons of resources and useful pieces of information for business owners and entrepreneurs. 

In addition to opening a business checking account, you should also get a separate credit card for your LLC expenses. Again, this will make it much easier for you to separate your personal and business financials. For some guidance and more information, check out our list of the best credit cards for startups.

As we’ve mentioned several times throughout this guide, the exact requirements for maintaining your LLC will depend on your specific state. So it’s in your best interest to consult with a business attorney if you have questions, concerns, or need some direction on what exactly is required. Instead of spending a fortune on a traditional lawyer, you should be able to get the right assistance using an online legal service


from Quick Sprout https://ift.tt/3jaFzz6
via IFTTT

Podium Review

Do you want to get more online reviews for your product or services? Podium has got you covered. By helping businesses send automated invites to customers at every critical touchpoint, Podium can give you a competitive advantage. It harnesses the power of online reviews for companies built on word of mouth. And with its powerful interface, you can also request feedback, convert web chat to text messages, and manage customer messages across different platforms all from the same place.

Podium Pros and Cons

Pros

  • Free version available (for US and Canada users only)
  • Easy-to-navigate user interface
  • Available in both desktop and mobile
  • Automated review solicitation
  • Instant notifications for real-time response to online reviews
  • Multiple customer interaction apps in one dashboard
  • Seamless CRM integration
  • Smooth onboarding process
  • Plenty of customer service options

Cons

  • Custom pricing structure available only by request
  • Commitment to a 12-month contract required
  • Cumbersome for very small businesses

Podium Features

From starting as a simple tool to procure quality reviews, Podium has grown into an all-in-one app that consolidates all customer interactions. With the help of Podium’s support team, you can cherry-pick only the features your business needs, at a price that is well within your budget.

Reviews

The most disgruntled customers are often the most driven to post their negative experiences. So even if you hold your business to a high standard, the negative reviews of a select few can warp people’s perception of your business. To stop these bad reviews from outnumbering the good, you need a reputation management tool like Podium’s. 

Podium is integrated with over 20 online review sites like Facebook, Google My Business, TripAdvisor, and a host of other industry-specific platforms. With Podium Reviews, you can view and manage all customer reviews from these platforms under one roof. No more jumping back and forth between these review sites as you can keep track of all new customer reviews straight from an easy-to-use interface. 

Are you ready to beef up your online reviews? It all starts with a request, and you can convince your customers to provide their reviews using your own message or one of Podium’s preset templates. 

Sending these review invites is a whole new ball game, but this where Podium outshines its competitors. Through its platform, you can set up automations so your customers can receive review invites soon after completing a purchase. With its switchboard feature, you can also determine how many customers will be sent to which review sites, ensuring no platform is overlooked. 

From the same dashboard, you can also set up alerts so you get notified each time a customer leaves a review. By doing so, you can promptly respond to each review and address customer complaints within the Podium app. 

Podium Reviews comes with in-depth reporting to help you gauge how well your business performs based on the reviews. By looking at star rating, recency, and review count, you can determine how well you stack up against competitors and whether your strategies need fine-tuning. 

Campaigns

Podium Campaigns is a potent alternative to old-fashioned email campaigns. Instead of sending emails that are often relegated to either the SPAM or a separate “Promotions” folder, you send marketing promotions to where customers can see them right away: SMS inbox.

We’re not talking about sending out spam texts en masse. Customers won’t receive marketing campaigns via SMS unless they opt in to your list. And with opt-in opportunities available in every customer touchpoint, you can passively grow the list of people who are more likely to respond to your promos. 

With a targeted list at your disposal, it’s easier to craft personalized campaigns that resonate well with your customers. You can send these campaigns to your entire list or to specific segments of your list. 

By using a conversational tone in your messages, you can take the first step towards building a long-term relationship with your audience. The text thread is also two-way so your customers can reply to your messages, giving you more opportunities to earn their trust.

Whether you’re sending out coupon codes or announcing a special sale, Podium Campaigns allow you to take advantage of the 98% open rate of a text message. Moreover, it comes with built-in analytics so you can measure your total revenue, unsubscribe rate, click-through rate, and response rate straight from your dashboard. Using these valuable data, you can fine-tune your campaigns and get better results in the long run. 

Inbox

By integrating Podium with Facebook, Google, Instagram, Zendesk, and other platforms, all customer conversations can be funneled into one location. This enables you to quickly reply to messages without having to juggle multiple platforms at the same time. 

Podium’s inbox also streamlines how you deal with all these messages. Using artificial intelligence, it can automatically group incoming messages so you know which one should be prioritized. Each customer profile also has an interaction history which includes all payments and transactions completed. At one glance, you can get insights about the customer you’re dealing with, allowing you to personalize your messages accordingly.

For the busy marketers who don’t have time to respond to all messages, Podium’s inbox also provides smart solutions. 

You can assign the messages to other employees or another business location. Access restrictions are also available to ensure only the authorized people can answer specific messages. 

Meanwhile, you can set up autoresponders so you won’t lose potential leads even outside business hours or whenever you can’t reply in person. By also automating feedback requests, review invites, and reminders, Podium ensures you won’t waste your precious time on cumbersome tasks.

Feedback

Getting feedback from your customers doesn’t have to involve long, boring surveys that barely get attention. Podium’s feedback feature turns the traditional survey on its head by sending two automated text messages proven to elicit quicker responses. 

Humans are notorious for having short attention spans. By sending short and simplified questions via SMS, you don’t have to wait for weeks or months for answers. Your customers can send their honest feedback almost instantly, which means you can also address customer complaints at lightning speed. 

With regular use of Podium’s feedback feature, you’ll be able to understand your market, explore opportunities to improve your service, and gain more loyal customers. The best part is you can also automate it so you can gather insights about your customers at any touchpoint, not just after they make a purchase. 

You can schedule when your customers will receive the feedback request and also set up automated responses based on the customers’ answers. By doing so, Podium can gather a wealth of valuable information even while you’re not around. 

Podium’s feedback feature also comes with analytics so you can dissect the impact that customer feedback has on your business. Through this tool, you can track your Net Promoter Score which gives you an idea of how satisfied your customers are with your products or services. It also enables you to measure how many customers who received feedback invites actually responded. By understanding how effective your campaign is, you can revise your questions accordingly to elicit more responses. 

Webchat

Through Podium’s webchat widget, you can turn random website visitors into customers. 

Unlike live chat where transactions begin and end in the same chatbox, the webchat follows your visitors even after leaving your website. All the visitor has to do is enter his name, mobile number, and message to the webchat and the conversation will be transferred to his phone. By giving you access to the SMS inbox where people are the most engaged, you can answer queries and nurture leads without being glued to your computer screen. 

The only downside is not everyone will agree to volunteer their contact details, especially those who are only making casual inquiries. But for those who agree to invite you to their personal inbox, the possibility is endless. 

To ensure the webchat can capture leads every single time, you can also set up autoresponders. This guarantees your visitors can get an automated reply even when no one from your team is available, usually during holidays or after business hours. 

Through Google Analytics integration, Podium webchat can give you insights on how your visitors interact with your website, and which web pages perform the best. There’s also an option to receive daily digest emails so you can keep track of every inbound lead. 

Finally, a leaderboard allows you to compare each employee’s response times and other metrics. It ensures nobody in your team is slacking off when it comes to capturing valuable leads. 

Podium Pricing and Package Options

Every business is unique so Podium offers custom pricing tailored to your needs. To get a personalized quote, go to Podium’s pricing page, fill out the form with your contact information, and submit it. A Podium representative will then contact you to get a better picture of your business, its industry, and its locations. 

A customized plan that includes only the features that will best optimize your business will be recommended. Price varies depending on how many features you need and the number of your business locations. A single-location business, for instance, can cost anywhere between $350 and $450. It may be too expensive for businesses that only need Podium’s review feature but remember that Podium is much more than a simple text messaging solution. 

What most users may find off-putting is the 12-month contract that they have to commit to initially. Payments can be made upfront (annually) or in monthly installments.

For those who can’t afford to get into a 12-month contract yet, Podium also has the free Starter plan. Users from the US and Canada can sign up to take advantage of a free textable number and up to 30 communications per month. 

The free starter plan also includes a webchat widget, a centralized inbox where you can manage all customer communications, and the ability to send a limited number of automated review invites via SMS. 

Podium Reputation

Podium has been known as a reputation management tool so it shouldn’t come as a surprise that most users rave about its review feature. In fact, it’s the leading reason why most users gravitate toward Podium. By letting them send review invites via text not only after purchase but at every possible customer touchpoint, Podium can help businesses triple the number of online reviews they get. 

The clean user interface makes it easier to navigate the dashboard and find what they’re looking for at a glance. Podium’s capability to consolidate all messaging apps in one place is also worth highlighting. By eliminating the need to move from one platform to another, Podium effectively streamlines how businesses communicate with their customers.

On the flipside, Podium may turn off businesses that value transparency. Pricing plans are not available publicly so any business interested to get a personalized quote must contact Podium directly. According to those who have already used Podium’s service, the steep cost of the customized plan may pose a problem to businesses that only need basic features. 

The platform has also grown cumbersome for small businesses that only signed up to beef up the number of their customer reviews. The problem is you can’t purchase a plan with only one feature. So even if your team only needs the review feature, they still have to contend with other moving parts they rarely use but make navigating the user interface a tad complicated.

Summary

Podium stands head and shoulders above the competition for helping businesses use every possible customer touchpoint as an opportunity to get reviews. And because online reviews are now the word of mouth of the digital world, multiplying the reviews you get tenfold can drive great returns for your business in the long run. 

However, Podium comes at a steep price, not to mention you have to commit to a 12-month contract before you can get your team on board. If your company has multiple locations and deals with a steady stream of inbound leads, it most likely has the revenue to justify the cost of using Podium’s services. 

On the other hand, small businesses that don’t have the means to enter into a long-term commitment with Podium can use its free starter plan instead. Alternatively, you can use Textedly and other similar services that let you message your customers via text but come with a more flexible monthly payment schedule.


from Quick Sprout https://ift.tt/3jcjErh
via IFTTT

Friday, July 30, 2021

How to Start a Remote Business

Whether you’re starting a side hustle on your own or launching a full-time business with employees, operating remotely is appealing to many entrepreneurs for various reasons. 

But taking your idea and turning it into a reality is a challenging step.

You still need to legally register your business, file paperwork with the state, and take steps to separate your personal assets from the company—even for a remote business. 

Once you get these initial steps out of the way, you can fulfill your dreams of working from anywhere without ever stepping foot into an office.

This guide will walk you through the step-by-step process of starting a remote business. 

The Easy Parts of Starting a Remote Business

The legal aspects of starting a remote business can be intimidating for new entrepreneurs. Registering your business with the state, filing the appropriate papers, preparing for how you’ll be taxed by the IRS, maintaining compliance—the list goes on and on.

Historically, business owners only had two options:

  1. Handle everything on their own and risk making costly errors.
  2. Hire a lawyer to set up your business and pay outrageous fees.

But today, there’s another option—business formation services

By using an online business formation service to start your remote business, you can get 90% of your needs covered by a single provider. You just need to answer some simple questions about your company, and the formation service handles everything else on your behalf.

There are lots of great online business formation services to consider, but Incfile is an excellent option for remote startups. 

Incfile lets you set up a wide range of remote business entities, including LLCs, corporations, and nonprofits. You can use them to obtain an EIN (employer identification number), register your business name, file the articles of organization, articles of incorporation, IRS forms, and so much more.

The base business formation services from Incfile start as low as $0 plus state filing fees. All packages include free registered agent services for the first year, too.

Using platforms like Incfile for starting a remote business will eliminate countless headaches and hours of filing paperwork. It takes less than five minutes to answer some questions and choose your preferences online. Then it’s just a matter of waiting for things to get finalized with the state—the service handles everything on your behalf. 

The Difficult Parts of a Starting a Remote Business

Officially registering the business and getting yourself ready to start operating is the easy part. But then, you’ll face challenges that aren’t solved so quickly—running a profitable business. 

Even remote businesses with low overhead struggle at first when it comes to making money. Getting your name out there, driving traffic to your website, landing customers, and retaining customers are all easier said than done.

Regardless of your industry, business model, or niche, you’re likely competing with hundreds if not thousands of other people doing the exact same thing. 

It can take years to generate sustainable income that you can use to grow the business and pay yourself. 

If you plan to start hiring employees as you scale, this presents other unique challenges as well. You’ll have to worry about managing talent, running payroll, additional tax compliance regulations, labor laws, and more.

Running a remote business doesn’t exempt you from these challenges.  

But don’t let this discourage you. As someone who has successfully started multiple remote businesses, I can confidently say that the rewards far outweigh the challenges if you stick with your plan. Rewards include flexibility and saving a ton of money on overhead!

Step 1 – Choose Your Business Entity Type

Not all businesses are the same in the eyes of the state, the federal government, and the IRS. When you’re launching a remote startup, the first thing you need to do is determine which type of business entity is right for you.

Generally speaking, these are your options:

  • LLC
  • Corporation
  • Nonprofit

There are other business types and subcategories out there, but most fall within these three general entity types. 

If you head over to Incfile and click Start My Business, the first step is choosing an entity and selecting your state.

Once you answer these two questions, it will present you with state-specific information and pricing. For example, the fees associated with starting an LLC in California won’t be the same as creating a corporation in Florida.

I’ll give you a basic overview of each entity type below to help you decide what’s right for your remote business:

LLC (Limited Liability Company)

An LLC will likely be the best option for most of you. According to Incfile, over 80% of small businesses are registered as LLCs. 

This entity type offers flexible ownership options and provides owners with liability protection—hence the name. By forming an LLC for your remote business, you can separate your personal assets from the company ones.

LLCs also have the luxury of choosing how they get taxed. By default, single-member LLCs are taxed as sole proprietorships, and multi-member LLCs are taxed as partnerships. However, you can choose to be taxed as a C corp or S corp instead. 

Consult with an accountant to determine which tax structure is right for your remote business. You can change this at a later time by filing straightforward paperwork with the IRS. 

Corporation

Corporations typically fall into two main categories—C corporations and S corporations. The most significant differences between these two entities are the taxation and ownership structure. 

Similar to an LLC, S-corps provide pass-through taxes. This means that taxes aren’t assessed at the entity level but rather on shareholders’ individual tax returns. 

With C-corps, the business and owners are taxed separately. While you’re technically getting taxed twice here, the corporate tax income is usually lower on personal returns. Again, it’s always in your best interest to speak with an accountant or tax attorney as you’re making these decisions. 

C corporations are better for companies that want to raise money from outside investors. Nearly all publicly traded companies are C corps. 

Nonprofit

Nonprofits are a subcategory of corporations, but they’re usually categorized separately because of the unique requirements. To qualify as a nonprofit, the principal purpose of the company must be for public benefit. 

If you qualify for nonprofit status with the IRS, your company may be exempt from sales taxes, federal income taxes, and property taxes.

Forming a nonprofit can offer liability protection to directors, officers, and employees. 

Step 2 – Register Your Business With The State

Even if you’re operating remotely, you still need to register the company with the state that you’re operating in. 

While there are some exceptions, the vast majority of you will be registering your business in the state where you live. 

For the purposes of this tutorial, I’m going to walk you through this process by registering an LLC in California using Incfile. But the steps will be similar regardless of the entity type and formation service that you’re using.

Select a Formation Package

Incfile, like most business formation services, offers tiered packages for registering a new business. Here’s what those fees look like for an LLC in California:

The cool part about Incfile is the base package, Silver is 100% free. You get the core features of Incfile and only pay the state filing fees (not any Incfile fees). 

The Silver package also comes with unlimited name searches, articles of organization filing, and a free year of registered agent services. But there are other requirements you’ll need to handle on your own. 

The Gold package includes an EIN, IRS Form 2553, an operating agreement, an online dashboard, and unlimited support. And the Platinum level has all of those features plus expedited filing and a domain name with a business email included.

I recommend you go with the Gold package and let Incfile handle everything on your behalf. 

Obtain an EIN

Every business needs an EIN (employer identification number). This is a nine-digit unique number assigned by the IRS that identifies your business for tax purposes. Think of it as the business-equivalent of a social security number. 

EINs are required for business banking, tax returns, payroll, working with vendors, and so much more.

You can apply for EIN directly with the IRS for free. But it’s much easier to get one from your incorporation service. You can add this service to Incfile’s Silver package for $70 or get it for free with the Gold or Platinum plans.

Prepare and File Additional Forms

Depending on the entity type you’ve selected, additional forms need to be filed with the state. This includes things like:

  • Articles of Organization
  • IRS Form 2553
  • Operating Agreement for LLCs
  • Corporate Bylaws for Corporations
  • Corporation Organizational Meeting Minutes

If you’re using a business formation service, make sure to select a plan that includes all of the necessary forms for your entity type. 

Most formation services also allow you to expedite the filing process for an additional fee. 

As you can see from the example above, the average filing time for LLCs in California is four weeks. But you can pay an extra $50 to get it done in five business days. The fees and filing time estimates vary from state to state.

Name Your Remote Business

Now is your opportunity to name the business and provide additional company information. 

This step is fairly straightforward. Just fill out the form fields as prompted.

You have the option to choose a designator as well. If I wanted to name my LLC “Quick Sprout,” then my designator options would be:

  • Quick Sprout LLC
  • Quick Sprout L.L.C.
  • Quick Sprout Limited Liability CO.
  • Quick Sprout LTD. Liability Company
  • Quick Sprout Limited Liability Company

You’ll also need to provide some basic information about the purpose of your business. 

The form will also ask you to select a management method. For LLCs, you’ll have the option to choose between member-managed and manager-managed. 99% of the time, you’re going to choose member-managed, especially for a remote business. 

Member-managed means the “members,” or owners, of the LLC are running the day-to-day business. Manager-managed is when designated managers or appointees like a board of directors run day-to-day operations.

Provide a Business Address

Even if your business is remote, you still need to have an address on file with the state. 

In most states, you can’t use a PO Box, and the address will become public record. So I advise against using your home address here. Fortunately, Incfile offers a professional business address and virtual mail service.

It’s just $29 per month, and you can cancel it at any time. But this is worth the price of keeping your personal address out of the public records.

Step 3 – Obtain a Registered Agent

Every business, including remote companies, needs to have a registered agent. Registered agents are available during business hours to handle government correspondence on behalf of your company.

For example, let’s say your business gets sued. Your registered agent will accept court orders and summons on your behalf at their address so that nobody will be knocking on your front door.

While you do have the option, I strongly discourage acting as your own registered agent. It kind of defeats the purpose of operating remotely, as you’ll be forced to be available during all business hours at your business address. 

Incfile offers free registered agent services for one year with the Gold and Platinum plans. 

The service automatically renews at the regular price of $119 per year.

Step 4 – Open a Business Bank Account

Next, you need to set up a separate bank account for your business. 

You’ll need to have an EIN for this step in many cases, which you’ll have by now if you’re going through these steps in the right order.

Many business formation services, including Incfile, have deals with banks to get you set up during the formation process. 

Here’s an example that includes a $500 bonus (terms apply) with Bank of America through Incfile:

You can always skip this and get a bank account on your own. Check out our guides on the best online business banking solutions and best business checking accounts to help you narrow down your options. 

Step 5 – Secure Your Domain and Create a Website

This step is essential for all businesses, but it’s especially crucial for remote companies. For most of you, your website will be the driving force behind a remote operation. 

Even if you’re not quite ready to launch the site today, you’ll want to secure the domain as soon as you’ve registered a business name with the state.

Your website name doesn’t have to be the same as your business name, but many people mirror these two for simplicity. It all depends on your branding strategy. 

Some business formation services will offer services for domain registration, but this is an upsell that you can skip. Instead, go straight to a domain registrar. These guides will steer you in the right direction:


from Quick Sprout https://ift.tt/3fgUO8y
via IFTTT

How to Write a Job Offer Letter

You probably know that you’ll use a job offer letter to offer a job to a successful candidate. 

The problem is, some employers don’t know how to write one. 

A good job offer letter can start off your relationship with your new hire on the right note, but a bad one can discourage the candidate from the start, potentially leading them to refuse your offer–or worse, accept it but already be thinking about eventually working elsewhere. 

So it’s pretty important to get the offer letter right. 

Fret not—our guide will show you how to write one step by step. 

The Easy Parts of Writing a Job Offer Letter 

Some employers believe writing a job offer letter is difficult and time-consuming. The truth is: it doesn’t have to be as hard as you may think. 

Writing a good job offer letter comes down to systematically making sure the letter includes the most critical information. 

For example, there is no one-fits-all job offer template that must be strictly followed per se. 

Instead, a good but concise overview of the job position and company, including specific job details like the start rate, remuneration, work schedule, and benefits, will often be enough to entice a candidate into your position. 

Using a dedicated recruitment software tool can be a big help here.

Workable, for instance, allows you to send job offer letters through tried and tested templates that successfully get a positive response from a candidate. 

The software made our top picks list for being the best overall recruiting software at scale.

Pricing starts at $99 per job per month on the “Paygo” plan, and you can try it free for 15 days

The Difficult Parts of Writing a Job Offer Letter 

We’ve mentioned that writing a job offer letter doesn’t have to be complicated. That’s true, but there are parts that some employers will find more challenging.

A good example is factoring in the time to write the job offer letter in the first place. Some employers mention the difficulty of crafting a great job offer letter when they’re busy managing other parts of the company. 

Another element employers find challenging is the order in which to send the job offer letter. Forgetting to send them out during the average day is part of that. 

Other worries include how to send the letter or the format, what exact details need to be included, and whether to be more informal or formal with your job offer letter. 

All of these worries are valid, but don’t let that stop you. Our next section will detail step by step the process of writing a great job offer letter. 

Step 1: Know What Details To Include 

No two job offer letters will be the same. After all, different roles require different things—knowing what to include in yours can therefore be a problem. In fact, it’s a key concern of employers. 

The good news is that there are some general things that every job offer letter needs to include. 

What To Include

There is a little debate on what constitutes the essential parts of a job offer letter, but generally speaking, and without factoring in different job roles, these are the things you must include:

  • The job description
  • The title of the job
  • Some specific detail on weekly duties
  • The starting date of employment
  • The overall salary
  • Benefits information and eligibility for them
  • Acknowledgment of the offer and confirmation of acceptance

Remember that a job offer letter is considered a formal document in most cases that’s sent out to candidates selected for employment, so getting the necessary details in there is essential to help them make a decision.

It’s a wise idea to have written confirmation of an offer, to have it readily accessible, so that both the employee and the employer know the exact conditions of the job in question.

Structure the Details 

You know the key details to include in your job offer letter, but you need to know how to structure them. 

A good order to follow—although by no means is this the only way to structure a job offer letter—is to start with the company logo at the top of the letter and closely follow it with the date and contact details. 

For the company logo, ensure you use the official letterhead of your company logo, as this adds a sense of professionalism and legitimacy. Having both of these qualities will inspire the candidate to read the job offer letter more thoroughly. 

On the contact details side of things, be sure to include the date, full name, and complete address of the candidate. 

These details should be followed with an opening line that greets the candidate formally or casually. Deciding between a more formal or casual approach depends a lot on your company’s culture and the image you want to present. So think carefully about what you want to get across here. 

For example, you could start with a straightforward “Dear [Insert Candidate’s name]” then offer them a job on an optimistic note like: “We are very pleased to offer you a position at [Insert Company name].” How you do this is up to you, but don’t be afraid to set yourself apart from others. If your company culture is more casual, feel free to open with a more conversational greeting and offer. 

Follow this with your job details, benefits, and salary, and don’t feel afraid to include an expiry date if appropriate. A standard time is to give the candidate a week to respond. If there are specific next steps that need to happen, make sure to lay those out here as well.  

End the job offer letter with a closing line and include details on how the candidate can reach you. For example, they might have a few questions about the job, and you’ll want to make sure you are available to answer them. 

A positive and detailed response to these questions might be all that stands between an employee joining your business or not, so take your time to respond fairly and properly. 

Step 2: Pick a Template To Follow

We’ve spoken about what to include in your job offer letter and the structure, but it’s helpful to look at a range of different templates for varying job roles. After all, each position and scenario will shape how to present your information to employees. 

Below we’ve included the specifics of some common templates.

Look at Part-time or Full-time Job Offer Templates

A part-time or full-time offer template is standard. 

You can modify the template as you wish, but for part-time or full-time roles, we recommend including the following: 

  • An intro addressing the candidate in the desired company culture
  • The position and department the candidate will be working for
  • The working hours, including details of any breaks throughout the day
  • Compensation in the form of a gross salary—12 monthly wages per year
  • Mention bonuses and when and if you offer them. A bonus during the holiday period is standard in some companies
  • Detail the benefits the employee will receive. Feel free to go to town here as these can be attractive. For example, private health and dental insurance plans, X days of paid vacation leave, educational materials, and other expenses paid.
  • Some letters end with the contact details for the HR department or details on how to contact the supervisor

These particulars are standard for both part-time and full-time job offers, so be sure to introduce them in a similar way to the template. 

Workable is a valuable tool here because it offers full letter templates and approval workflows to speed up the entire process: 

In the picture above, the green text is where Workable has auto-populated the details as set by the user. You fill in the basic details, and Workable will do the rest. 

The platform will even let you know when a candidate has accepted the offer. 

Look at Internal Job Offer Letter Templates 

Internal job offer letter templates differ slightly from standard ones.

These offers may have started from an informal conversation with someone already on your team, but they still require a job offer letter to be sent to the candidate to make it official.

Most of the details above still apply. That said, you must mention to the existing employee the full details of the new job opening on the team. This new role might be a move to a different department altogether, so be clear about the details.

Of course, congratulating the employee is vital as you recognize their existing achievements with the company. The more you do this, the more likely they will stay with you for the long term.

Look at Remote Job Offer Letter Templates

Remote job offer letter templates differ because they need to mention flexible working hours, remote work options, tech equipment, professional development, and standard details in a more traditional role.

Will the job offer in question require the employee to be in the office any day of the week, or is the position fully remote? Will you pay for equipment expenses, and how will you communicate with your employee? 

These are all extra areas to consider for remote roles. With the post-pandemic world fully embracing remote working, it’s wise to stay updated with requirements. 

Step 3: Show Your Personality 

Most job offer letters come across as dull, and that’s a problem if you want to fill your roles quickly.

With a new and younger workforce that expects a bit of a flair to proceedings, you need to show your personality in the letter.

Think About Tone

Most companies will write stiff job offer letters that don’t excite their candidates enough to accept the offer.

Think about it like this: you only get one chance here to make a great impression, so a light sprinkling of personality can do wonders. We are not suggesting you become so casual that you undermine the importance of the offer, but some fun here is perfectly acceptable within reason.

It’s a good way of showing your company’s culture and what the employee might expect once they join you fully. For example, are you a fun company where the candidate will work hard but also play hard? If so, don’t be afraid to talk about that in the offer letter–and tell the candidate how much you’re looking forward to having them on your team. 

Choose Your Format

There are a few key ways you can send a job offer letter. 

The first is the formal and physical letter that you post to a candidate’s address. This letter will include all of the details you would expect. Some companies prefer this format, but it’s fair to say it’s not something every company will want to use. 

Email job offer letters are increasingly common, and there are two ways to send these: in the body of the email or as an attachment to the email. 

We prefer having the job offer letter as a PDF attachment that sets out the details rather than simply in the body of an email, but this is up to you and the impression your company wants to create for the candidate. 

Step 4: Know When and How to Send It 

When do you send the job offer letter, though? This question is something many employers ask—luckily, the answer doesn’t have to be complicated.

Contact via Phone

Depending on your company and the role in question, it’s not unusual for a company to contact a candidate via phone.

The call is typically carried out well before you send the candidate the job offer letter itself. In other words, you’re letting them know in advance, which also helps to give them more notice. If you’re a remote company, this might occur on Skype or Zoom instead of a traditional phone.

That said, there is another way to send it, which brings us to our next point.

Contact via Email

We’ve mentioned contacting candidates via email. 

However, an increasingly common way of doing things is to contact them with an initial email before following up later with another one.

The initial email will effectively express the offer.

The second email will detail it more formally and will usually be the job offer letter presented as an attachment in a PDF or other professional format.

Workable offers a dedicated hiring plan that can help out here too:

With the software, you can plan and track your hiring and are notified at every key stage. 

The hiring workspace automates approval workflows and captures requisitions, so you’ll never have to chase candidates again. 

Step 5: Be Patient 

The final step is learning to be patient about the response from your candidate. 

Rushing at the final stage can scare candidates away, some of which were probably hours from accepting your offer. 

Set an Expiry Date 

One way of tackling this is to set an expiry date on your job offer letter.

The expiry date is typically added towards the end of the letter and gives the candidate a set amount of time to accept the role. 

The standard amount of time here is around a week from the date of the offer, but some employers might worry this is not enough time—others might prefer a response in a matter of days. 

Ultimately, set an expiry date that’s best for you and give your candidate a fair and reasonable amount of time to make up their mind. 

Don’t Pester the Candidate 

Top talent is frequently hard to retain, so don’t pester the candidate during the time you’ve given them—that’s if you’ve given them a defined time in the first place. 

There have been cases where a candidate is close to accepting the offer, but the employer was too eager and lost them. 

The point to keep in mind is that candidates typically apply to multiple companies at once, and therefore, they might have many offers available to them during the decision process. 

You want to ensure you’ve given them time to think things through—following up too soon could be a make-or-break decision, so think carefully before doing so. 

Workable features built-in reports that help out here as well. It includes aspects such as the time to hire and the results of what candidates want to see.

Specifically, candidate surveys are a great way to measure what works during the hiring process and help you to build your recruiting practices. 

Know what candidates want to see during the hiring process, and you’ll have a better chance of recruiting top talent overall. 


from Quick Sprout https://ift.tt/2WE0PFR
via IFTTT

How to Use Milestones to Map Your Customer Journey

How to Use Milestones to Map Your Customer Journey written by John Jantsch read more at Duct Tape Marketing

Marketing Podcast with John Jantsch

john-jantschIn this episode of the Duct Tape Marketing Podcast, I’m doing a solo show where I’m talking about some of the concepts in my newest book, The Ultimate Marketing Engine: Five Steps to Ridiculously Consistent Growth.

Key Takeaway:

In a previous episode, I talk about creating a Customer Success Track. And in this episode, I’m diving into one element of the Customer Success Track — milestones. The idea behind the Customer Success Track is that you develop a roadmap for the stages your customers can go through based on where they are today and based on what their desired outcome is.

Each of those stages in the Customer Success Track has milestones that make it clear what they need to accomplish in order to reach the next stage. In this episode, I’m going to map out a very clear picture of how to develop these milestones for your customer journey.

Topics I Cover:

  • [1:02] The idea behind the Customer Success Track
  • [1:48] What milestone marketing is
  • [2:37] Creating a clear picture of developing milestones
  • [2:41] Breaking out our stages of the channel work that we do: website, content, SEO, social media, email, paid search
  • [4:12] Assessing your customer’s milestones in the foundation stage
  • [10:16] Integrating all channels
  • [11:23] Getting access to the Ultimate Marketing Engine Companion Course

Resources Mentioned:

More About The Duct Tape Marketing Consultant Network:

Like this show? Click on over and give us a review on iTunes, please!

This episode of the Duct Tape Marketing Podcast is brought to you by Fiverr Business.

fiverrr

Fiverr Business connects your team with expert freelancers and provides a powerful workspace to manage all your projects and budgets more efficiently. You get access to a curated catalog of top outsourced talent in 500+ categories – already vetted for quality and experience. You can create projects, approve budgets, and manage your freelancing activity in one workspace.

They help you need to succeed by providing you with designated Business Success Managers to help all your accounts match with the right talent for every task and make the most of each tool for success while providing priority customer support. Sign-up for Fiverr Business for free.


from Duct Tape Marketing https://ift.tt/3x8nzdC
via IFTTT

How to Stop Your Emails from Being Marked as Spam

It doesn’t matter what type of company you have or what industry you’re in, email marketing needs to be a priority for your business.

In fact, 89% of marketers named email as their primary method of lead generation.

If you are putting more effort into your email marketing strategy, you’ve got the right mindset.

That said, just because you’re sending lots of promotional emails doesn’t necessarily mean they are effective.

Some of your emails might be getting marked as spam.

You spent time carefully writing your content, but you didn’t get the results you had expected. Why did that happen?

As you’ll soon learn, there are several different reasons why your emails are getting marked as spam. That was my inspiration for writing this guide.

I want to help you identify what’s putting your messages in the spam folder.

Even if you’re not currently getting your content marked as spam, you can still benefit from this guide. Understanding these email principles and best practices for writing marketing content will help you avoid these mistakes in the future.

In a perfect world, your emails should go straight to the recipient’s inbox, get opened, and generate click-throughs.

But you can’t get conversions if your content is being marked as spam.

If you don’t think through your marketing automation campaign, you may give off the impression of being an accidental spammer.

A content mishap can also be more than just an innocent mistake. Without even realizing it, you could be breaking the law.

Keep my recommendations in mind and use this guide as a reference moving forward to help keep your emails from being flagged as spam. Let’s jump in.

Need Help With Email Marketing?

Get help with improving your email campaigns, traffic, and revenue.

Get Started

Understanding how consumers define spam

Spam used to be pretty easy to identify.

You’d get a message saying you won a contest you didn’t enter. The subject line would have a bunch of stars and other sketchy characters.

The message would come from an unknown sender.

In your lifetime, you probably even got some spam messages with subjects featuring NSFW content. I don’t think I need to provide an example of this since I’m sure you have an idea of what I’m referring to.

Years ago, spam would even contain malicious content, e.g., attachments containing viruses or phishing scams.

But email software has improved over time, and these messages tend to go straight to the spam folder.

However, now legitimate brands are getting emails marked as spam because the consumer definition of it has changed:

define spam

As you can see, consumers report messages as spam even if they know the sender. They’ll even flag spam from senders who have their permission to send them emails.

This is a big game changer.

Someone could willingly sign up to receive emails from your brand and still send your content to the spam folder.

Studies show 57% of people say getting too many emails from a sender or receiving irrelevant messages causes them to mark the content as spam.

What does this mean for you as a marketer?

It means that your promotional messages are susceptible to getting marked as spam. Being a reputable brand and sending messages only to your subscribers doesn’t make you immune to this.

Before I dive into the actual tips lets discuss email marketing laws in general that you should research and abide by before sending a single email.

Knowing the Law

Keep in mind, before reading this section, that we are NOT lawyers, and we have not reviewed this section with any attorney. We’re reporting what we’ve learned from basic web research with the goal of helping you figure out what your blind spots are and what questions to ask. Proceed with caution, and consult with a lawyer and/or official government source before moving forward.

Let’s start with the law. You’re probably well-aware that in the early days of the Internet, shady marketers abused the heck out of email. What happened as a result was a federal crackdown on sketchy marketing activity.

The CAN-SPAM Act of 2003 was signed into law by President George W. Bush in 2003. The law established the U.S.’s first national standards for email—enforceable by the Federal Trade Commission (FTC).

The CAN-SPAM law’s full name is Controlling the Assault of Non-Solicited Pornography and Marketing Act of 2003. The goal is to protect consumers from unsolicited email. The law overrides many state laws that would otherwise allow for unregulated or partially regulated email marketing activity.

Relax—there’s no need to worry. The FTC has provided a clear set of (actionable) guidelines to keep you in the clear.

Here is the law, directly from the FTC (in their words):

The Law from the FTC

  1. Don’t use false or misleading header information. Your “From,” “To,” “Reply-To,” and routing information – including the originating domain name and email address – must be accurate and identify the person or business who initiated the message.
  2. Don’t use deceptive subject lines. The subject line must accurately reflect the content of the message.
  3. Identify the message as an ad. The law gives you a lot of leeway in how to do this, but you must disclose clearly and conspicuously that your message is an advertisement.
  4. Tell recipients where you’re located. Your message must include your valid physical postal address. This can be your current street address, a post office box you’ve registered with the U.S. Postal Service, or a private mailbox you’ve registered with a commercial mail receiving agency established under Postal Service regulations.
  5. Tell recipients how to opt out of receiving future email from you. Your message must include a clear and conspicuous explanation of how the recipient can opt out of getting email from you in the future. Craft the notice in a way that’s easy for an ordinary person to recognize, read, and understand. Creative use of type size, color, and location can improve clarity. Give a return email address or another easy Internet-based way to allow people to communicate their choice to you. You may create a menu to allow a recipient to opt out of certain types of messages, but you must include the option to stop all commercial messages from you. Make sure your spam filter doesn’t block these opt-out requests.
  6. Honor opt-out requests promptly. Any opt-out mechanism you offer must be able to process opt-out requests for at least 30 days after you send your message. You must honor a recipient’s opt-out request within 10 business days. You can’t charge a fee, require the recipient to give you any personally identifying information beyond an email address, or make the recipient take any step other than sending a reply email or visiting a single page on an Internet website as a condition for honoring an opt-out request. Once people have told you they don’t want to receive more messages from you, you can’t sell or transfer their email addresses, even in the form of a mailing list. The only exception is that you may transfer the addresses to a company you’ve hired to help you comply with the CAN-SPAM Act.
  7. Monitor what others are doing on your behalf. The law makes clear that even if you hire another company to handle your email marketing, you can’t contract away your legal responsibility to comply with the law. Both the company whose product is promoted in the message and the company that actually sends the message may be held legally responsible.

Each separate email in violation of the CAN-SPAM Act is subject to penalties of up to $42,530, so non-compliance can be very costly.

Before you send a single email make sure that you consult with a legal professional to ensure that you stay compliant with all laws.

Just make sure that you’re compliant. Got it?

Ok lets move on to my top 11 tips that will help you avoid having your emails being flagged as spam.

1. Don’t buy subscribers

As I just said, even recipients who subscribed to receive emails from a brand are still marking messages as spam.

If you’re buying email lists and sending content to people who never signed up to receive them, there is even a greater chance you’ll be heading for the spam folder.

Furthermore, you’re putting yourself at risk of violating the CAN-SPAM Act, which is enforced by the Federal Trade Commission.

Overall, sending unsolicited emails is just a losing strategy. In addition to the legal repercussions, it’s terrible for your brand reputation.

An average person who works in an office receives 121 emails each day. They won’t waste time checking unwanted messages.

Put yourself in their shoes for a minute. If you get a promotional message from a brand you never heard of and never signed up for, are you going to buy something from them? Probably not.

You can’t expect to see results from other people who receive these unwanted messages.

Instead, you should be focusing on how to grow your email list by getting new subscribers. Include signup forms on your website.

Research shows that the most common placement for email opt-in forms is in the footer of each page.

footer

Give this strategy a try, and watch your email list grow.

Now, you’ll be sending promotional content to people who actually want to hear from you as opposed to random email addresses you purchased.

2. Limit your sending frequency

As a business owner, you think about your brand 24 hours a day. I can relate to this.

You’re always coming up with new ideas to promote your company.

But your customers and email subscribers aren’t always thinking about you the same way you think about them. That’s just a reality. Can you blame them?

They have more important things on their minds, and they don’t want to hear from you that often.

Distributing promotional emails on a daily basis is not going to help your cause. You need to be selective when you send a new message.

When it comes to receiving emails, consumers report that sending emails too often is the number one most annoying action taken by marketers:

annoying

I’d recommend limiting these messages to once a week at the most.

You can even change the sending frequency based on what the subscriber prefers.

When a new customer signs up to receive your content, ask them how often they want to hear from you. You can segment this list by people who want weekly messages or just a monthly newsletter.

Giving your subscribers exactly what they’re asking for reduces your chances of getting marked as spam.

3. Use a clearly labeled “from” field address

Make it clear whom the email is from.

Some of you may have multiple email addresses within your domain, depending on the size of your company.

For example, if someone submits a complaint or request for help on your website, they may get a reply from a support@yourdomain.com.

But if they’re trying to make a purchase or return an item, email inquiries might be made through sales@yourdomain.com.

Don’t change the sender field too often. Try to stick with the one that works best for your promotional messages.

Avoid odd choices, such as donotreply@yourdomain.com or 372as2y9@yourdomain.com.

Make sure you create a solid reputation for these sender fields. It will build trust with your subscribers and even increase the chances that they will add the address to their contacts lists.

If they are used to receiving your marketing emails from the same sender address and one day it comes from a different one, they may think it’s spam.

Even if that message is coming from your company, it’s confusing to your subscribers.

4. Don’t try to trick the recipient

I see people make this mistake all the time.

In an attempt to increase email open rates, they try to be sneaky and trick their subscribers into clicking the message.

That’s a big mistake. Tricking your customers can damage your brand.

In addition to marking your message as spam, the recipient might ultimately unsubscribe from your email list. More than half of consumers say they have felt cheated or tricked into opening a promotional email:

deceptive

I’ll share with you some strategies that are perceived as deceptive by recipients.

Do not start your subject line with “Fwd:” or “Re:” to try to get more opens. This type of text implies you’ve already had a previous communication with the subscriber.

Discovering this was not the case will put a bad taste in their mouths.

Don’t send a message telling people they’ve won a prize if they haven’t actually won anything. Again, this is a fast way to disappoint the recipient and get your content marked as spam.

I’ve also seen some marketers conceal spam content by creating an image with text written on it.

You might fool spam filters, but you won’t fool the person who opens the email. They’ll still send you to the spam folder.

5. Choose the right service provider

Work with a partner that has a positive track record. There are thousands of marketing automation and email marketing companies out there—some are bound to be spammy, with dubious histories.

No matter what you’re promised, don’t take any chances—ever.

Only work with the companies that have a positive track record.

6. Certify your IP

This will help you get on the good side of many email providers. It will likely cost thousands of dollars a year, so make sure to do a rigorous cost/benefit analysis.

7. Set clear expectations

One of the first emails that you send should be a short introductory email that sets expectations about the content that you plan to send. To the best extent possible, make this information available before audiences describe.

Here are the expectations that you should clarify:

  • Content:Tell audiences exactly what your future emails will deliver—from blog posts to tips and promotional offers.Here is an example from Pinterest:
  • Frequency: Make sure that your subscribers know how many emails to expect from you. And don’t be sporadic. If too much time passes between messages, your subscribers may lose interest.
  • Design: Why not show your audiences a preview of your newsletter campaign? Keep the design consistent—don’t catch them off guard with any unexpected (or unwelcome) surprises. Tell audiences exactly what your future emails will deliver—from blog posts to tips and promotional offers.

8. Stay relevant

You need to focus on the content of your messages.

Ask yourself these questions before you hit send: Why are you sending this email? Is this message adding value to the subscriber?

If you don’t have a clear answer to these, you should probably re-evaluate the message.

Don’t send content just to say hello or provide a friendly reminder that your company exists. Your subscribers don’t care about this.

Here’s a look at the top reasons why emails get reported as spam:

reasons consumers mark spam

Take a look at the top reason.

Earlier I talked about how the frequency of your emails can cause you to get marked as spam. Well, there is a second part to this principle.

Your content needs to be relevant.

Even if you’re sending emails only weekly or bi-monthly, you can still get sent to the spam folder if the subscribers think the message is irrelevant.

For example, let’s say you run an ecommerce website selling home furniture. A marketing email updating your subscribers about the weather doesn’t add value to their lives. It also has nothing to do with your brand.

Make an effort to always stay on brand.

If it’s been a while since you’ve communicated with your subscribers and you feel like it’s time to send a new email, you probably can’t go wrong by sending out a discount or promotional code.

Run a flash sale, or send an exclusive personalized offer.

These types of messages are likely to get opened and lead to conversions.

9. Segment your list

Group audiences by demographic variables or web traffic source. Whatever dimensions you choose for segmentation, make sure that they reflect a clearly defined set of user characteristics.

Here is an analysis about what happens when marketers segment their list. As you’ll see in this sample, segments performed higher—in terms of both open and click-through rates—compared to the email list’s average.

10. Master your subject lines

A successful email marketing campaign starts with the subject line.

You could have the best promotional message in the world, but nobody will see it if they don’t open the message.

It’s in your best interest to keep your subject line as short as possible. Research shows that email subjects between 1 and 20 characters yield the highest open rates, regardless of what type of email you’re sending.

This is partially due to the fact that 55% of emails are opened on mobile devices.

If your subject line is too long, it will get cut off when it’s viewed on a cell phone. If the subscriber can’t read the full subject, it decreases the chances they’ll open the message.

Let’s put open rates aside for a minute and get back to the topic of discussion: spam.

Research shows that nearly 70% of emails get flagged as spam just based on the subject line:

subject line

Learning how to write email subject lines will help reduce your chances of getting marked as spam.

I recommend personalizing your subject lines. Personal subjects have higher open rates and click-through rates. They also tend to increase website traffic and drive sales.

Use your subject line to create a sense of urgency. Provide an offer that won’t last forever, and make sure it’s properly conveyed in the subject.

Tell a story. Provide breaking news. Stimulate curiosity.

These are all great types of subject lines that will entice your subscribers to open your messages instead of reporting them as spam.

11. Check spam risk before you hit send

Most email software for marketers has a built-in feature that checks for spam.

It scans your message and determines how likely it is to get sent to the spam folder.

To avoid a high spam risk, make sure you limit the use of promotional words such as:

Certain words are flagged by email clients as “suspicious” or spam.

Here are some examples from the finance space:

  • $$$
  • Affordable
  • Bargain
  • Beneficiary
  • Best price
  • Big bucks
  • Cash
  • Compare rates
  • Cost
  • Credit
  • Credit bureaus
  • Discount
  • Earn
  • Easy terms
  • Free

And here are some examples from the ecommerce space:

  • As seen on
  • Buy
  • Buy direct
  • Buying judgments
  • Clearance
  • Order
  • Order status
  • Orders shipped by
  • Shopper

Don’t get me wrong, you can include these words in your message, but use them sparingly.

Avoid special characters and writing in all capital letters. Don’t make obscure choices, e.g., adding spaces between letters, like F R E E.

Make sure the size of your email isn’t too big either.

If you’ve got links, be sure they from reputable websites with a high domain authority.

Your messages shouldn’t be too text-heavy or image-heavy. Balance text and images.

Don’t include too many colors or text written in colors difficult to read.

Here’s an example of what the spam check feature looks like on the Constant Contact platform:

constant contact

It may look a bit different on a different platform, but you’ll still be able to accomplish the same thing.

If your spam checker says you’re at a high risk of being marked as spam, you need to make some changes before you hit send.

Conclusion

It’s great you’re focusing on your email marketing campaigns. But if your content is getting marked as spam, it’s obviously not an effective strategy.

Times have changed. Even reputable brands who have permission from recipients to send emails are getting flagged as spam.

The key is being able to identify why emails get sent to the spam folder and how you can avoid this from happening to you.

Never buy subscribers or send unsolicited emails. Instead, use your website as a tool for growing your email list.

Use tools to help check your content for spam before you hit send.

Don’t send marketing emails too often. Clearly label the sender field, and don’t change this address.

Do not deceive your subscribers by tricking them into opening a message. Always make sure the content of your emails is relevant.

Learn how to write subject lines that lead to opens and clicks as opposed to the spam folder.

Following these tips will help you avoid getting marked as spam. Ultimately, this will lead to higher conversions for your business.

Need Help With Email Marketing?

Get help with improving your email campaigns, traffic, and revenue.

Get Started


from Quick Sprout https://ift.tt/2UZmoAi
via IFTTT