You’ve made some pretty spectacular changes to your website. However, somehow, they don’t reflect on your website.
Nearly every troubleshooting advice you receive will tell you to clean your WordPress cache first.
You see, your WordPress website creates static versions of your content and serves them to visitors to ensure faster performance. It’s a standard feature that all websites have to store temporary information on a local directory. This is cache.
However, caching does have its fair share of disadvantages, which is why you should clear your website cache periodically.
An information overload can make your website seriously slow. Moreover, at times, you may not see the changes you made to your website right away. Precisely why a little WordPress cache cleanup becomes necessary.
What to Expect When Clearing Your Cache in WordPress
A three-second delay can cost you 40% of your visitors. So you can imagine the massive loss in revenue that a slow page load speed can cause. You must think of ways to keep your website faster if you want more customers and higher sales, and the best way to ensure this is by clearing your website cache.
Here’s how you do it:
- Step 1 – Find Out If You Really Should Clear Your WordPress Cache
- Step 2 – Clear Cache Data with Your Web Host
- Step 3 – Clear Your WordPress Caching Plugin Data
The Good
Clearing cache may sound complex, but it really isn’t. On the contrary, it may be the easiest thing you can do to troubleshoot any website problems you run into. All you need to do is make sure you follow the steps in this guide.
Whenever a user visits your site, a request is sent to your server to display the page. From there, the server pulls the necessary data and then forwards it as an HTML file to the user’s browser. The user’s browser then processes the HTML file, converts it, and displays it as a web page.
The rule is simple: The faster this process, the happier your visitor, and the more likely they are to stay on your website.
Clearing your cache is just another effort to keep your visitors happy. This way, your visitors will be able to see the latest tweaks and updates you make to your site, which will again improve their overall experience.
What’s more, clearing your WordPress cache is even easier if you already have a cache plugin installed. I’m talking two or three clicks max! Plus, you’ll see all the made changes reflect on your website as soon as your cache folder gets empty.
The Bad
You’re supposed to clear your cache whenever you make substantive changes on your website. The challenge here is your update schedule and frequency. Your update schedule may vary, which is why you might forget to manually clear caches whenever you make any modifications to your main website.
Again, using automatic cache clearing schedules (it’s a feature offered by WordPress cache plugins like WP Rocket or WP Super Cache) is a viable solution. But they may not be the best fix if your update frequency is on the higher end.
Clearing your WordPress cache will update your website, yes. But it also means that the static files must be stored again to boost page loading times. Until that happens, you may find your SEO rank suffering a bit and your website taking a little longer to load for your visitors.
Well, you win some, you lose some.
Step 1 – Find Out If You Really Should Clear Your WordPress Cache
The whole point of website caching to enhance your visitors’ UX. You can ensure an optimal experience for your visitors through this by sending a static copy of your site, which, in turn, helps your website load faster with every visitor.
At the same time, it’s possible for caching to accidentally stand in the way of delivering new content to your website visitors.
To avoid issues or losing customers, you have to learn to clear your WordPress cache manually. But before we discuss that, let’s find out whether you need to clear the cache.
New Content Isn’t Visible
If you find new content isn’t displaying on your website, treat it as a red flag.
If you make any changes in the WordPress customizer or update an already published page or post, check whether they’re visible on your site. Alternatively, you can open a window in ‘incognito mode’ to see if your browser has cached the changes you made.
In this case, you may have to clear the WordPress cache manually—even if you have a WordPress cache plugin. After this, you’ll also have to clear your browser cache as well.
Updated Plugins and Themes
Caching plugins cache all the assets of other plugins and themes, and that’s great. But you may find your website glitching after you update your website plugins and themes for a bit.
This is because the CSS/JSS files become obsolete after every major update. It’s why clearing your WordPress cache after every plugin/theme update is so crucial. Don’t worry, though. Everything will be back to normal once you clear your WordPress cache, followed by refreshing your browser cache.
Do any of the above circumstances sound familiar? If yes, keep reading to know how you can clear your WordPress cache in two minutes.
Step 2 – Clear the Cache on Your Browser
Before we talk about clearing out your browser cache, you should know what it means.
Whenever you visit a website, your browser takes pieces of the pages and stores it in your device’s hard drive. This can include HTML, CSS files, JavaScript, and other media files like logos, backgrounds, pictures, and so on. These are known as static assets, which represent the parts of a website that don’t change from your last visit.
Storing these static assets helps the website load faster on your visitors’ computers, which, in turn, improves user experience. However, sometimes web browsers may fail to realize that a web page has changed, so instead of fetching a fresh copy, they might still reload the cached (and old) version stored on the computer.
Typically, a browser cache refresh should solve the problem.
Clear Your Browsing Data
Open Google Chrome on your device. Click on the three horizontal dots (this is the menu icon) located on the top right-hand corner of your screen.
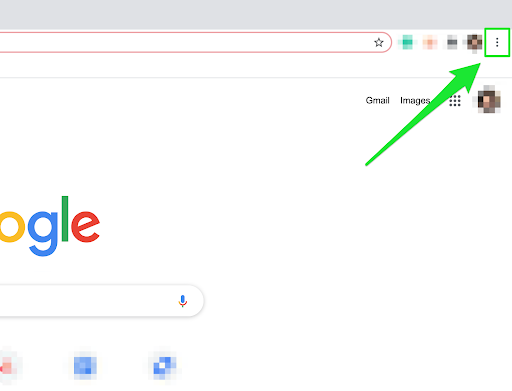
Click on More Tools, and select Clear Browsing Data… from the dropdown menu. A Clear browsing data pop-up will appear on the screen.
![]()
Click on the Advanced tab, and select All time from the Time range dropdown menu.
![]()
Make sure the Cookies and other site data and Cached images and files checkboxes are checked. Finally, click on the Clear data button.
All your browser cache is now successfully cleared.
To double-check, visit your website to see whether the changes you made before clearing your cache are visible on your site. If not, move on to the next step.
Step 2 – Clear Cache Data with Your Web Host
Disclaimer: If you have a caching plugin installed and activated on your website, skip this step and move on to Step 3
Popular WordPress-specific hosting options let you clear cache directly through them. This includes web hosting bigshots like Bluehost, SiteGround, and WP Engine.
I’ll show you how you can clear your cache using Bluehost, but the process is more or less similar for other web hosts, too. If you find yourself stuck somewhere, you can always contact your support team.
Clear WordPress Cache in Bluehost
Bluehost is one of the best web host providers you can get your hands on. It offers affordable subscription plans and top-notch security and support, plus tons of useful freebies like a free domain and SSL certificate.
Considering the platform is designed to be user-friendly, it’s unsurprising that clearing your cache in Bluehost is also super easy.
Go to the main admin dashboard, and click on the Caching button you’ll find at the top of the admin toolbar.
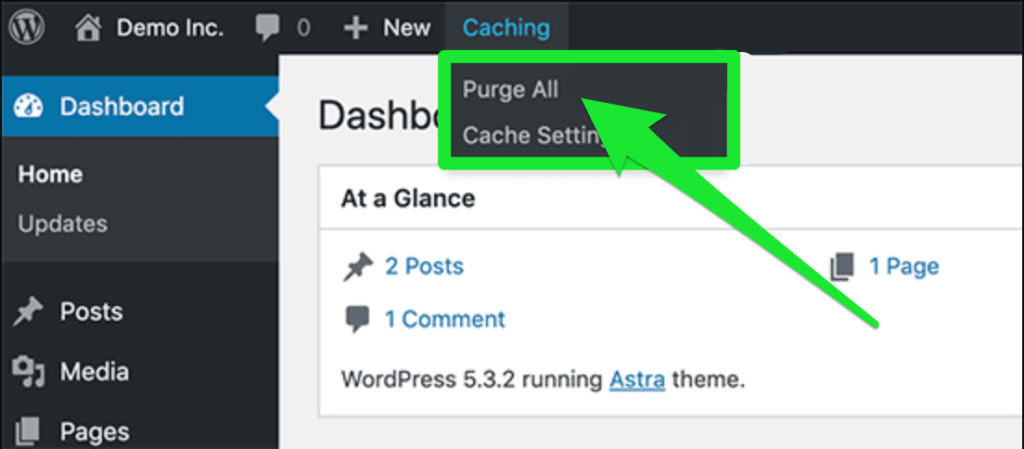
Two options will appear on your screen in the dropdown menu. Select Purge All. This will immediately clear all your WordPress cache files.
Like I said, super easy.
Step 3 – Clear Your WordPress Caching Plugin Data
WordPress caching plugins are excellent options to give your website that much-needed boost immediately.
When clearing out your browser caching doesn’t work, you’ll have to clear your plugin cache. This refers to the HTML pages of your website that are saved on your server.
The process to clear your cache will differ depending on the plugin you use. Below, I’ll show you how you can clear your WordPress cache with the four most popular caching plugins.
Let’s take a quick look:
How to Clear Cache With WP Super Cache
WP Super Cache is an incredibly popular caching plugin that comes loaded with several advanced caching features. This includes automatic cache compression, cache scheduler, and so on.
Here’s how you can clear cache with this caching plugin:
- Go to the main WordPress dashboard. Click on Settings, and followed by WP Super Cache.
- Click on the Delete Cache button located towards the bottom of the screen right under the Delete Cached Pages field.
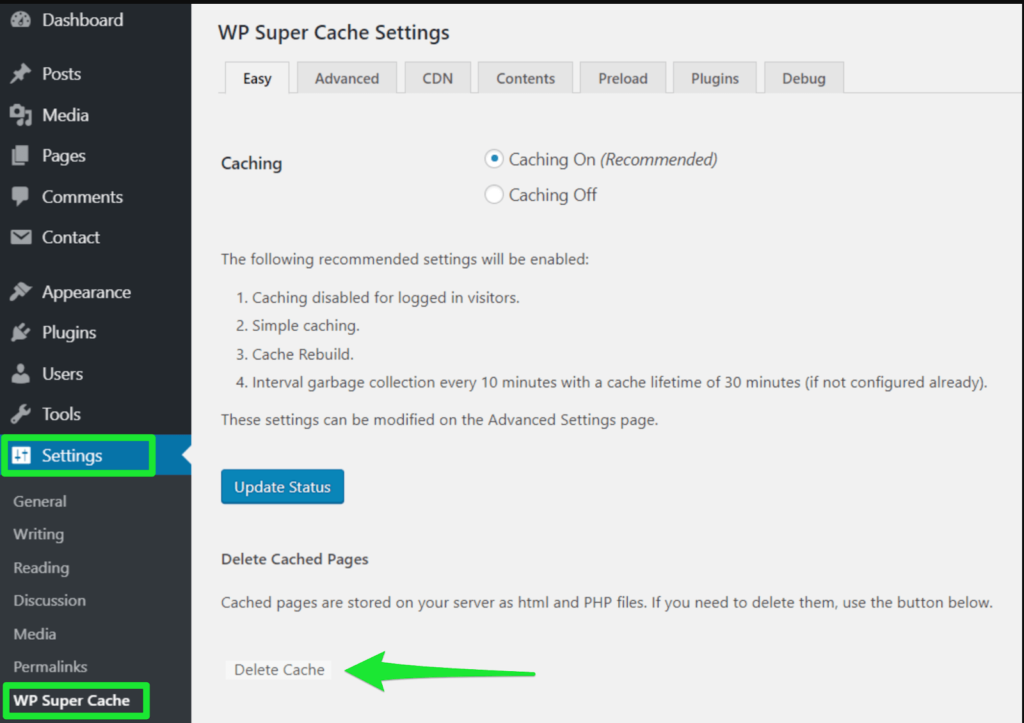
And that’s it! All your cached pages will be deleted.
How to Clear Cache with WP Rocket
Many website owners will vouch for the sheer caching excellence that is WP Rocket.
It builds the website cache while turning on the recommended WordPress caching settings like GZIP compression, page caching, and cache pre-loading—all by itself. Follow the steps below to clear the cache files stored by this plugin.
- Open your WordPress admin dashboard.
- You’ll find the WP Rocket menu is already added to the admin toolbar. Hover your cursor over the tab.
- Select Clear cache from the dropdown menu options.

Congratulations! You now know how to clear your WP Rocket cache data files.
How to Clear Cache With With WP Fastest Cache
The highest-rated cache plugin on WordPress, WP Fastest Cache, is a beginner-friendly cache plugin that creates static HTML files from your dynamic WP site. At the same time, it also minifies HTML and CSS files, reducing the overall file size.
How to go about it:
- From your WordPress dashboard, go to the WP Fastest Cache option.
- Select the Delete Cache tab on the top toolbar, and finally, click on the big Delete Cache button.
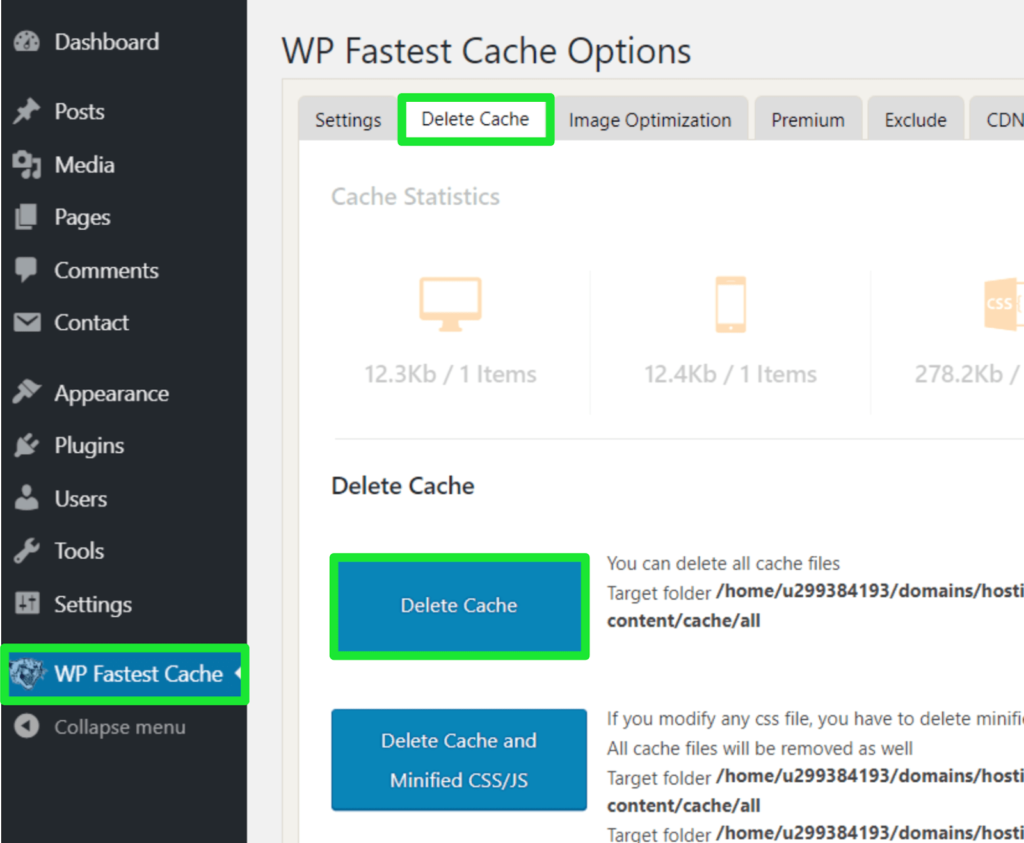
That said, the WP Fastest Cache plugin deletes all cached files automatically whenever you publish a new page or post. But you can still follow the manual method above to delete your cache files.
How to Clear Cache in W3 Total Cache
W3 Total Cache provides top-notch customization and bandwidth-saving features. It’s designed to improve your server performance by caching every aspect of your website and is also compatible with most networks—WordPress included.
Let’s take a quick look at how you can clear your W3 Total Cache files:
- Click on the Performance option on your WordPress dashboard.
- Select Dashboard from the presented options and follow this up by clicking on the empty all caches tab. You’ll find this button located at the top half of your screen.
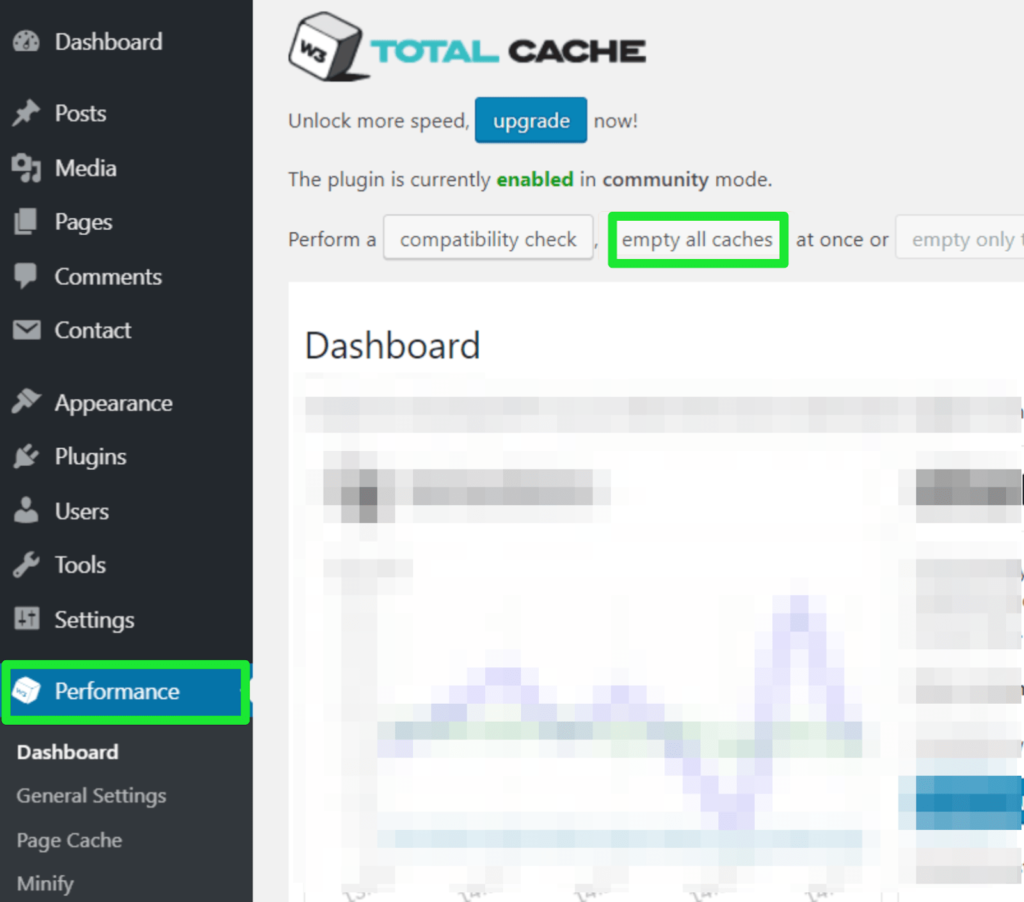
Your WordPress plugin cache is now clear!


from Quick Sprout https://ift.tt/2RzY9Xl
via IFTTT
