Security needs to be a top priority for every website. From small personal blogs to global ecommerce sites, added security builds trust with visitors and boosts search rankings.
If you’re looking for a quick and easy way to secure your website, start with an SSL certificate.
What is an SSL certificate? SSL stands for “secure sockets layer.” It’s an internet protocol that secures the data transfer between a website and the visitor’s web browser. SSLs are typically used to protect login credentials, credit card data, and other sensitive information.
Generally speaking, SSL certificates can cost anywhere from $50 to $200 per year. But there’s no reason to pay those prices.
As someone who has owned and managed dozens of sites throughout my career, I’ll show you how to get an SSL for free.
What to Expect When Getting a Free SSL Certificate
The best way to get a free SSL certificate is by signing up for a web hosting plan from Bluehost. All of their hosting packages come with a free SSL, and the entire process can be completed in just three simple steps:
- Visit Bluehost.com
- Sign up and choose a hosting plan
- Activate the SSL
The Good
For the most part, getting an SSL certificate is easy. Many web hosting providers include a free SSL certificate with hosting plans. You need to get web hosting regardless, so it makes sense to get a hosting plan and SSL all from the same provider.
In many cases, you won’t even need to select the SSL certificate as an add-on. The certificate will automatically be bundled within the hosting plan.
You can get an SSL certificate for free with entry-level web hosting. Most new websites choose shared web hosting. These plans are cheap and have enough resources to accommodate brand new sites. Even with these low-cost hosting packages, you can still get an SSL certificate for free.
There is no shortage of reputable web hosting providers on the market today. So, you won’t have to dig too hard to find one that will provide you with a free SSL. I’ll show you my favorite option shortly (Bluehost).
The Bad
Getting an SSL certificate for free involves a few extra steps. It’s not a one-click process.
New website owners need to buy a domain and find a web hosting provider before they can consider getting an SSL certificate. Choosing a CMS (content management system) or site builder is something else that you’ll have to ponder. Some of these extra steps will cost money. And web hosting isn’t free, so you’ll still have to pay something.
But just because you have an SSL certificate doesn’t necessarily mean that it’s activated. So, there might be an additional step or two for enabling your SSL. Once installed, it could still take a few hours to activate.
Starting a website without an SSL certificate is a bad idea. Besides exposing your visitors to potential threats and hackers, some web browsers go out of the way to inform people that the site isn’t secure.

If people see this next to your URL, it makes them nervous and causes them to leave your site.
Personally, I always try to avoid unsecured websites. I’m not alone in this thought process. In fact, 50.8% of people immediately leave a website when they see a “not secure” notice. An additional 23.8% of visitors say they won’t share any personal details on these sites.
Step 1 – Visit Bluehost.com
Bluehost is arguably the most reputable and reliable web hosting provider on the market today. It’s an easy and affordable way for new websites to get a hosting plan and SSL certificate.
I like Bluehost because it’s essentially an all-in-one solution for new website needs. All hosting packages come with a free SSL certificate and a free domain.

They have hosting solutions for everyone. Whether you’re looking for a cheap entry-level plan, managed solution, WordPress hosting, or web hosting for an ecommerce site, Bluehost has you covered.
Before we dive into the free SSL, take a minute to assess your hosting needs. This will make the process much smoother as you continue through the tutorial. Here’s a brief overview of Bluehost’s hosting solutions, which will help you determine the best option for your website.
Shared Hosting
For new websites, shared hosting will be the best option. These plans are cheap but still accommodate the needs of low-traffic sites.
You’ll be sharing server resources with other websites, which can potentially cause slower loading times and performance issues. But that’s fine for most new sites, especially for smaller sites and personal blogs.
If you’re not expecting a ton of website visitors for the foreseeable future, there’s really no reason to break the bank and choose anything more advanced than a shared hosting plan.
In addition to a free SSL certificate, all of Bluehost’s shared plans also come with a free CDN and free domain for one year.
VPS Hosting
Bluehost’s VPS (virtual private server) plans are designed for sites that want better performance. This is a step above shared hosting and comes at a higher price point as well.
VPS hosting provides guaranteed resources to your site. While you’ll technically still be sharing a server with other websites, you’ll have dedicated resources on your “virtual” server.
For sites expecting higher volumes of traffic out of the gate, VPS hosting is a viable option. Advanced users will benefit from features like optional root access as well.
Dedicated Hosting
Dedicated hosting is the top of the line in web hosting. You can rent an entire server just for your website and won’t have to share it with anyone else.
These packages come with premium performance, but for a premium price.
The vast majority of you won’t need a dedicated hosting plan, so I won’t spend too much time explaining how this works. But generally speaking, these are reserved for high-traffic sites or for people who want complete control over their hosting environment.
WordPress Hosting
Bluehost has hosting plans that come with an automatic WordPress installation. This is one of only three web hosting providers explicitly recommended by WordPress, so these plans are extremely popular.
They also offer fully managed WordPress hosting, a viable option for growing websites with higher traffic volumes. Even the entry-level managed hosting plan can accommodate up to 50,000 visitors per month.
Additionally, Bluehost has ecommerce plans optimized for WooCommerce. So, if you’re planning to run an online store via WordPress with the WooCommerce plugin, these plans will be perfect for you.
Step 2 – Sign Up and Choose a Hosting Plan
Now that you understand the different hosting options offered by Bluehost, it’s time to select a plan that’s right for you. For the purposes of this tutorial, I’ll go with a shared hosting plan since most of you will likely fall into that same boat.
Here’s a quick overview of the shared packages:
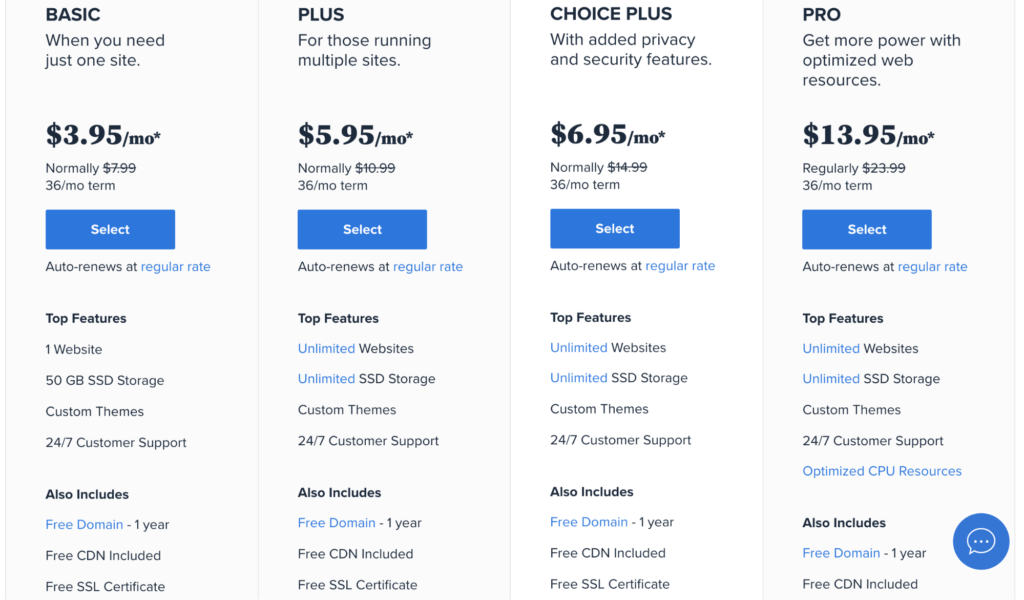
All of these plans come with a free SSL certificate. Once you’ve decided on a package, just click “Select” to continue.
Set Up Your Domain
After selecting a plan, you’ll automatically be prompted to set up your domain. There are two options to choose from, depending on your unique situation: creating a new domain or using a domain you already own.
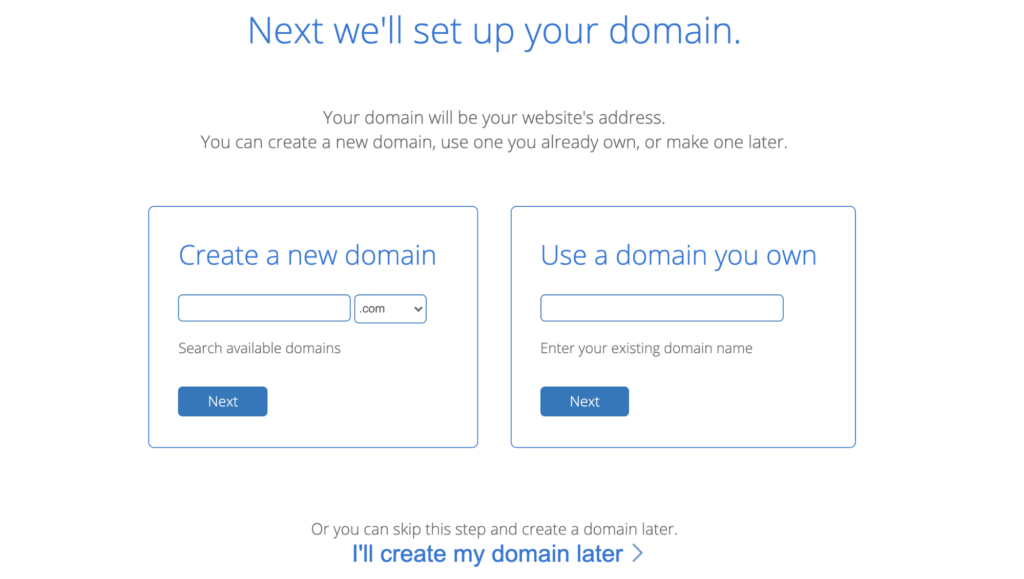
This is pretty self-explanatory. If you’ve already purchased a domain elsewhere, just enter it here. For those of you who don’t have a domain name yet, you can search for an available domain and get one directly from Bluehost.
Another reason why Bluehost is so appealing for new websites is that you’ll get a domain free for the first year when you create it with Bluehost.
If you’re not ready to do this quite yet, you can skip it and set up your domain later. Even if you skip this step, you’ll still be entitled to a free domain credit if you get one with Bluehost.
Since this tutorial focuses on getting an SSL certificate, I’ll select the option at the bottom of the screen and create my domain later.
Create Your Account
Bluehost will prompt you to sign up and create an account. You’ll just need to provide some basic details about yourself or your business to continue.
Those details include:
- First and last name
- Business name (optional)
- Address
- Phone number
- Email address
This is about as straightforward as it gets and shouldn’t take more than a minute or so to fill out.
Choose Your Plan Terms
To get the best possible rate, sign up for a 36-month plan, and pay upfront. Bluehost also offers 24-month plans and 12-month hosting plans.
I’m all about value, so I recommend choosing the most extended contract to get the best terms. But the plans are cheap no matter what term length you decide on. Don’t overthink it.
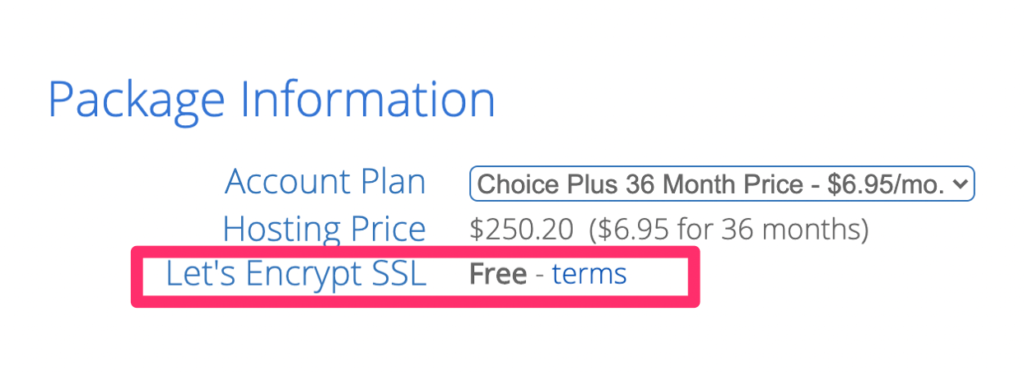
As you can see, a free Let’s Encrypt SSL is automatically added to your package. You don’t need to check any boxes or select an add-on to get this feature.
Bluehost will hit you with a couple of other upsells as you finalize the package. Examples include SEO tools and SiteLock Security. You can probably skip the SEO tools, but lots of people like SiteLock for added security. This covers things like malware detection, weekly scan reports, automatic malware removal, file-level scanning, and Google blacklist monitoring. You’ll want these features eventually, so it makes sense to get it now.
Provide Payment Details
Paying for your Bluehost plan is the final step to creating an account. Just enter your credit card details or pay via PayPal.
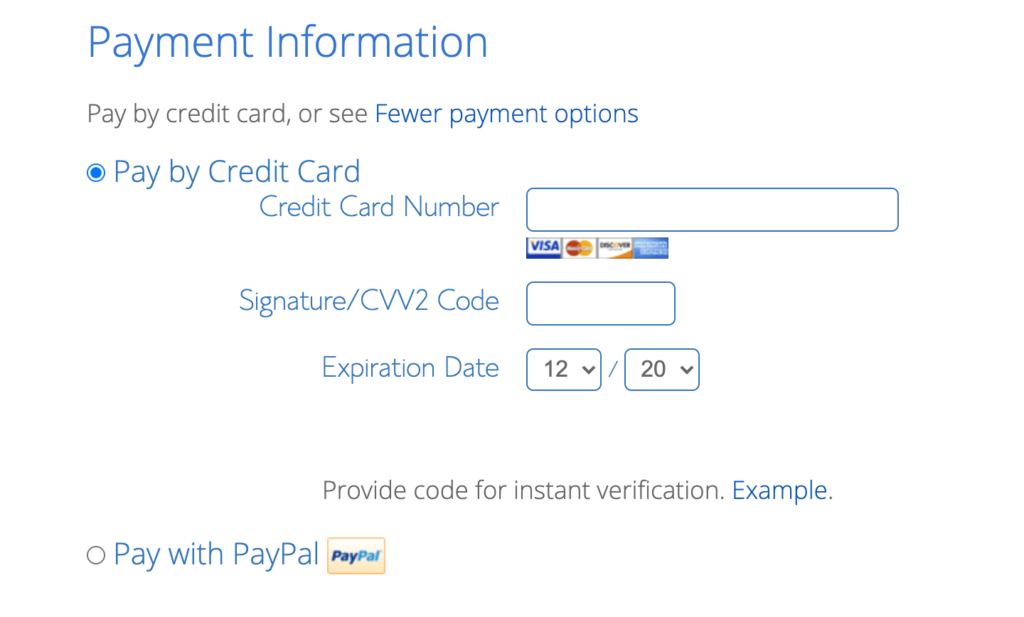
A 30-day money-back guarantee backs Bluehost plans. So, if you decide to cancel within 30 days, you’ll be eligible for a full refund. This guarantee doesn’t extend to add-on products like purchased domain names.
Your plan will automatically renew at the regular rate when the term expires. That’s another reason why I recommend locking in a longer contract. You won’t be able to access these low introductory rates after the first term.
Step 3 – Activate the SSL
Once you’re signed up, you need to make sure the SSL is active. In most cases, the SSL will be automatically assigned to your website and install itself on the domains in your account. However, some Bluehost customers need to enable the SSL certificate manually.
Whether you got your domain from Bluehost or a third-party provider, always verify that the SSL has been activated.
This is easily managed from your Bluehost control panel.
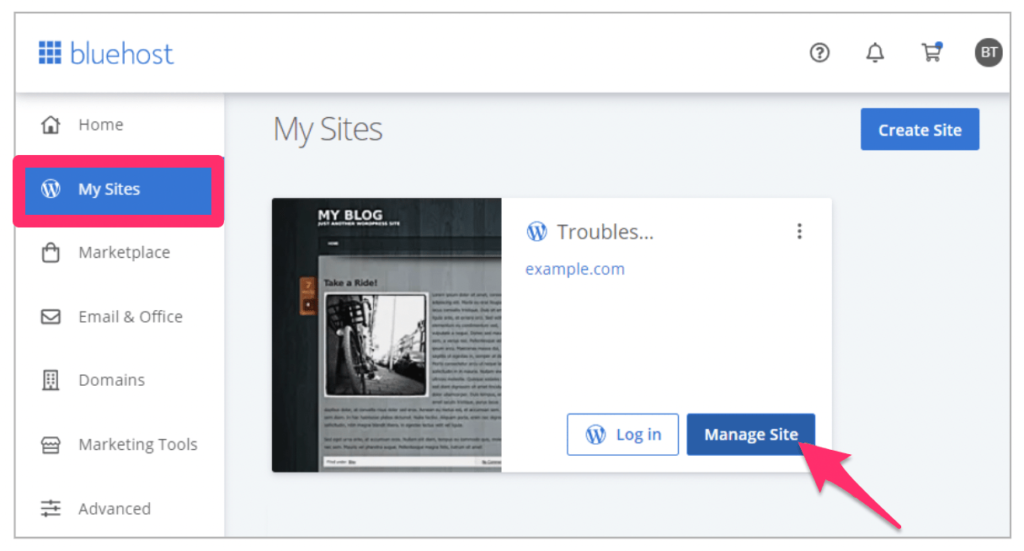
Click the “My Sites” Menu From Your Bluehost Dashboard
Once you’ve logged in to Bluehost, make your way over to the “My Sites” page of the dashboard. For those of you who have multiple sites hosted in the same account, you’ll see all options listed here.
Find the site you want to activate the SSL for and click the “Manage Site” button.
Enable Free SSL Certificate From the “Security” Tab
From here, you need to make your way to the “Security” menu. This can be found towards the top of the screen.
Next, locate the “Security Certificate” portion of this page. You’ll see “Free SSL Certificate” listed in this area.
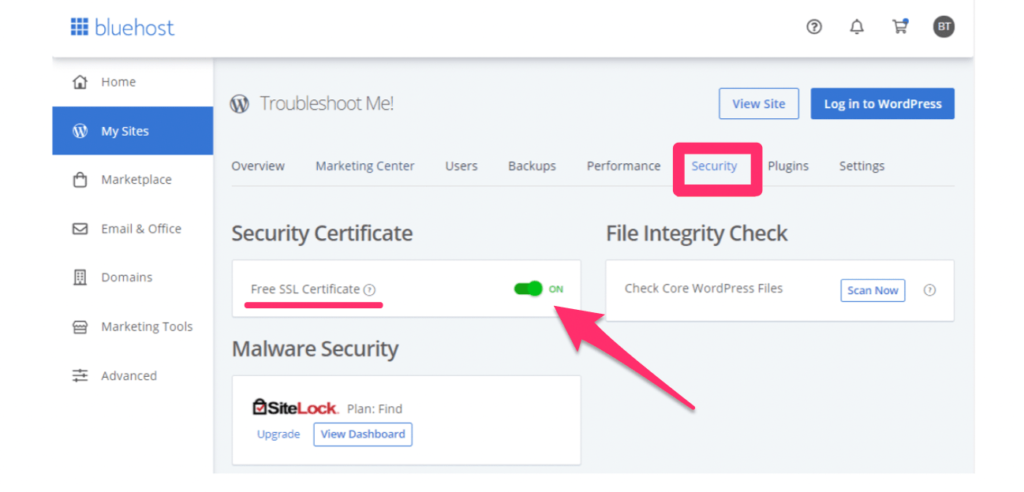
If the certificate is turned on (as shown above), there’s nothing you need to do. The SSL has already been installed. If not, simply toggle the free SSL certificate to the “on” position to activate it.
Once turned on, the SSL certificate can take a few hours to install itself completely and activate. Don’t be alarmed if your site is still showing as “not secure” immediately after turning the SSL on.
Keep a close eye on your email for the next few hours as well. In some instances, Bluehost will require you to complete an action to continue. Clear instructions will be sent to you via email if necessary.
If for some reason you ever want to de-activate the SSL, follow the same steps, and just switch the slider to the “Off” position.
from Quick Sprout https://ift.tt/3oqZ1ZX
via IFTTT
