
How many articles have you read about creating great content? Quite a few, hopefully…
Creating valuable to your readers content is one of the key components of effective content marketing.
But here’s the problem:
How do you combine the lessons from all those articles?
They all teach you something valuable, but consolidating all those useful techniques and tactics isn’t always easy. For example, you might read an article about simple but effective copywriting techniques.
You get excited, and then you focus on practicing those in the next few articles you publish. But writing a few articles isn’t enough to establish a habit.
Even if you truly understand how to apply the things you learned, you might not remember to do them in the future. That is, unless, you have a way that forces you to remember them. A list of them.
Every time you write an article, you should make sure that you apply as many of the items on the list as possible.
You should make your own list.
However, I thought I’d create this post to get you a solid start. I’ve put together a list of 11 points that your content should meet if you want it to be effective.
It doesn’t matter if your content is text, audio, or video—most of these points will still apply.
It also doesn’t matter what the content will be used for.
Great content is necessary not only for your blog and any guest posts you make but also for other channels such as social media.
Finally, before we get started, I know that checklists aren’t really fun, but they’re effective and efficient.
Create the list once (or take mine), and it will raise the quality of your content for years to come.
Since 70% of marketers create more content each year, small improvements based on a checklist in a single article can result in a big difference overall.
1. The headline hooks my target reader
Think about where you spread your content after you publish it.
Social media is probably one of the first stops.
You also probably email your list.
Then forums, groups, and other communities.
All of those have one major thing in common:
Success depends on your headline.
Your headline isn’t the only factor, but it’s usually one of the main things that causes people to click or not click through to your post:
We already know that most social shares come from people who don’t even read past the headline.
Even if you have a great article, it won’t matter if no one sees it in the first place.
It starts with the headline. Obviously, it doesn’t end with the headline. If your content sucks, no one’s going to share it after they click through.
Back to the headline…
Writing a great headline isn’t easy. It takes knowledge and practice. I’ve written many posts about how you can write great headlines for different situations:
- The Formula for a Perfect Headline
- The Step-by-Step Guide to Writing Powerful Headlines
- Headline Writing 101
But remember what we’re doing here.
This isn’t the time to come up with a headline—you should have done that already.
This is a point in a checklist. It’s asking you to evaluate a headline, which is much easier.
I can tell you if a painting is good or not (for the most part), but I sure as heck can’t paint a great one myself. Judging is almost always easier than doing.
Here, you want to consider two main factors…
Factor #1 is always relevance: The first question you should ask yourself when judging a headline is: “Is this relevant from my audience’s point of view?”
Basically, this means that your headline should contain keywords related to your niche.
And not just any keywords, but one’s that your actual target audience will recognize and probably care about.
Obviously, I write a lot about marketing on Quick Sprout. If you look at my headlines, you’ll see a lot of the following words:
- traffic
- leads
- content
- sales
- SEO
- autoresponder
These are common keywords contained in keyword phrases that I might target with my content.
But they are also widely used terms that almost all of my readers recognize.
So, when they see one of my headlines, they see at least one of the concepts they are interested in, which gets them to read the entire headline.
A common mistake: It’s easy to forget the perspective of your readers. Just because you might know an advanced term for something doesn’t mean your readers will. If they see a headline but are not sure if it relates to their interests, most will pass on it.
Factor #2 is curiosity: Once they see a keyword that is related to their interests, most readers will take a look at the whole headline.
Afterwards, they decide if it’s worth reading or not.
Basically, it comes down to this question: “Does it look interesting?”
If the reader is curious enough, they have no choice but to click through. That’s when you know you have a good headline.
Here’s an exercise you can do…
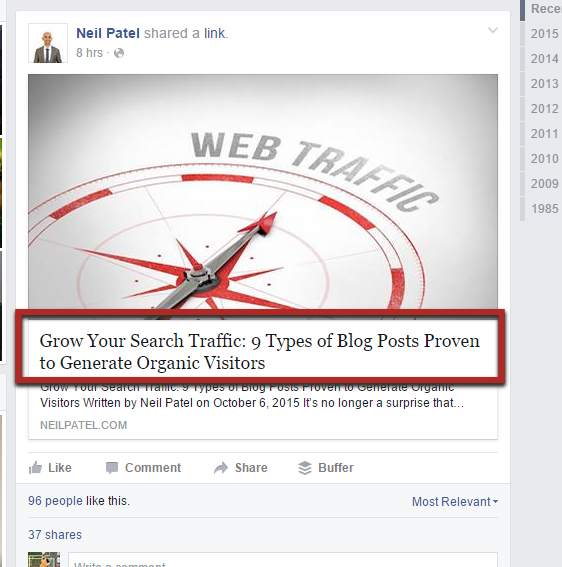
Go to a major news site or blog in your niche. In my case, for the sake of an example, I went to Search Engine Land, a major SEO news site.
Ideally, you want to find a list of their current most popular content or at least their most recent content somewhere on the homepage.
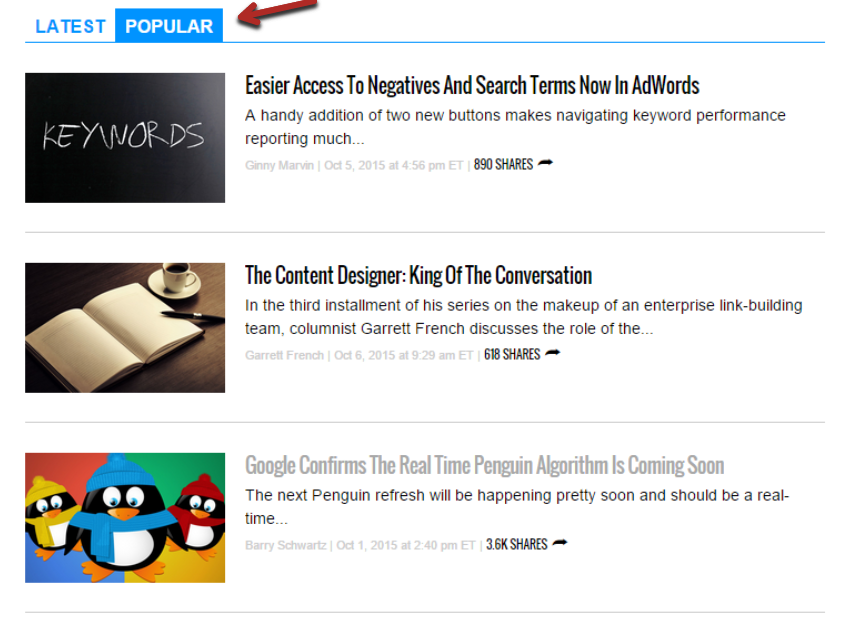
Next, you’ll replace one of the titles with the title of your content.
To do this, right-click on one of the titles while in Chrome, and choose “inspect element.” This will create a little pop-up.
In the left side of the pop-up, double click the title text (among the HTML code), and type in your headline instead:
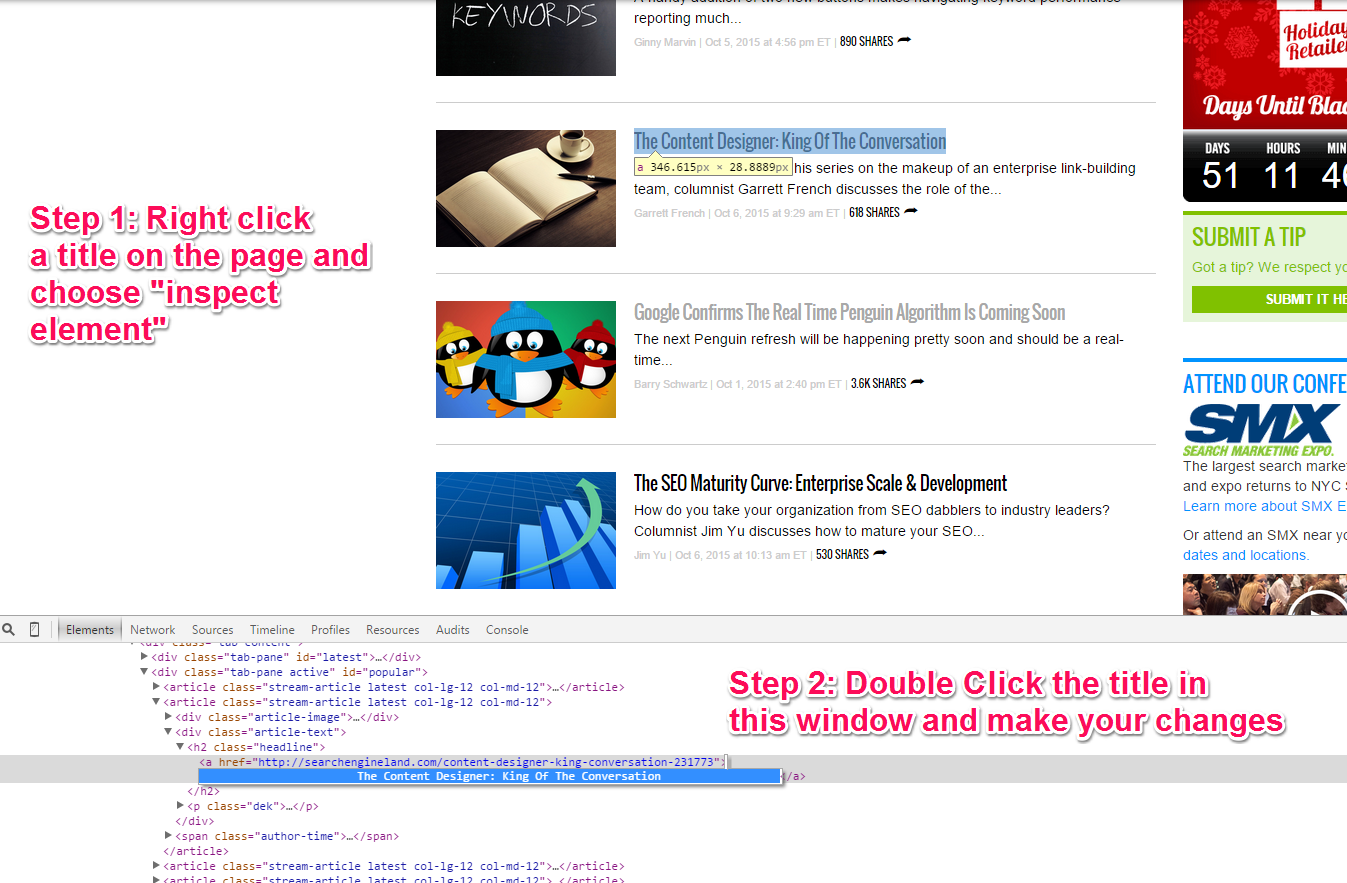
When you’re done, press enter and close the pop-up.
The change that you made (to the highlighted part in the picture above) will now show up on your screen:
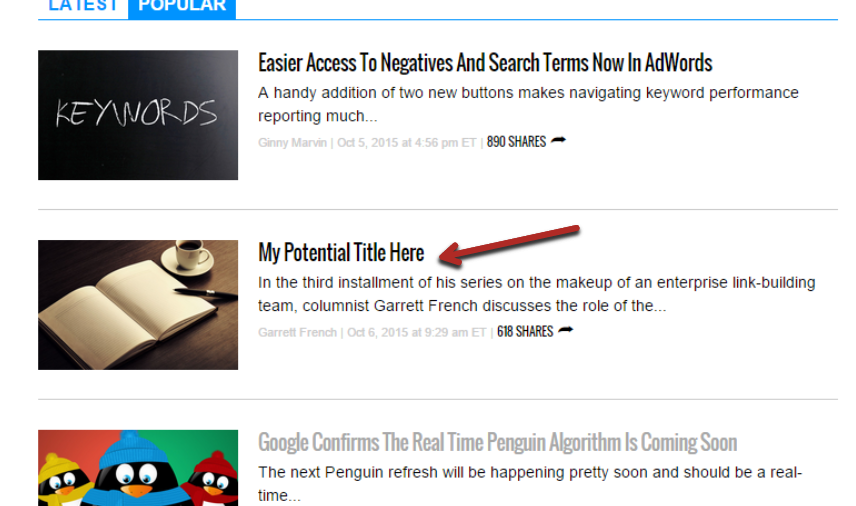
Now, do your best to get in the mindset of the reader you’re trying to attract.
Ask yourself in which order you would click on these titles (if at all).
If you choose your own article last, you have a big problem.
If you choose it first, you likely have a great title.
Obviously, it’s hard to be unbiased. If possible, get a second opinion from a friend or any of your fans who’d be willing to help you in this way.
2. Introductions have one main purpose…
Can you guess it? The purpose of an introduction?
This is actually from copywriting.
To get to the purpose of your introduction, let’s start with your headline.
A headline has one goal: to get someone to read the first sentence.
The first sentence is to get them to read the second sentence, and so on.
The introduction, as a whole, has one main purpose:
To get your reader to read the rest of the article (specifically the first subheading/section).
So, how do you do this?
Again, there are many ways, but here we’re just judging what you already have.
The key factor is whether your introduction is easy to read.
Readers should be able to feel like they are flying through it, understanding it, and moving down the page. It helps them feel like they are making progress.
Imagine reading a dense introduction that takes you five minutes to understand. Then, you look at the rest of the article and see that it’s 2,000 words long.
Chances are you won’t read the rest.
That’s why you want yours to be simple: to give the reader some momentum and to help them commit to reading the rest of the article.
You can look at the introductions written by any of your favorite bloggers to see this in action.
For example, here’s one from Brian Dean:
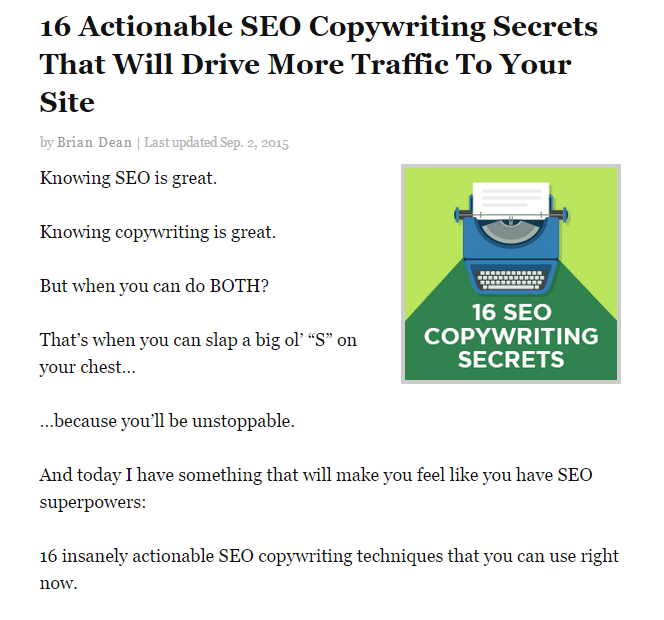
I can read those seven lines in about 10 seconds and move down to the first section.
Brian writes in short sentences and paragraphs and uses simple words. You should do the same.
Open your article again and time how long it takes you to read and understand the introduction (from your target reader’s point of view).
It shouldn’t be longer than 1-2 seconds per line. If it is, that means your introduction contains too much complex information and/or is formatted poorly.
3. Content is optimized for “skimmers”
Your most loyal readers read your every post.
They examine every sentence and every word because they love what you produce.
This makes up about a whopping 1-5% of your readers.
Be thankful for them; they are amazing.
But what about the other 95-99%?
They’re still important, but they either don’t have time or interest to read every post and every part of that post.
The average reader of a post only reads 20-28% of it.
In other words, they skim it.
And there’s nothing wrong with that. We all have a limited amount of time in a day to learn, and everyone needs to prioritize their own time.
I’d rather have someone skim my posts than not read them at all.
Element #1 – Clear and intriguing subheadlines: There’re a few things that skimmers look for as they skim a post.
Think about why they’re skimming in the first place. It’s to save time.
They’re not sure if reading the entire post is worth their time. If you’re producing longer content, like I obviously do, then this is even more of an issue.
A typical reader, as you can probably imagine, looks to see whether any of your sections contain useful to them information.
It makes sense.
Say, I published a post “8 Content Marketing Tactics to Do X.”
If someone already knows quite a bit about content marketing, not all of those eight tactics will be new to them.
So, what do they look at?
Subheadlines.
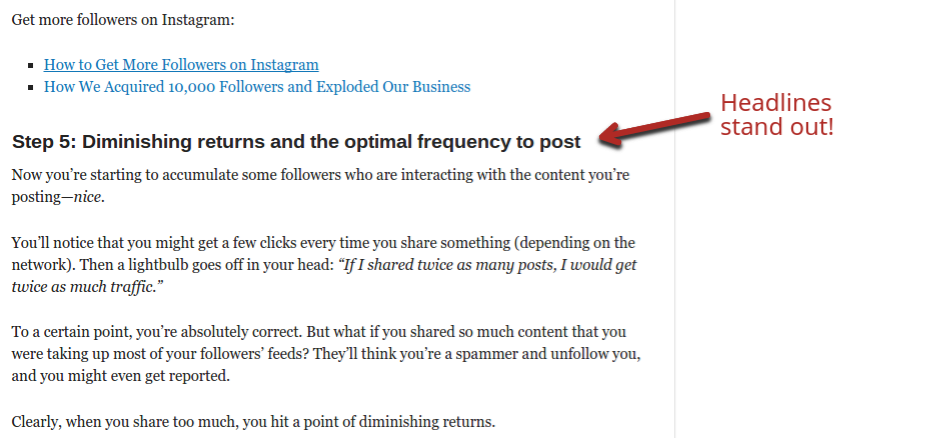
First, ask yourself, “Are my subheadlines easy to find while skimming?”
Just skim your post, and see which parts jump out at you. If your formatting is good, your subheadings will stand out:
At the same time, remember that the first point in this entire checklist was about your main title.
Similarly, you should ask yourself whether each subheadline is clear (as far as the topic goes) but also whether it creates enough curiosity for the readers to want to read the section it introduces.
That’s why I don’t use simple 1-3 word subheadlines very often, unless it’s for a specific reason.
(Advanced) Element #2 – Format backgrounds to indicate new sections: If you’re willing to invest a bit of extra time and resources, you can make your content even better for skimmers (and all readers).
If you’ve ever read one of my Quick Sprout advanced guides (in the sidebar), you’d notice that each section has a different background color.

Instead of having to scan for a subheadline, which can be missed, skimmers can easily find a new section based on the background color.
You will have to learn some basic CSS to do this. However, after you apply it once, you can use it over and over again without spending much time on it.
(Advanced) Element #3 – Custom CSS boxes for important parts: Another advanced formatting element you can take advantage of is a box around any particularly important or impressive content. Like this:
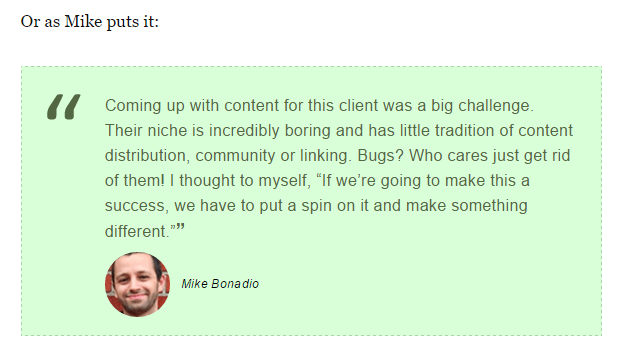
Imagine scrolling down a page and seeing a bright green box jump out at you.
You’ll probably pay some attention to it.
If there’s something new or insightful in that box, you might go back up and read from the start of that section.
I’d recommend putting expert quotes or impressive results (e.g., “ranked #1 in 5 weeks using X technique”) in them.
Again, you’ll need to learn some CSS. I walk you through a simple procedure in this post about advanced formatting.
4. Content is balanced between text and non-text
There are very few people who can read a long post that consists of nothing but text.
Unless you’re an amazingly entertaining writer, no one’s going to read your post if you don’t include good formatting principles.
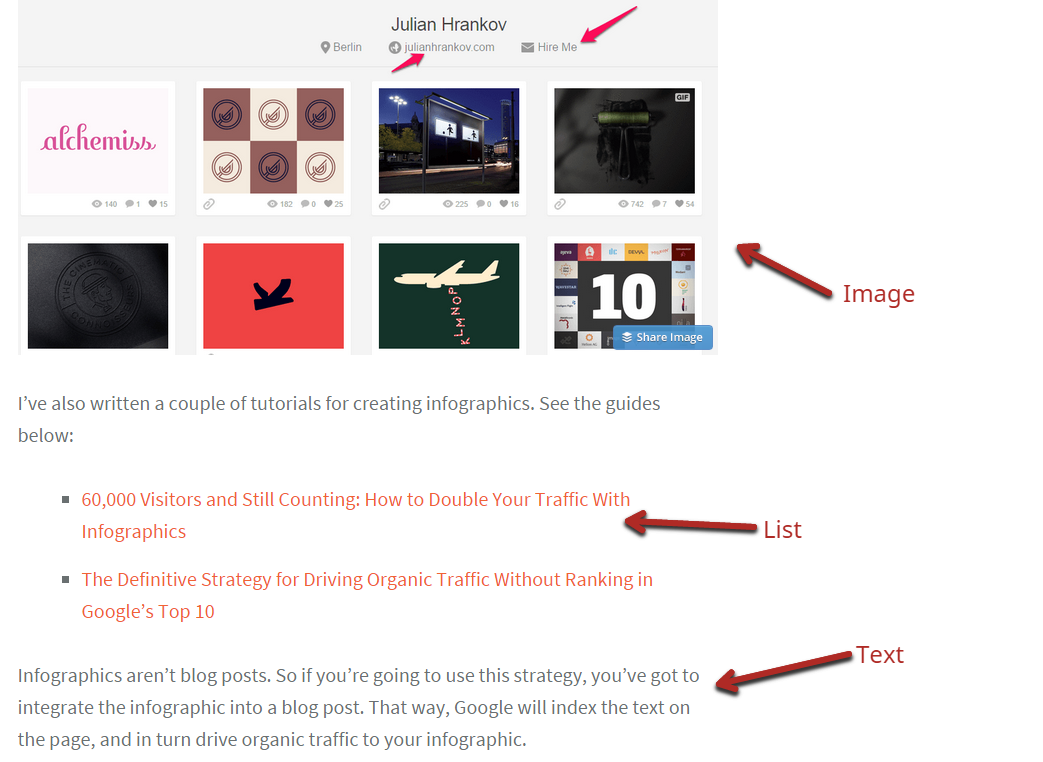
We’ve talked about a few of them, but by far the most important is to include non-text elements such as images, lists, and quotes.
Can you go overboard with this?
Of course. In most cases, you need plain text to get your main points across. The images and other non-text elements simply support those points.
One analysis concluded that the ideal ratio is at least one picture for every 350 words. I wouldn’t go below that.
It depends on the topic and your niche, but you probably wouldn’t want to go above one image for every 100 words in almost any case. So stick to somewhere in-between.
You can group lists, quotes, and anything else that breaks up the text for the reader in this ratio.
If your post in question meets this criteria, check this item off the list.
5. It’s better than anything else out there (by far)
I mentioned that there are a few principles of content marketing that can’t be ignored if you want to see great results.
One of them is that your content needs to add something to the giant piles of content already out there.
It needs to be better in at least one way, by a significant amount, than all the other most popular pieces of content on the topic you are writing about.
If possible, improve it in multiple areas. That makes it even more obvious that it is something special that should be paid attention to.
To check this, follow this 2-step process.
Step #1 – Research the competition: Before you started writing your post, you probably identified one or two main keyword phrases that describe what you’re writing about.
If not, do it now.
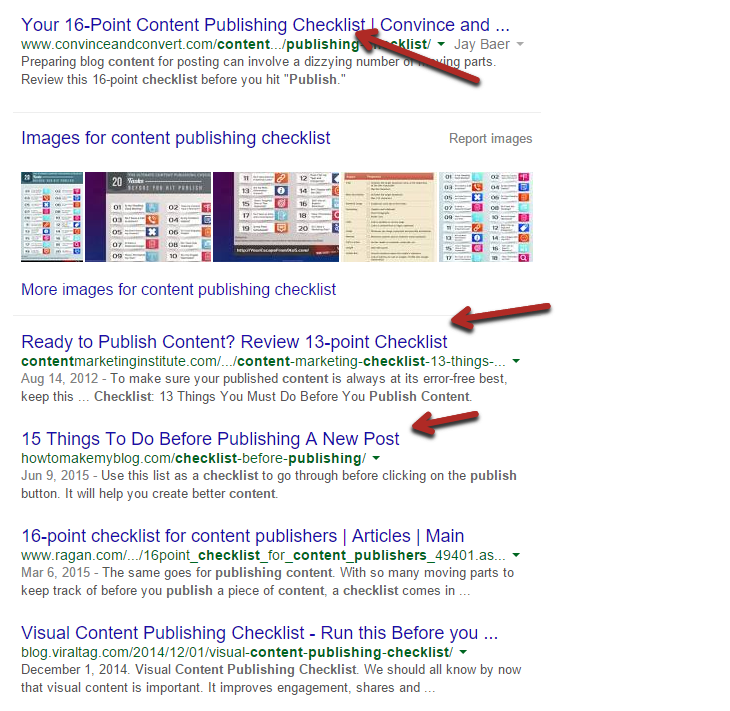
Search each of those phrases in Google, and take a look at the top 5-10 results:
Click on each to see what they are.
Make notes on the strengths and weaknesses of each. A great post will fix any weaknesses found in those posts and build on their strengths.
For example, my top result above was this post:
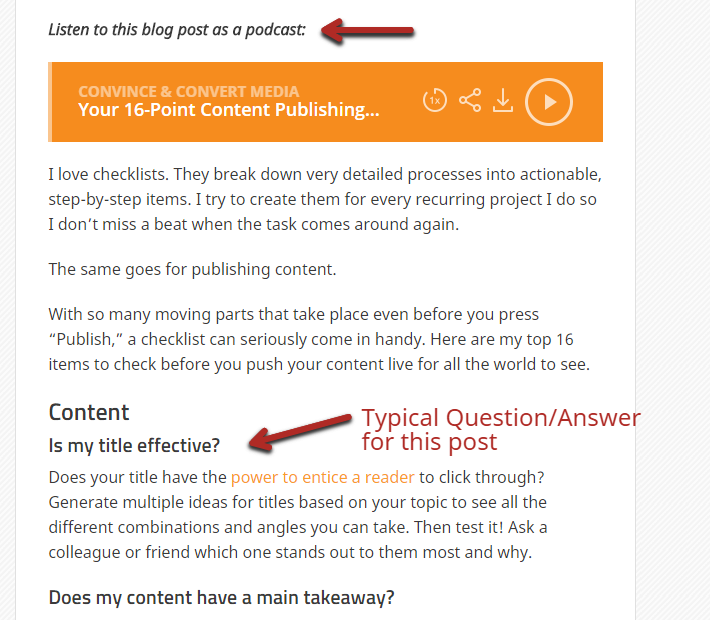
Right away, I notice that it has a link to a podcast, which breaks down the post. This is a strength and a very nice feature.
I’m not so sure that it’s a huge benefit for this particular post (lists are typically better in text), but it still gives the reader the option.
But what I see from the rest of the post is that it’s almost all text.
On top of that, all the explanations are very short, with few examples or suggestions on how to fix any weak parts of a post.
I’d categorize that as a weak part. I can improve the post by simply adding detailed examples as well as resources to help my readers.
Step #2 – Answer these four questions: Once you understand what the competition has to offer, simply compare your content to them.
Here are some good questions that you should be able to answer:
- Is your post clearer for the typical reader (more detailed)?
- Is your post formatted as well or better?
- Have you addressed all competitor’s weaknesses?
- Do you at least match all competitor’s strengths (or a high percentage of them)?
If you answered yes to all of these questions, you’re good to move on.
6. Take it seriously: preview before you publish
This is an expected element of good content.
Your content should show up correctly, no matter which device or browser you’re using.
It should also have proper spelling and grammar. Granted, a few mistakes here and there are expected, but overall, your writing should be error-free.
So, this step is very easy. Just complete the following check:
- Load your post on your phone and any other mobile devices you have. Does it show up as intended?
- Load the post in all major browsers (Chrome, Firefox, Internet Explorer, Safari). Does it show up as intended?
- Copy your post into a text editor (e.g., Google Docs, Microsoft Word, etc.). Use the spellcheck function to find any obvious errors.
- (Optional) Hire an editor to proofread your work.
Once everything checks out, you can move on to the next point.
7. Fluff has been eliminated
Fluff is the enemy of all good content.
It refers to those parts of the content that do not add any value.
Every sentence should either add new information or serve to clarify previously stated information.
If you ever want to see a perfect example of a non-fluff post, check out any of Seth Godin’s writing.
Here’s an example of one of his typical posts:
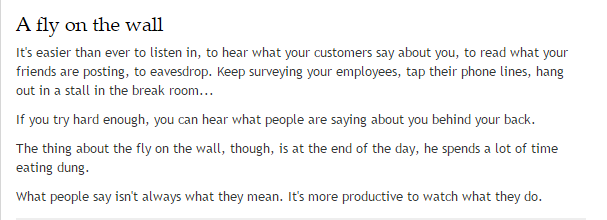
Yes, that’s the full post.
His brevity has to do with the types of things he writes about but also with his desire not to waste any words.
Most of us have some fluff in our posts, and that’s okay. Your goal is to eliminate as much fluff as possible.
A big help – the Hemingway App: If you’re new to cutting out fluff, it’s not necessarily easy. It takes time and practice to recognize what does and doesn’t add value.
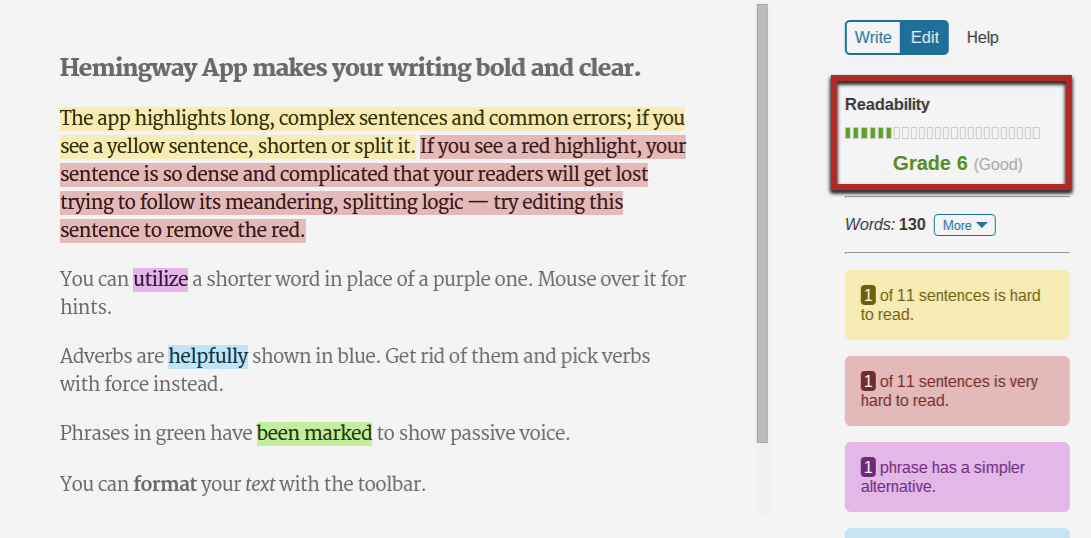
Luckily, there’s an awesome free tool called Hemingway App that will spot most “bad” instances of fluff.
It looks at common patterns of “fluffy” writing to identify poorly written and wordy sentences.
Let me show you an example.
I put a small part of one of my guides into the tool, and this is what I saw:
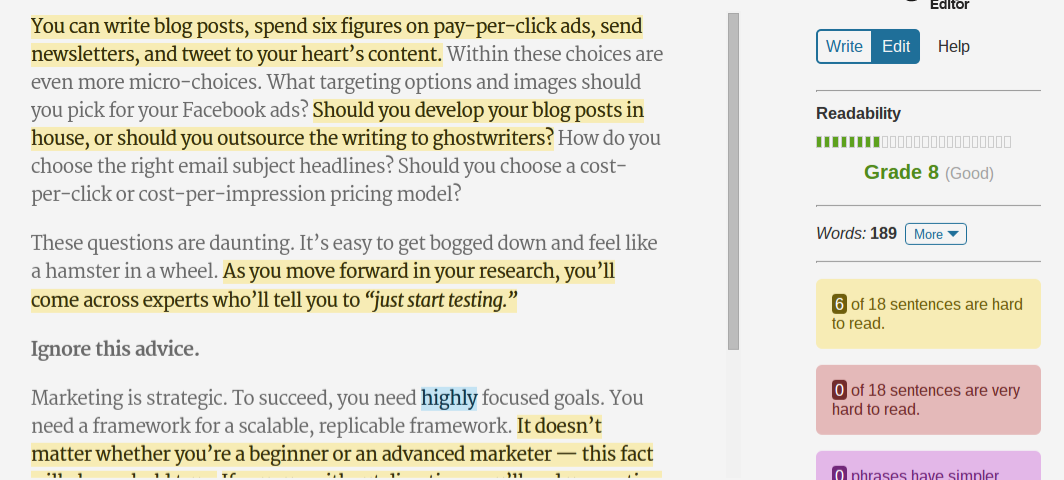
You can see that many sentences are a bit hard to read, and they could be written more concisely.
This is what it looked like when I fixed those errors:
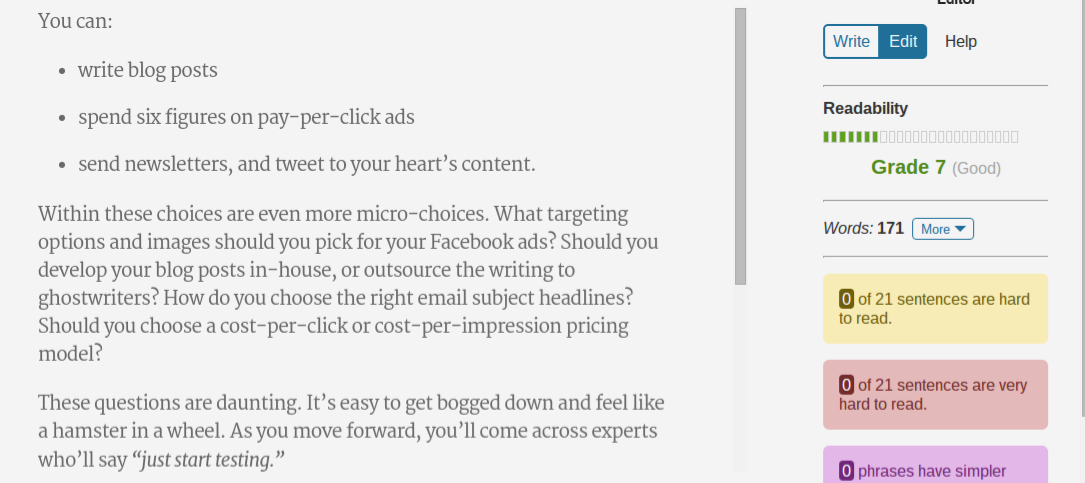
Right away, you can see that the readability level went down from grade 8 to 7. This means my content is now easier to read.
You can also see that the number of words went down from 189 to 171, which is about 90% of the original length.
In other terms, 10% of the original text was fluff. Apply that to a long post, and that’s hundreds of words you can do without.
Making those edits isn’t easy at first, but here’s a great resource on editing tactics to get you started.
If you’ve gone through your content and removed as much fluff as possible, check this off the list.
8. Great content flows…
Have you ever noticed that sometimes you just get sucked into an article?
You start reading, and before you know it, you’re at the end.
As the content creator, you should always aim to create this experience for your readers.
For that, your article needs to be cohesive.
It needs to flow from one section to another.
One mistake many content marketers make is trying to create a post that is as epic as possible and then including irrelevant (although interesting) parts.
If the reader has to stop reading and ask, “How does this fit with what I just read?”, you’ve ruined their immersion.
Here’s the basic way to check if your writing flows well.
Start by looking at all the subheadings of your article.
As an example, let’s use my Guide to Creating a Social Media Strategy.
The subheadings of the article are:
- Step 1: Dive inside your readers’ minds
- Step 2: Choose your most effective channels, and double down
- Step 3: Build a content bank of VALUE
- Step 4: Get followers or get ignored
- and so on…
The following is the test you can use for each pair of subheadings. Can you fill out this sentence?
I need to know [subheading 1 topic] in order to understand [subheading 2 topic].
And you go through each subheading like that, in pairs.
For example, do your readers need to know how to understand what’s in their readers’ minds (subheading 1) in order to understand how to pick their most effective channels (subheading 2)?
Yes, they do.
If they don’t understand their audience’s demographics and psychographics (from that first section), they might start on the wrong channel.
Next up, do they need to pick a channel in order to build a content bank?
Again, yes they do.
Each channel needs a different type of content.
Get it?
For your content, create a list of all your subheadings. Then, go through that process for each section.
If they all naturally flow from one to the next, you’re good to go.
9. Have you answered all of your readers’ questions?
Before you write a post, you should know which of your readers’ problems you’re trying to solve.
Then, you should brainstorm a list of questions they might have about it.
For example, if you were writing a post about installing a simple WordPress site for a small business, readers might have the following questions:
- How do I buy a domain name?
- Is WordPress the best option?
- What’s the simplest hosting option?
- What are the best themes for businesses?
- How do I optimize it for SEO?
You can also come up with this list after you write your post. You might uncover a few hidden questions while writing.
You don’t need to have a Q&A section in your content, but you should address all the questions somewhere.
It could be a section dedicated to it.
It could be a link to more information on a related topic (such as SEO optimization in our example).
Or it could be a brief explanation mixed into another section.
Go down your list, and once you’re sure that everything has been answered, check this item off the list.
10. Have you provided the best resources?
Unless you’re creating an ultimate, 10,000+word guide on a narrow topic, you can’t cover everything there is to know about that topic.
But you can link to additional resources.
You’ll notice that I link often in my posts whenever I mention something that I think a reader might be interested in.
For example, when I cite a research study or analysis, I link to the results.

If the reader wants more information about it, they can follow the link to get it. Considering only a small portion of readers will want to know more, a simple link is better than a detailed explanation in my article.
Another type of useful link is to related topics.
For example, if I’m writing about some aspect of SEO, I might be able to link to my posts (or someone else’s) about conversion rate optimization or content marketing:
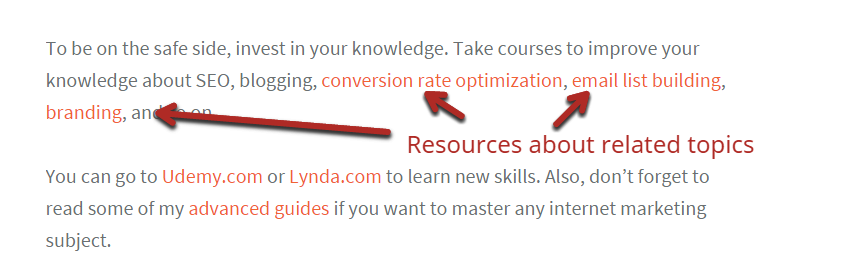
While not all readers will be interested in those related topics, a healthy portion will be.
The point here is to always give readers the resources to learn more about any particular part of your content.
Go through your content, and pretend like you’re a typical reader (as well as you can).
Read every sentence, and ask yourself if there is anything related to that sentence you might like to read more about. If there is, and you haven’t included that resource, add one.
Once you feel like you’ve provided a great user experience with links, check this off the list.
11. What should the reader get out of this? Is it clear?
I think that just about every piece of content should have a conclusion at the end (maybe not necessarily with that title).
You can look at any of my posts for an example.
In this final section, you should sum up the main things that a reader should have gotten from the post and suggest where they should go from here.
For example, at the end of this post on writing a good welcome email, the author tells the reader how to use the information in the article:
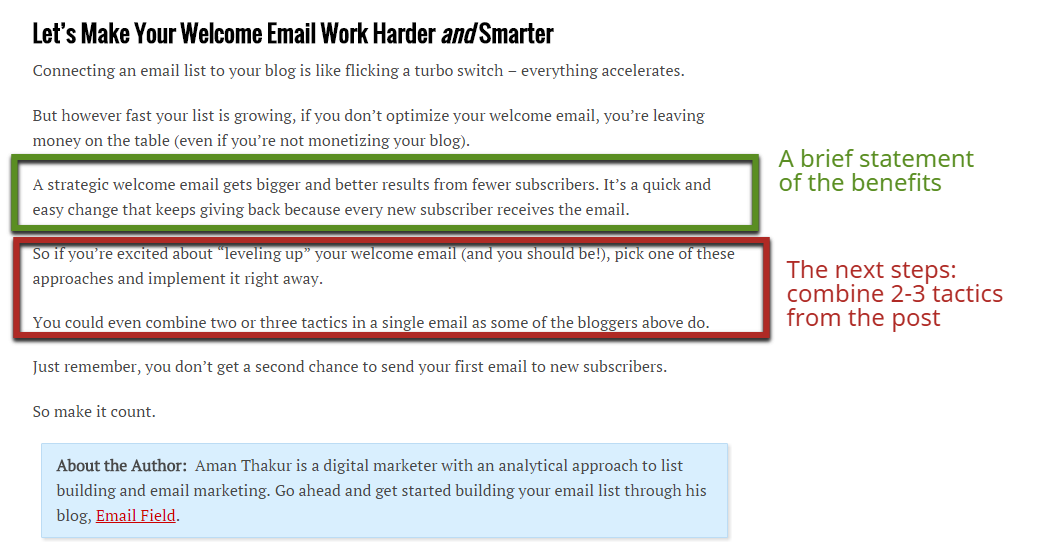
In this case, he tells the reader to start with just one tactic and then combine it with one or two more to get even better results.
I do the same in many of my conclusions.
If you feel that you’ve summed up your content well, check this final item off the list.
Conclusion
Creating great content isn’t easy.
Creating it every single time is even more difficult.
But if you take care to include all the key elements of great content every time you write, you’ll be consistent.
The 11 points I talked about in great detail here form the basis of a list of requirements that all your content should meet.
From here, make your own list, including as many of those 11 points as you’d like (maybe all of them). Then, if you think I missed any, add those to your list too.
Get in the habit of going through this list after creating each piece of content.


from Quick Sprout https://ift.tt/2Yzu5d4
via IFTTT
