Blogging is one of the most lucrative career options right now.
In fact, tons of people have made massive amounts of money from their blogs already. Neil Patel and Marie Forleo make roughly several million per year, Pat Flynn makes $2,171,652 per year, and Naved Moazzez easily makes about $300-500K per year.
Don’t even get me started on Dr. Axe, which has an insane 70 million visitors monthly, making his revenue about $50-$70 million every year.
Now, that’s definitely a MASSIVE sum of money.
Exactly why blogging is something that you should pursue.
The first step to making money with a blog is creating the blog itself. And when it comes to creating a blog, WordPress has everything you need. It’s remarkably affordable, packed with features, and customizable. In this article, I’ll walk you through exactly the steps you need to follow to set up a WordPress blog.
Ready?
What to Expect When Creating a WordPress Blog
Creating a WordPress blog is an equally exciting and daunting process, but when you have the right guidance, it’s mostly exciting.
All you need to do is carry out the following steps:
- Step 1 — Get a Web Hosting Service and Domain
- Step 2 — Install WordPress
- Step 3 — Work On Your WordPress Website and Start Blogging
Sounds easy, right? It is.
The Good
“Launching a blog is time-consuming and takes a lot of effort.” This statement was 100% true a decade ago, but now things are very different.
Today, you can set up your blog at nearly the same time it would take for you to enjoy a cup of coffee.
You need a hosting provider to install WordPress first. I’ve chosen Bluehost, but you can opt for any other provider that you think suits your needs and preferences better. The good news is that every provider has a simple signup process that hardly takes minutes.
You also have tons of WordPress themes to design your blog exactly how you want it. There are thousands of templates out there that are super cheap and look fantastic. Whether you want a royal theme or something more contemporary, you can pick from all kinds of themes that were designed to suit all kinds of tastes.
The option to install plugins is also another advantage.
For blogging, in particular, using Yoast SEO could be an excellent choice. The plugin gives you suggestions to optimize your content, helping you attract more organic traffic. Even WP Rocket is an excellent WordPress caching plugin that can seriously boost your loading times, reducing bounce rates.
Still, it’s the simplicity and convenience of setting up a WordPress blog that takes the cake. You can literally start your career AND earn money by making a few clicks.
The Bad
Starting a blog is easy. But it’s getting people to come to your blog that’s hard.
Growing and promoting their blog should be the top priority of all bloggers. However, since it’s tricky, not everyone is successful.
Implementing clever marketing strategies, such as email marketing and content marketing, can work wonders for generating traffic, but there are so many nuances to them, which, again, complicates things.
Being consistent and maintaining quality are other factors that contribute to the difficulty.
Your content has to be unique and valuable to interest your target audience. You’ll have to maintain a list of blog post ideas—something that will involve several brainstorming sessions—and also post articles consistently on your blog.
Plus, there are about a bazillion things that can hinder your consistency. Lack of ideas or inspiration, emergencies, technical faults, or just life getting in the way…one never knows.
Blogging can be a constant struggle, but it’s worth the effort.
If you successfully come up with fantastic blog ideas and blog consistently, you’ll soon have a loyal subscriber base, which, in turn, will open up plenty of fantastic opportunities for goodwill, satisfaction, and yes, lots of money.
Step 1 — Get a Web Hosting Service and Domain
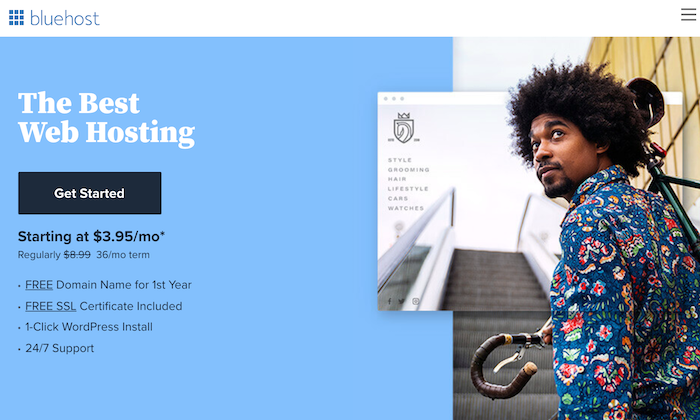
You need hosting and domain to make your blog accessible to other people around the world. The good news is you can get a domain for yourself without having to pay the extra money. I’ll tell you how: Choose the right web hosting provider.
As someone who has created several high-traffic websites and managed their blogs, I highly recommend Bluehost. It’s reliable, lets you install WordPress easily, offers faster loading times, and packs in a solid performance.
Bluehost tops my best web hosting services for WordPress list because it gives users a free domain on signing up, among other reasons, of course.
It’s practically a win-win situation for you.
Signing up for Bluehost
Head over to the Bluehost website. You’ll see three hosting plans: Basic, Plus, and Choice Plus.
I recommend the Basic plan for beginners as it offers you plenty of website space and has all the necessary features you would need for starting a blog. Plus, you get a free domain.
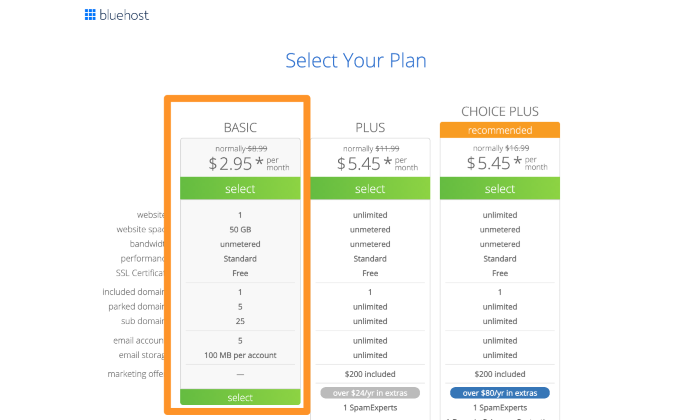
The plan also costs $2.95 per month only — provided you choose the three-year subscription plan.
Register Your Domain Name
Bluehost gives you the option to either create a new domain or continue with one you currently own.
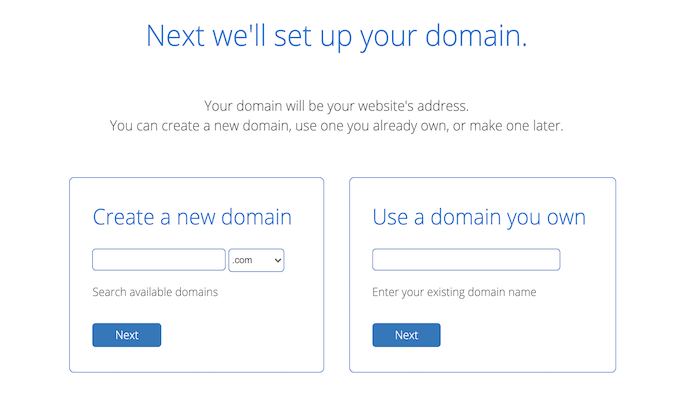
Wondering which domain name would work best for your site? Here are a few tips:
- Choose something short and easy to spell
- Make sure it’s memorable and unique
- Try to include niche-related words for more authority
- Check the availability of your prospective names
That said, there is no need to put yourself under too much pressure. If you aren’t feeling inspired, you can always skip this step and choose a domain name later.
Take all the time you need. Your domain name is your identity on the internet, so you have to get it right.
Finalize Your Account Details
After registering your domain, you have to finalize your account details and make the payment.
Fill in your personal information. When you reach the Package Extras section, check off only those items that you need. Domain Security + Protection and SiteLock Security – Essential, for example, keep your personal information private and prevent any compromise of critical data. You can select what you like—it’s totally up to you.
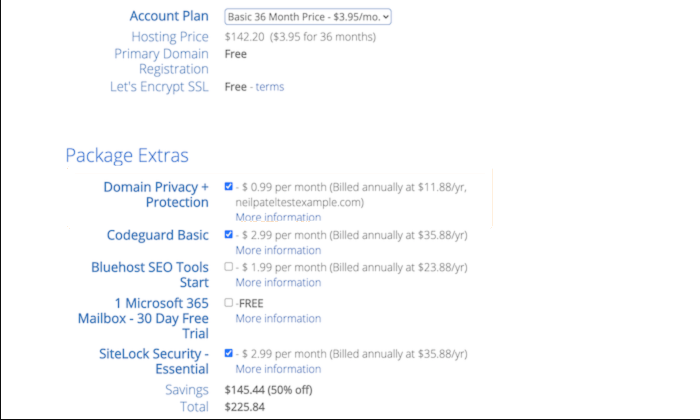
Finally, make the payment to finalize your Bluehost account.
Congrats! You now have a domain and web hosting provider to launch your WordPress blog.
Step 2 — Install WordPress
Unsurprisingly, you need the WordPress software before you can create a WordPress blog. And the installation is just as easy as setting up a Bluehost account.
Call the Bluehost Wizard At Your Service
After making the payment, you’ll receive a confirmation mail from Bluehost. This will hold all the details on how you can log in to the Bluehost Customer Area.
Click on it to log in to Bluehost.
After logging in, Bluehost will give you a simple wizard that will guide you through the process of installing WordPress on your new website. Just follow the prompts, and you’ll have WordPress all set up.
Don’t see the setup wizard? No need to panic.
Go to My Sites from the side menu bar, and click on the Create Site button. This will launch the wizard.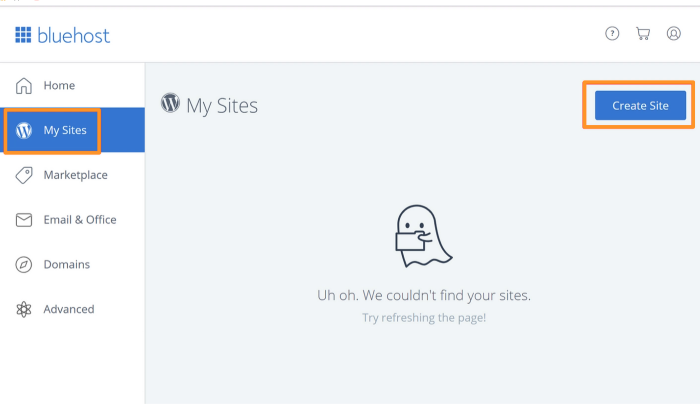
Fill in Your WordPress Blog Details
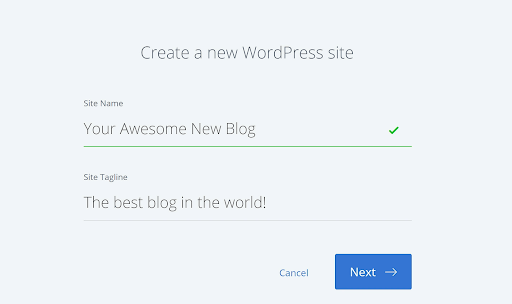
Next, fill in your website details like Site Name and Site Tagline.
You’ll be able to access your new WordPress blog dashboard once the installation is complete. Use this address to go directly to your dashboard: yourdomain.com/wp-admin.
Step 3 — Work On Your WordPress Website and Start Blogging
Your WordPress blog should reflect your brand. Make it look pretty and professional, extend its functionalities, and experiment around a bit before publishing your first piece of content.
This step is slightly more comprehensive, but considering how important it is to make a good first impression on your visitors, all your efforts will be worth it in the end.
Choosing a WordPress Theme
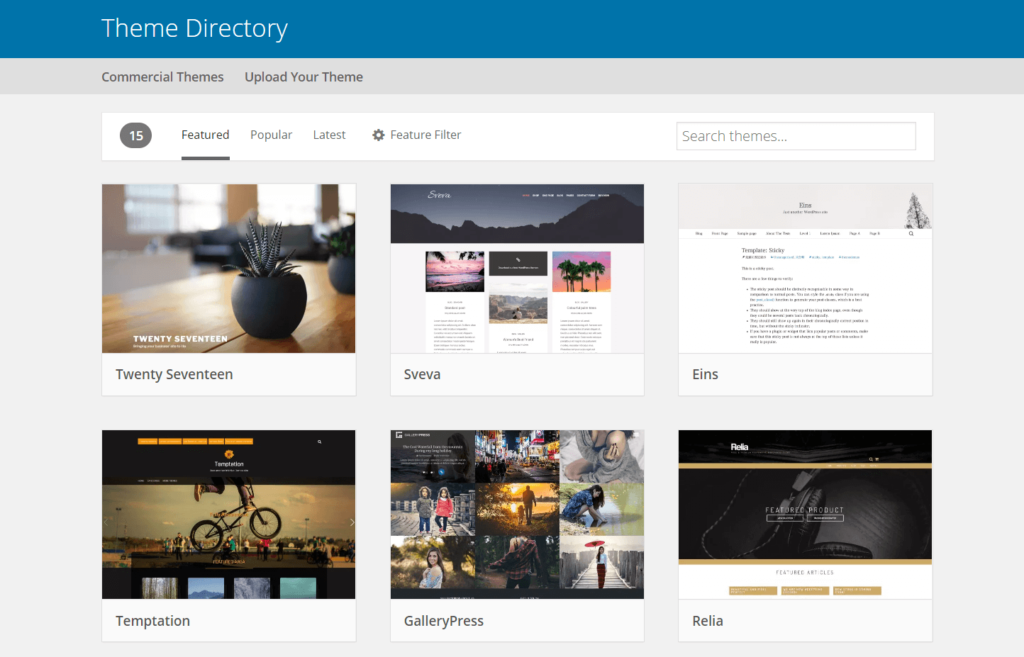
WordPress themes are like clothes for your website. When you pick a theme, you also finalize how your blog will look.
Just like expensive clothes, there are premium themes. But as there are some pretty fantastic free themes available, I highly recommend trying those out first.
Go to Appearance on the side menu, and click on the Add New button. Tons of themes will crop up on your screen. Take your time and choose one that you think fits your brand, and of course, your blog niche perfectly.
The even better news? You can change your theme whenever you want with a few clicks, so don’t stress yourself out too much trying to pick the perfect one.
If you’re willing to spend some money, you can check out ThemeForest. They have an excellent collection of premium themes.
Install WordPress Plugins
WordPress plugins are small programs designed to extend your website’s capabilities, and just like WordPress themes, you have free and premium plugins.
Each plugin is created for a specific function, which allows you to customize your website however you want. For instance, you can have a plugin for optimizing your website, another for backing up your files, and a third for boosting site speed, but more on that later.
Here’s how you can install a plugin:
Select Plugins in the left-hand corner of your side, followed by Add New. You’ll see a list of featured plugins by default, but you can change the setting to see the most popular.
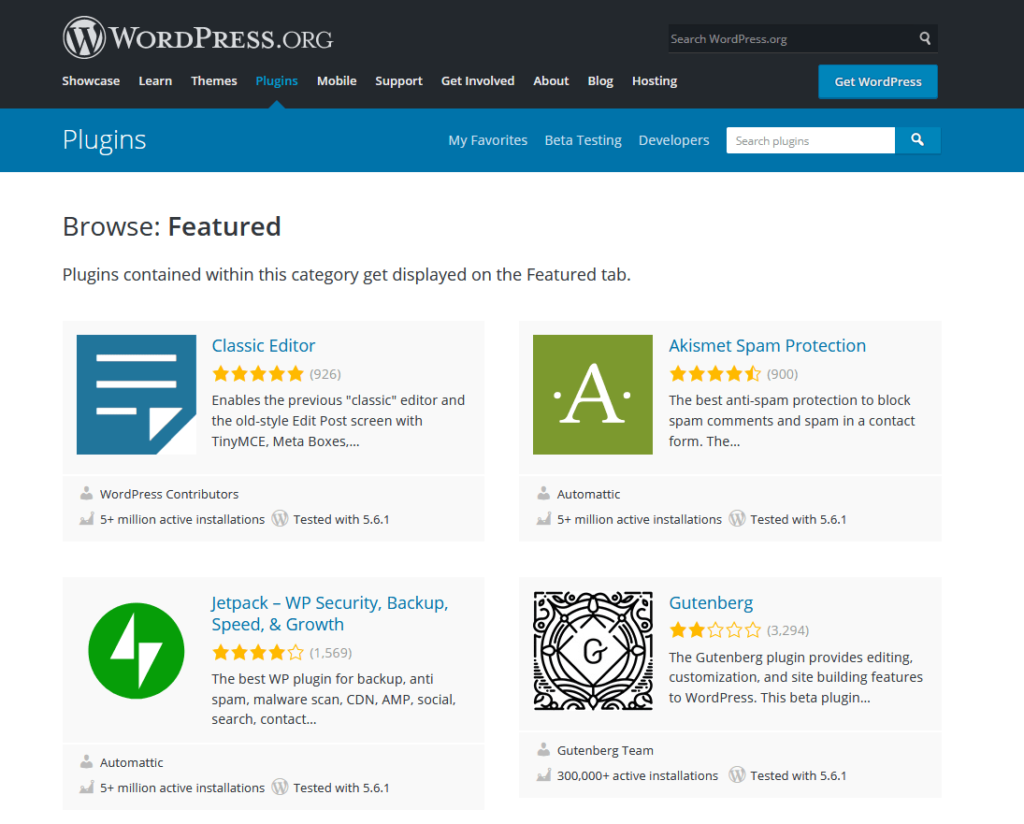
This will give you a better idea about the kind of plugins that people around the world find helpful.
My top picks are Yoast SEO, Monster Insights, WP Rocket, and Wordfence Security. You can also check my comprehensive guide of the best WordPress plugins to decide the best ones for your site.
That said, don’t go too overboard when installing plugins. Too many may slow down your loading speed or create tech glitches.
Experiment and Customize Your Site
You can do so much to your WordPress blog to make it on-brand. Whether it’s trying out different colors and designs, adding a logo, the options are truly endless.
Also, you can refer to other websites to get some design inspiration—just avoid stealing or copying anything blatantly.
Publish Your First Blog Post
At this stage, you’re done with every technical part of the blog. Now you can focus entirely on why you wanted a website in the first place—blogging!
To post a blog, go to your blog’s WordPress dashboard. Click on Posts and then Add New. This will launch the WordPress editor, where you can write your blog posts.
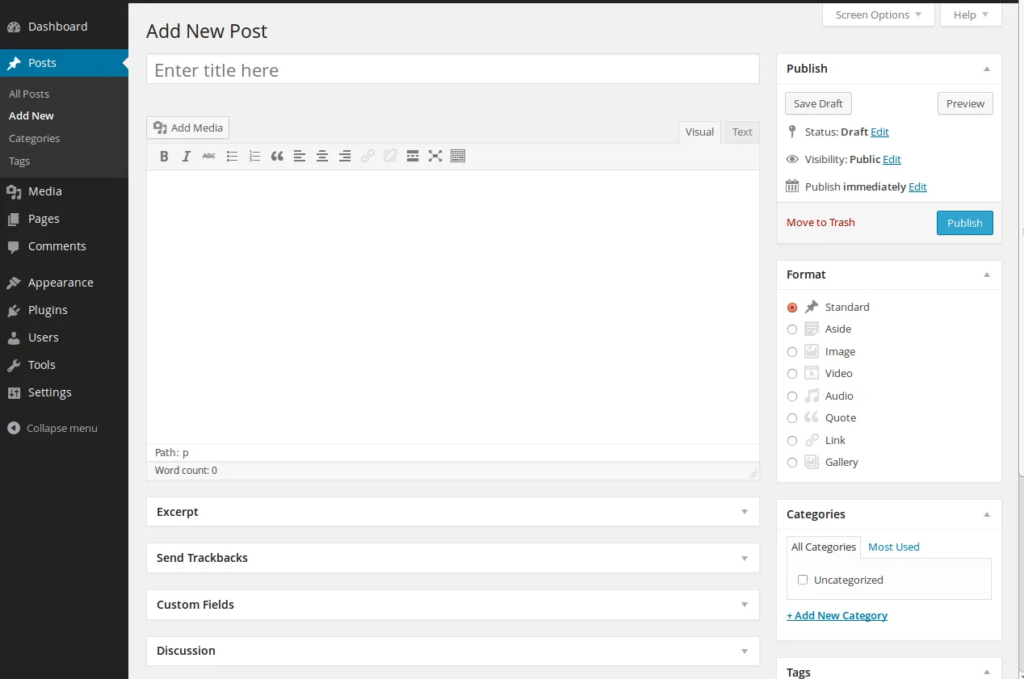
And that’s it! You can then hit the publish button after writing your first blog post.
Here are a few guidelines that have worked for me in the past for creating content that boosts engagement:
- Prioritize creating value. Think about the kind of content your target audience would like to see. It could be something informative and practical, something funny, or something entertaining.
- Think (and write) passionately. Your visitors know when you write about topics you’re genuinely enthusiastic about and when you aren’t. It’s exactly why you should choose a blogging niche that won’t tire or bore you so easily. In turn, you’ll always be able to produce excellent and value-filled content.
- Focus on useful topics. Write a blog about content that piques your target audience’s interest. You can write answers to common questions, give practical tips, or simply something inspiring. If you have vast experience or a unique journey, you can share your biggest challenges and how you overcame them.
- Don’t forget the eye candy. Visual assets are a must as nobody likes to see large chunks of text-only content. It is boring, after all. So make sure you add plenty of clear and high-quality images and videos to support your text.
- Leave no room for errors. People value an expert’s advice, but it can be very difficult to establish your authority if your blogs are filled with silly grammatical mistakes.
My tip? Proofread your post out loud. This will help you find common mistakes and change sentences that sound post or unnatural.


from Quick Sprout https://ift.tt/3smK4tn
via IFTTT
