Want to just get started? Click here to sign up for Hostinger and get WooCommerce hosting for your ecommerce website today.
Online shopping is standard and common for most product categories.
Getting into the ecommerce industry now is your chance to win a share of the growing profits. The sooner you start, the sooner you can establish your brand and get the word out.
Every successful online business starts and ends with a great website. If you haven’t made one before, don’t let that stop you. After all, your first sale isn’t going to happen by itself.
With the tools available on the market today, building your ecommerce website is easier and more intuitive than ever.
Read on to learn how to create an ecommerce website with two of the best tools on the market today–Hostinger + WordPress.
Top Rated Ecommerce Website Builders to Create an Ecommerce Website
If you want to create an ecommerce website, you’ll need an ecommerce website builder. Here are the top options:
- Wix eCommerce — Best for getting a store up in minutes
- Zyro — Best ecommerce site builder for beginners
- BigCommerce — Best site builder for multichannel selling
- Squarespace — Highest quality website templates
- Square Online — Best integration with brick-and-mortar
- Shopify — Most customizable ecommerce site builder
- Weebly — Most affordable for small businesses
- Shift4Shop — Best enterprise-level builder at rock bottom prices
You can read full reviews of each ecommerce website builder here.
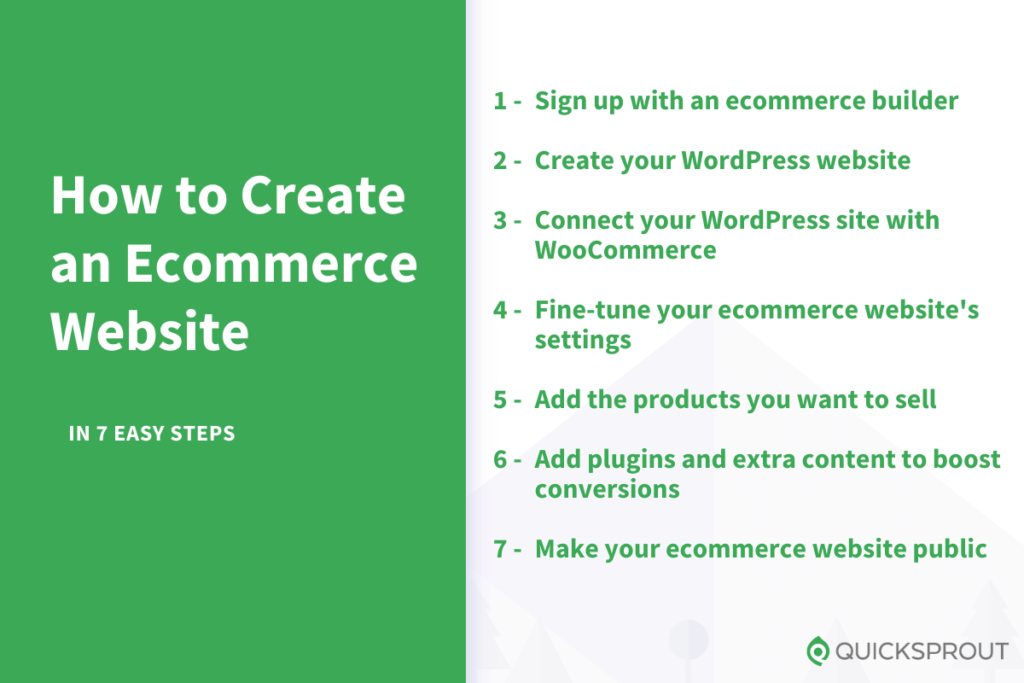
7 Steps to Create an Ecommerce Website
Creating an ecommerce website is easy. Just follow the step-by-step instructions below:
- Sign up with an ecommerce builder
- Create your WordPress website
- Connect your WordPress site with WooCommerce
- Fine-tune your ecommerce website’s settings
- Add the products you want to sell
- Add plugins and extra content to boost conversions
- Make your ecommerce website public
The Easy Parts of Creating an Ecommerce Website
2022 is the best time to enter the ecommerce landscape.
People have made online shopping their newest hobby and relish the convenience of shopping from home.
This means you already have an extensive customer base waiting to buy your stuff. You can even sell internationally by partnering with courier companies. No geographical barriers whatsoever!
All you need to focus on is making an easily navigable and optimized ecommerce website, selling high-quality products, and offering excellent customer service, and you’ll be laughing your way to the bank!
Making an ecommerce website is easier than ever, too, thanks to tons of excellent website builders like WordPress, Wix, and Squarespace. These tools take over all the hard parts for you. You can get started as soon as you create an account and purchase a plan.
What’s more, the services are affordable and super fast. You can have a site running within 2-3 hours max at just $3.99 per month by using WordPress + Hostinger.
It only takes a few clicks to get Hostinger web hosting up and running, install WordPress, and add the WooCommerce plugin. This allows you to create an online store without having to know HTML, CSS, or web design.
Another benefit of running an online business is the flexibility to scale and grow. For instance, if you’re running paid ads, you can easily adjust this based on your target audience’s behavior.
The availability of hundreds of unique themes and plugins can help you build the website of your dreams. You have full control over how your website looks, how it works, and what goes on it. You’re the boss!
The Hard Parts of Creating an Ecommerce Website
Everything depends on how good your website is.
If your website isn’t optimized for mobile phones, takes too long to load, or has lower quality product images, you’ll lose business—lots of it. Users should also be able to navigate to product pages in just one or two clicks.
Then there’s the issue of the lack of trust among visitors.
You have to show your visitors third-party proof that your website is secure by either getting an SSL certificate or adding security authentication and trust marks. Customers won’t want to give you their credit card information if they aren’t confident they are on a secure website.
Payment processing and shipping are other common ecommerce challenges.
Customers tend to favor specific payment methods. If your website doesn’t offer that particular payment method, they might end up abandoning your site. For instance, if you only support payments via PayPal or Stripe and your customer wants to pay via credit card, they may not buy your product or service.
Shipping is an area where ecommerce sellers have the least control. You have to work through third parties, which creates a lot of room for error. Although rare, your product may arrive damaged, which won’t reflect well on your brand.
Step 1: Sign Up With an Ecommerce Builder
Before you can have an ecommerce website, you’ll need an ecommerce account.
This is a crucial step, where you make tons of important decisions. You have to choose a reliable website builder, decide on a domain name, and create your account.
A common mistake that many ecommerce sellers make is rushing through these seemingly insignificant decisions. Don’t be one of them.
Take your time, weigh the pros and cons, and then make the final payment.
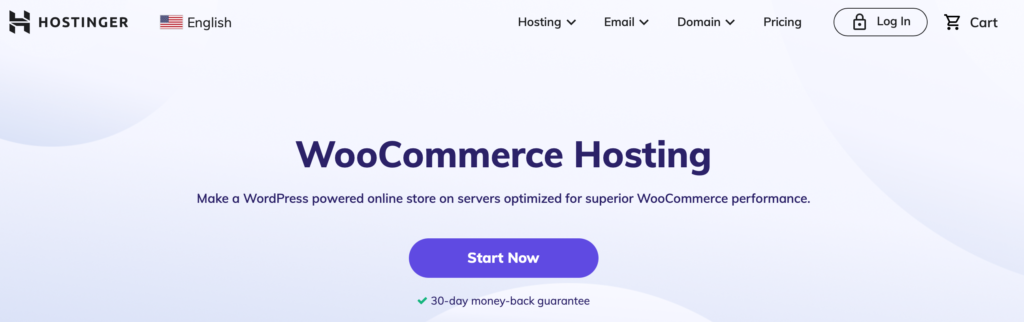
I highly recommend using WooCommerce hosting from Hostinger. WooCommerce is a WordPress plugin that allows you to create an online store.
It’s a tad more expensive than their WordPress hosting, but it comes with everything you need to build an online store.
It’s fully customizable, secure, gives you a free SSL certificate and domain name, AND gives you access to excellent WooCommerce tools to help you build, promote, and start selling from a secure online store!
Let’s jump in.
Head Over to Hostingers Website
First, you need an account with Hostinger. You’ll set up your WordPress account during the signup process for Hostinger’s WooCommerce hosting page.
Tip: Follow the link above. You can go to Hostinger’s homepage, but I haven’t always seen the WooCommerce hosting option available in the drop down.
Once you’re there, you’ll see the different pricing plans they have available.
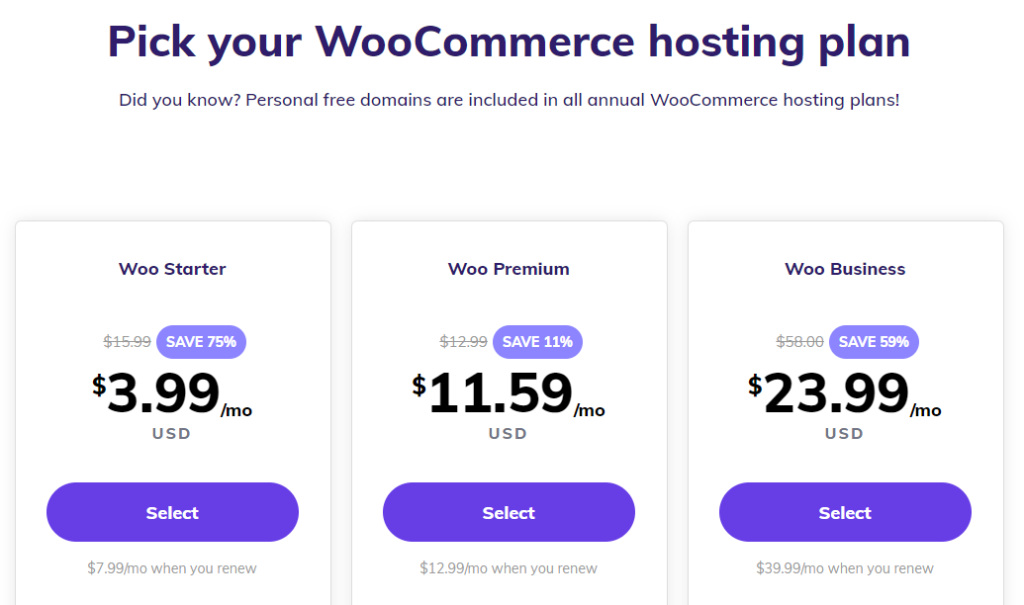
Each plan comes with a different amount of hosting resources (like storage, RAM, and bandwidth) as well as tools to help you build your online store. You’ll find a complete list of everything that comes with each plan on the site.
Maximize Your Discount
Once you have selected a plan, you’ll be asked to select how long you want to sign up for.
Your options are paying month-to-month, or agreeing to a 1-year, 2-year, or 4-year commitment.
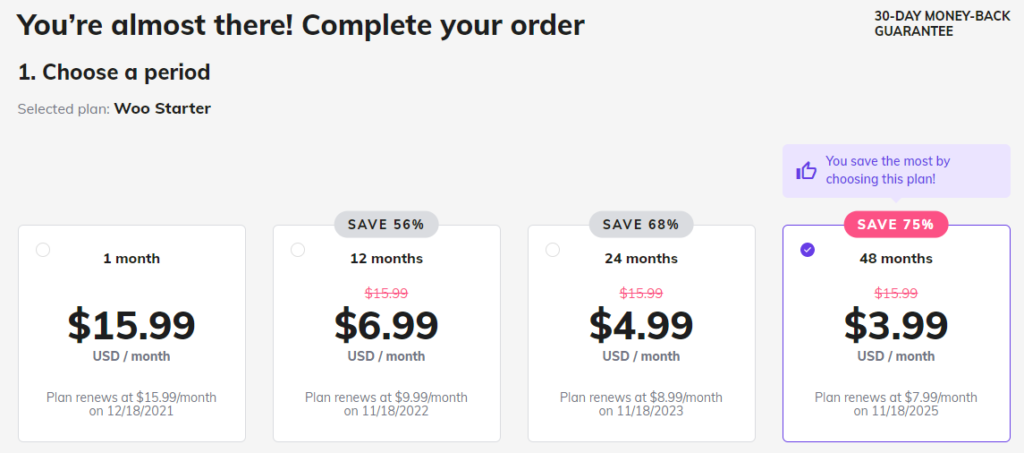
The longer you sign up for, the greater your discount and lower your eventual renewal price. Renewing a 1-year plan costs $9.99, whereas a 4-year term renews at $7.99.
I recommend signing up for as long as possible. Yes, you have to pay upfront, but the savings are significant over time. Lock in the low promotional rate for as long as you can.
Once you’ve input your billing terms, complete the signup process. All you need to do is enter an email to create your Hostinger account and fill out the payment information.
You’ll receive an email confirmation with further instructions shortly after you submit your payment.
Step 2: Create Your WordPress Website
Follow the links in the confirmation email to verify your email address and log into your new Hostinger account.
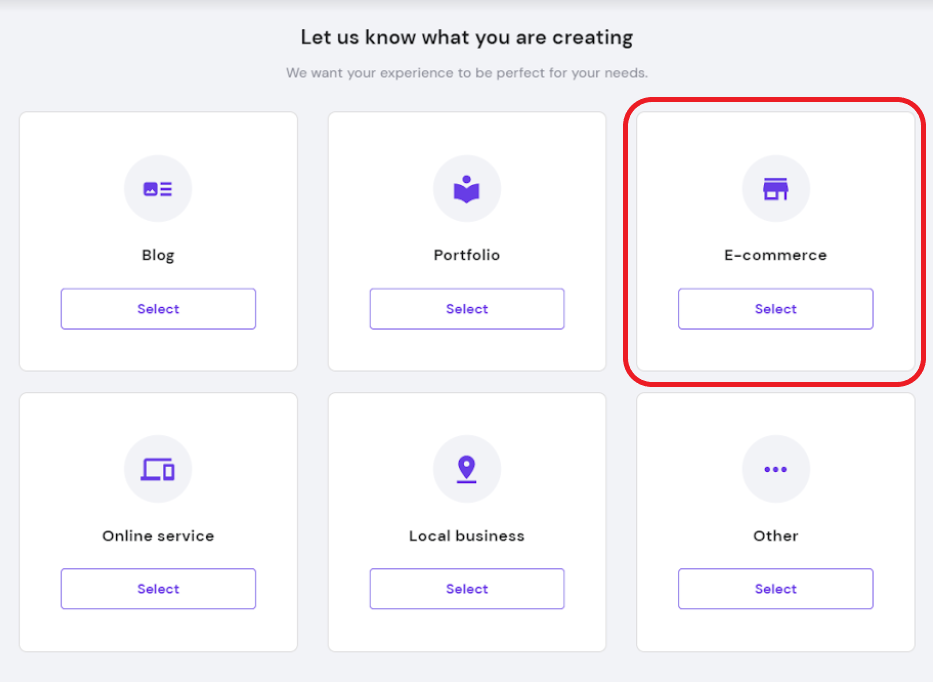
It’s going to ask you what type of site you want to create. Select “E-commerce”:
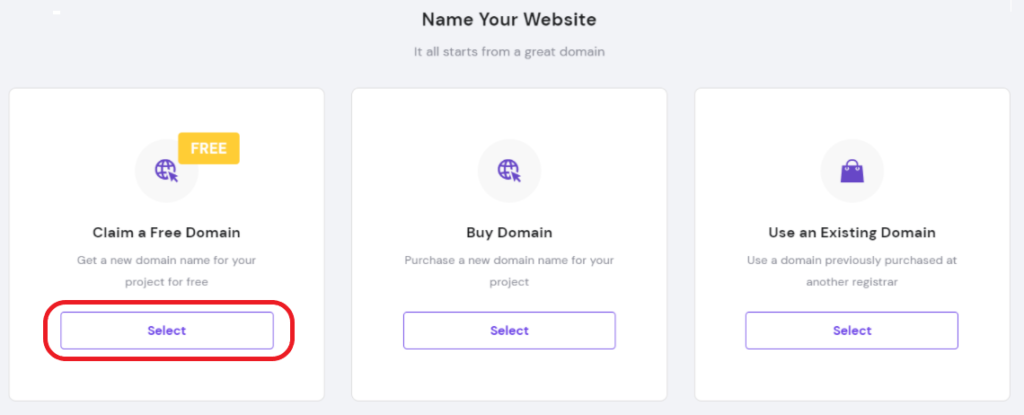
You’ll then be prompted to claim your free domain name that comes with all Hostinger WooCommerce packages.
Enter the domain name you want into the Domain Checker tool. It will let you know if it’s available, or if you have to choose something else.
Get inventive with your domain name ideas. Brainstorm words and phrases that make sense with your online store.
I recommend .com domain extensions, but you may have more luck with a different one, like .net, or .biz.
For ecommerce, some of the newer domain extensions can also work very well, such as:
- .store
- .gift
- .supply
- .shop
Hostinger will automatically display other options and domain extensions if the one you want is not available:
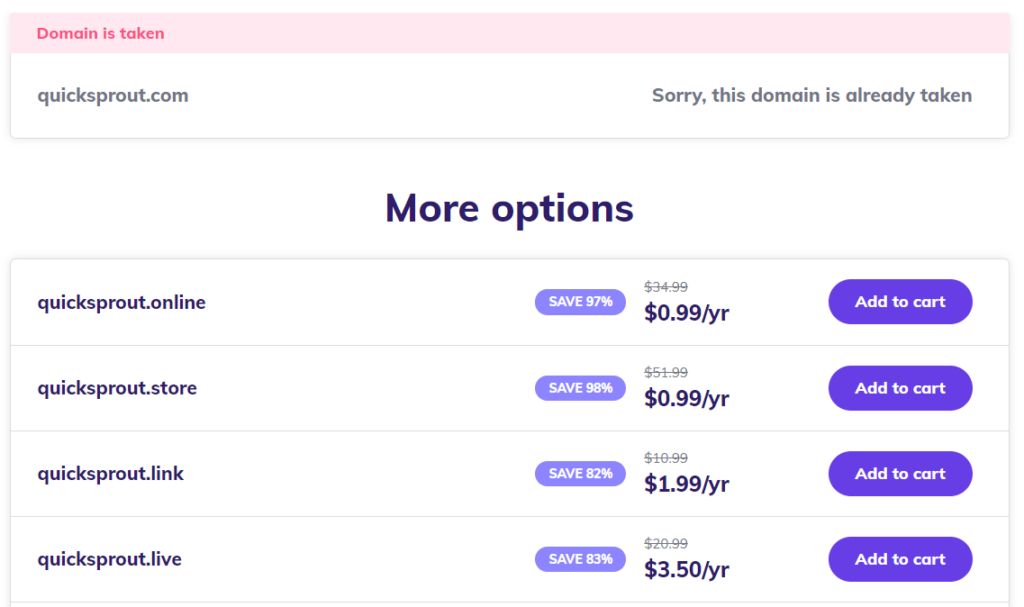
Even though you aren’t paying for your domain name now, you will have to renew it next year. This isn’t a Hostinger thing, this is just the way domains work.
What’s important now is taking a close look at the renewal pricing. In the image above, each domain costs less than $5, but some of them renew for more than $50.
Install WordPress + WooCommerce
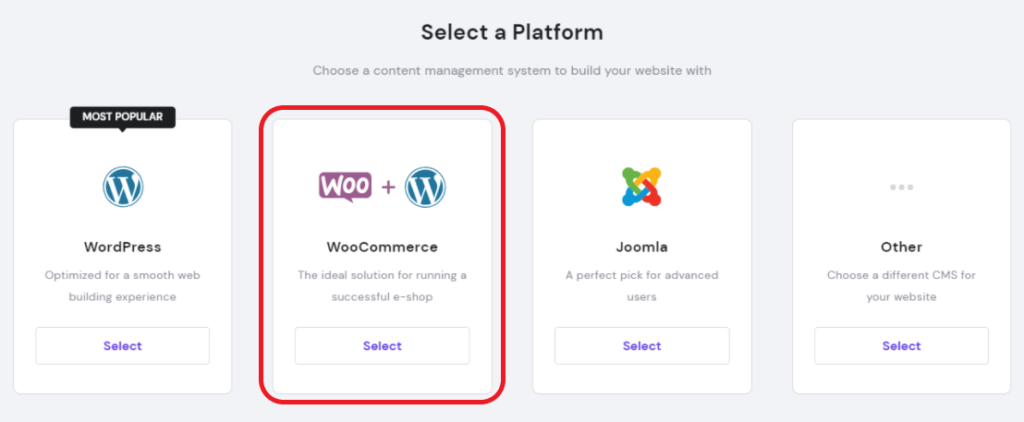
After you have selected a domain, Hostinger will prompt you to install a content management system (CMS). This is the system you will use to publish and maintain content online.
Select “WooCommerce,” which as you can see from the two logos, is actually the WordPress platform and the WooCommerce plugin.
You’ll be prompted to create a WordPress account. Write your username and password down, because you’ll need them again shortly.
After that, you can choose from any of the free WooCommerce themes. These themes determine the basic layout of your online store, but of course, you can customize them to fit your brand.
Over time, you’ll work with different themes to find out what you like. You might even spend money on a paid theme down the line.
For now, you can choose a free theme that looks good, or just skip this step and finish setting up your website. You can pick a new theme at any time.
At the bottom of the page, you’ll be able to review all the details. Double-check everything. Make sure the domain name is spelled right and the email account is correct.
Once you’re sure, click “Finish Setup,” and Hostinger will start building your site.
In my experience, it really did take less than 3 minutes for Hostinger to get everything pushed online.
Step 3: Connect Your WordPress Site With WooCommerce
Once your account is ready to go, Hostinger takes you to a new screen that helps you finishing setting up your site. You’ll find walkthroughs for activating your SSL certificate, launching WordPress, and installing WooCommerce.
I’ll cover the key points here, but you can always check out this in-depth tutorial on WooCommerce setup from Hostinger that walks you through each step of getting your store online.
You should be able to log right into your WordPress account with the credentials you created in the last step.
Install WooCommerce Plugin
Once you are in the WordPress dashboard, you will need to install WooCommerce. Here’s some guidance about how to install WordPress plugins if you’ve never done it before.
Follow the prompts once WooCommerce is installed. The setup could not be easier.
WooCommerce is one of the most popular plugins for transforming a basic WordPress website into a full-fledged ecommerce store—and not without reason.
It’s free, user-friendly, and is an open-source platform. From product pages to implementing payment gateways to automated tax calculations, WooCommerce is a true lifesaver for ecommerce sellers.
Let’s walk through getting the nuts and bolts of your new online store set up.
Add Your Basic Information
Here, you’ll find yourself entering all kinds of information related to your store, industry, product type, and business.
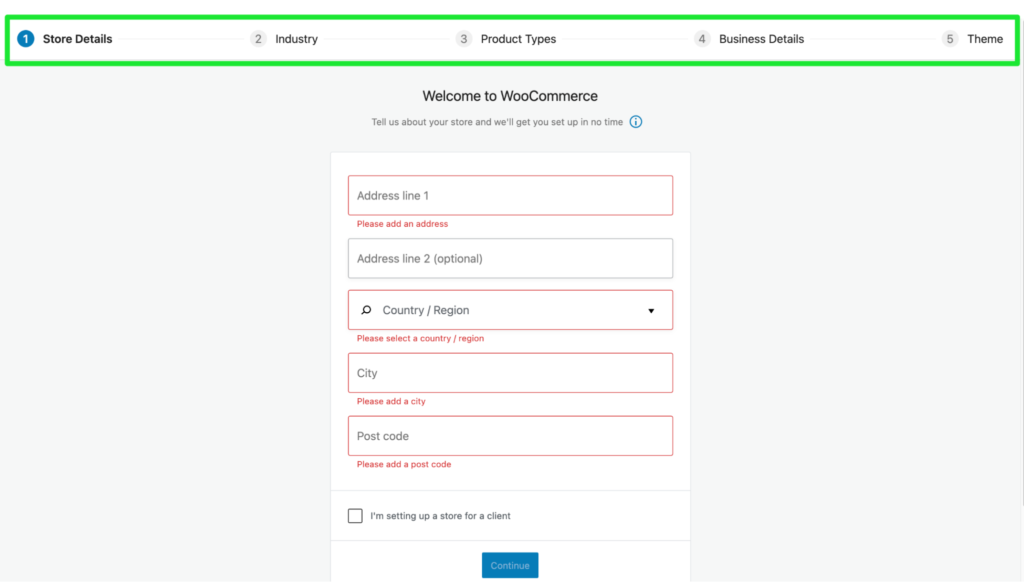
From your address to the industry to the kind of product you want to list on your side, you’ll have to answer them all.
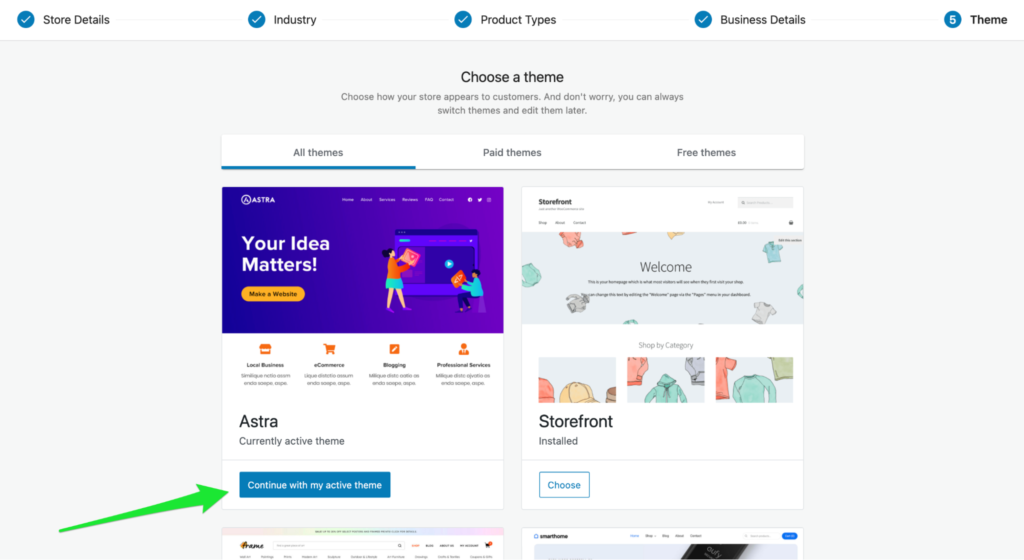
Choose Your Ecommerce Website Theme
At this point, you can either continue using the theme you chose in Step 2, or you can change your mind and proceed with another one.
I want to continue with Astra, so I’ll click on Continue with my active theme.
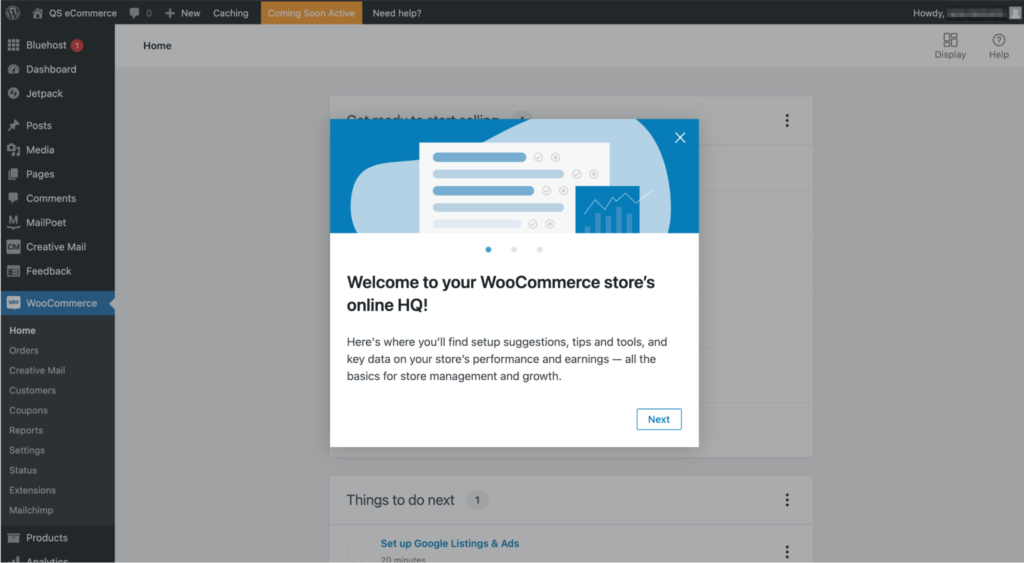
And that’s it! You’ll now see a popup welcoming you to your WooCommerce store’s online HQ.
Step 4: Fine-Tune Your Ecommerce Website’s Settings
This step focuses on setting up the must-have elements of an ecommerce website, including payment gateways, shipping options, and automatic tax calculations.
Now, this may sound intimidating, but it really isn’t. You only need the right guidance, which is exactly what this guide provides.
Set Up Payment Options
Click on Set up payments under the Get ready to start selling section of your WooCommerce dashboard.

Select the payment options you want to accept through your store: Stripe, Razorpay, PayU, or direct bank transfer.
The setup process is very straightforward, and you’ll have to connect your respective accounts with your website after clicking Set up. Remember, Stripe will allow you to take credit card payments.
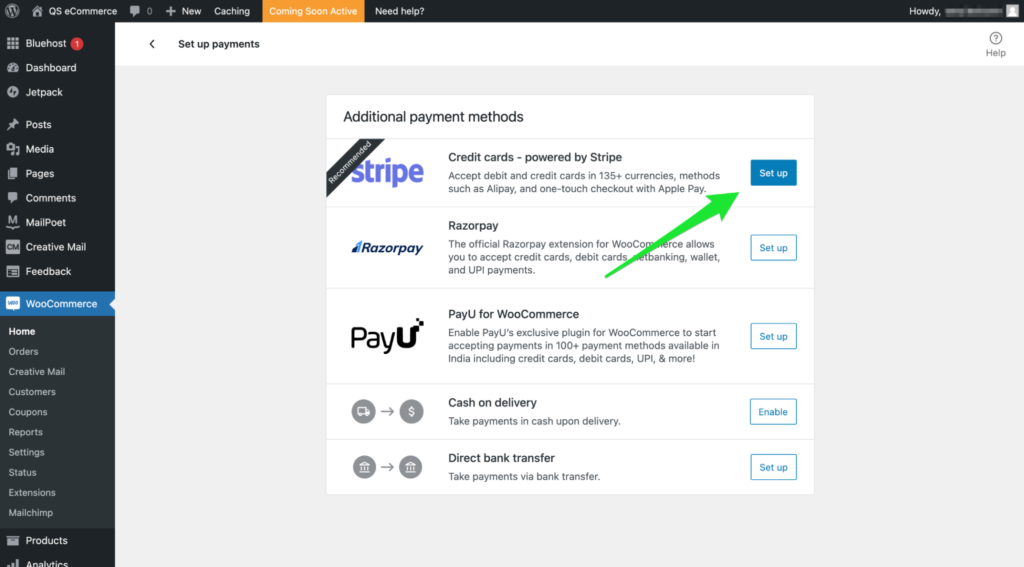
You can also enable cash on delivery, but make sure you have the logistics in place. PayPal is another option.
Configure Your Tax Rates
Clicking on Set up tax from the WooCommerce dashboard lets you configure your tax rates payable by your customers. Click Configure.
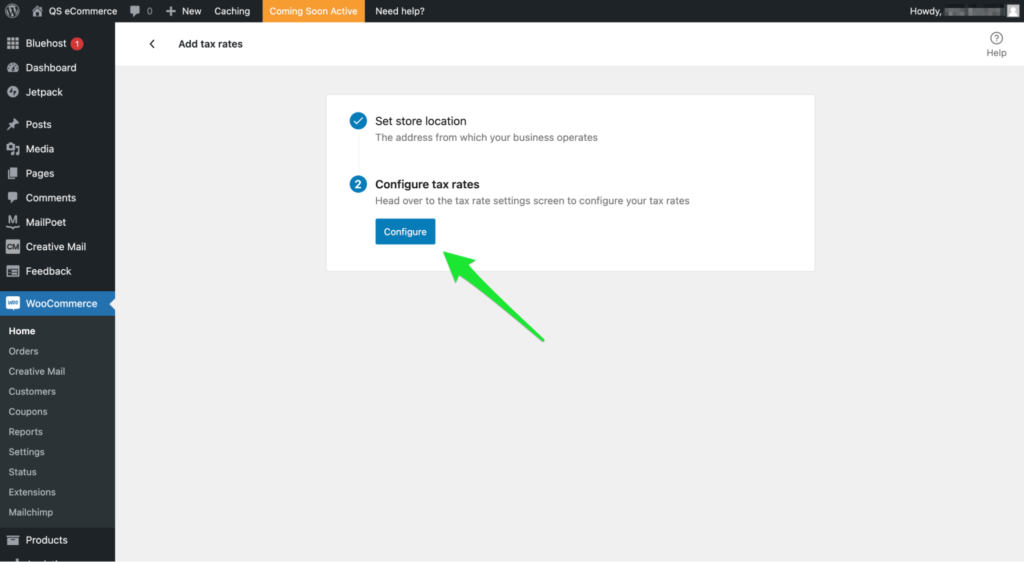
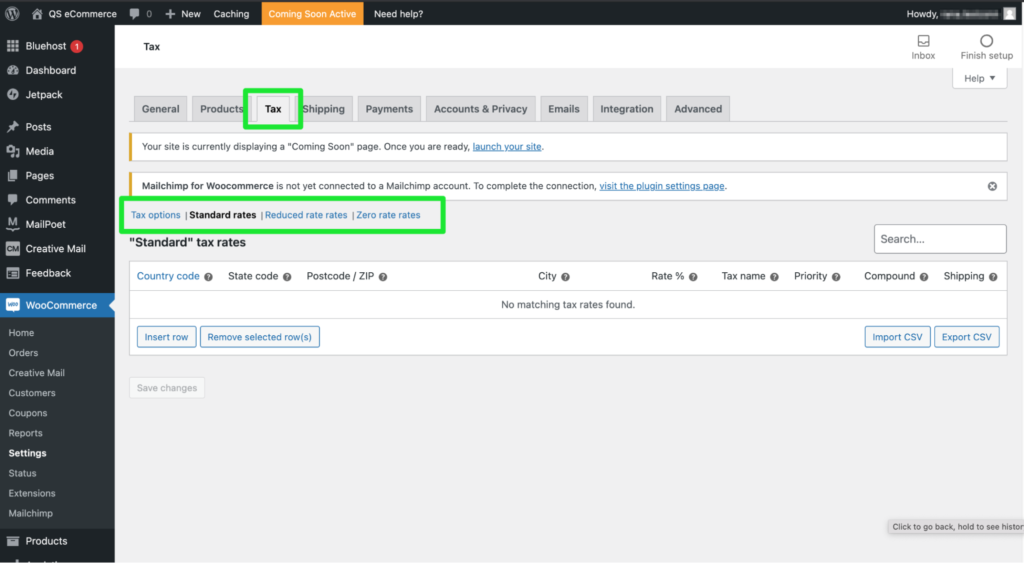
You’ll then be directed to the Tax tab, where you can configure your standard tax rates, among other tax options.
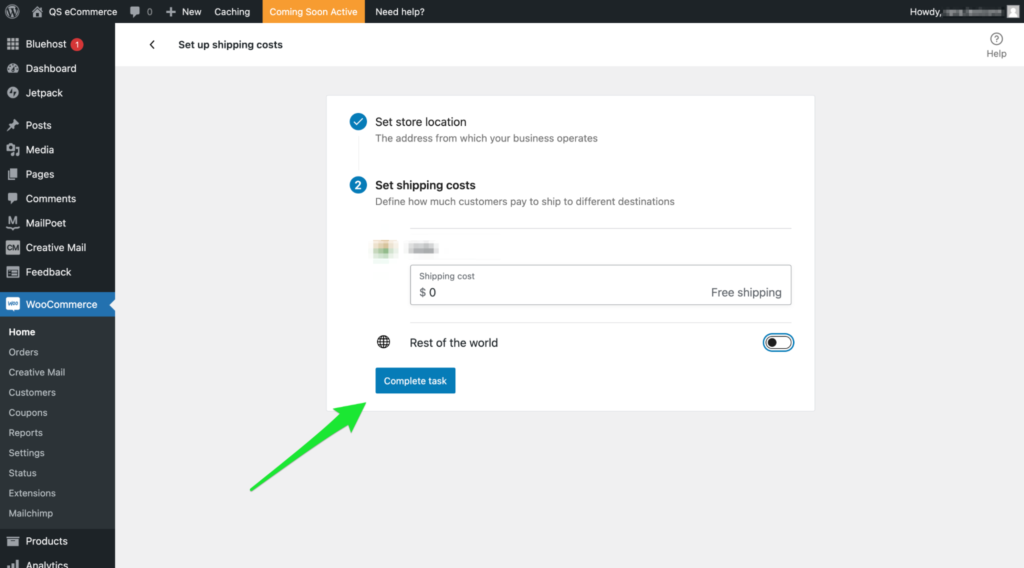
Set Up Shipping Options
To add shipping options, select Set up shipping from the list of displayed options on your WooCommerce dashboard.
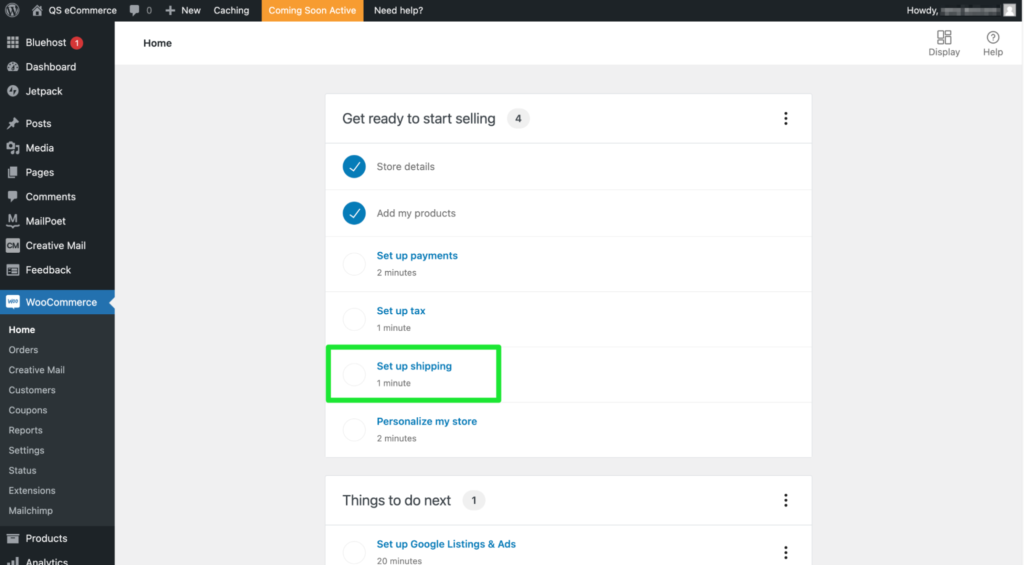
While WooCommerce will automatically recognize the area you are in, you can choose your shipping rates. What’s more, you can either set a fixed price for every zone or set it as free.
Once done, click Complete task.
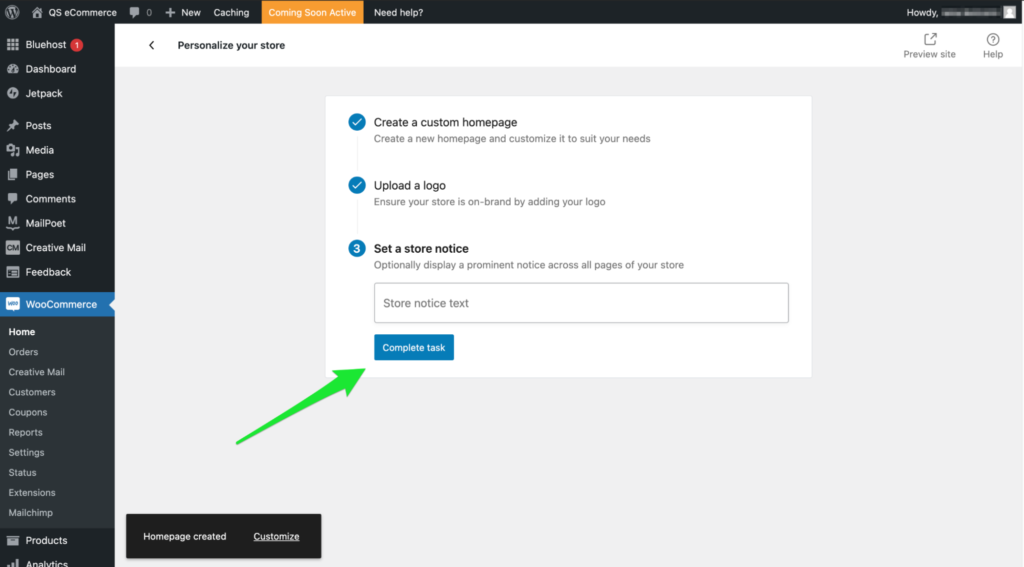
Personalize Your Ecommerce Website
Stand apart from your competition by creating a custom homepage, uploading your company logo, and adding a store notice. Do this by clicking on Personalize my store on the WooCommerce dashboard.
WooCommerce allows you to customize everything that goes on to your website. So you never have to worry about restricting your creative side.
Click Complete task once you’re satisfied with how everything looks.
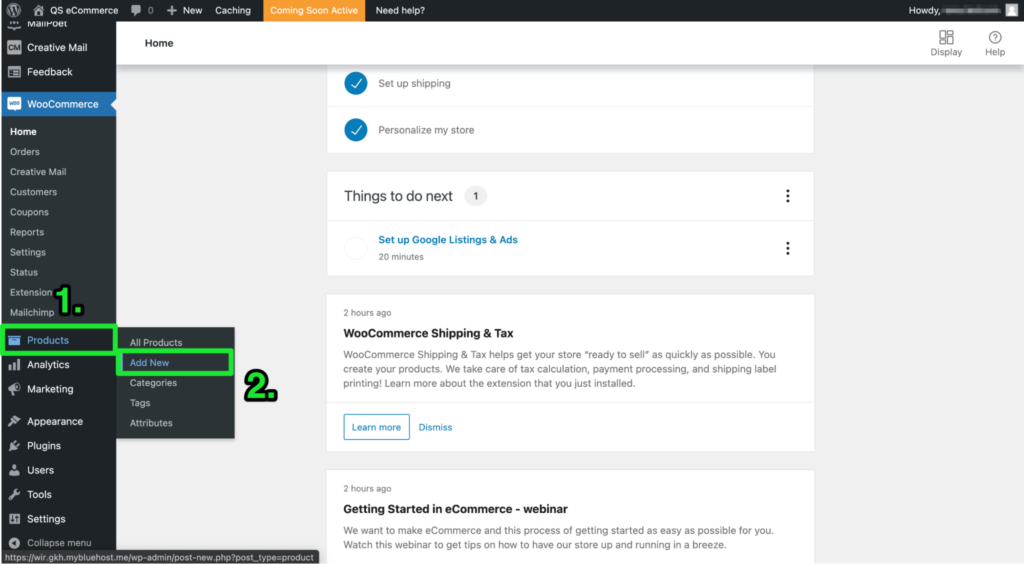
Step 5: Add the Products You Want to Sell
It makes no sense to have an ecommerce website if you have nothing to sell. Precisely why the next step is to add the products you want to sell.
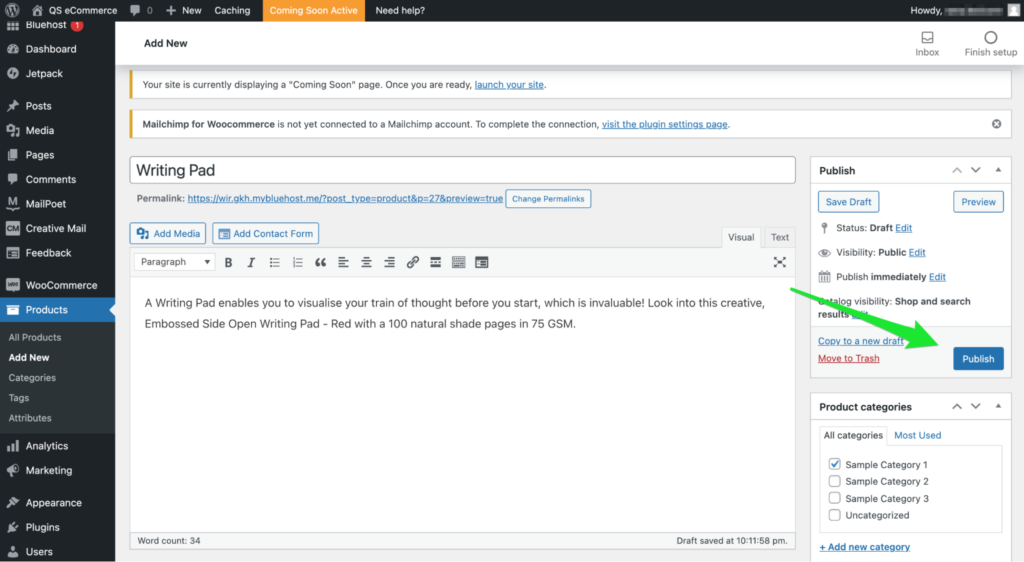
Select Products from the WordPress menu sidebar on the left, followed by Add New.
At this stage, you have a blank canvas.
You will fill in the product’s name, price, and description and set the product category. You can also add product images, as well as any additional gallery images.
In addition to the above, you’ll also find other tabs—General (the one you’re currently in), Inventory (track your inventory and add SKUs), Shipping (product dimensions and shipping costs), Linked Product (upselling complementary products), and Attributes (size, color, etc.)
For more information on how the product categories and other attributes work, check out this detailed guide from WooCommerce.
Click on Publish when done.
If you click on All Products from the Products side menu bar, you’ll find your product list along with the previous examples.

Here’s a quick checklist to ensure you’re adding the products correctly before hitting Publish.
- Write the product title.
- Enter the long product description and short description for the product you want to upload. Try to incorporate SEO words to rank higher in the SERPs.
- Add product images.
- Upload your product to your WordPress dashboard.
- Organize each product by category to keep everything organized.
Step 6: Add Plugins and Extra Content to Boost Conversions
You’ve done everything at this point to create a new ecommerce website. Next, we discuss tactics that can help you bring more traffic to your website and, in turn, earn more revenue.
Install Plugins
You may have already noticed the Jetpack tab on the WordPress menu bar.
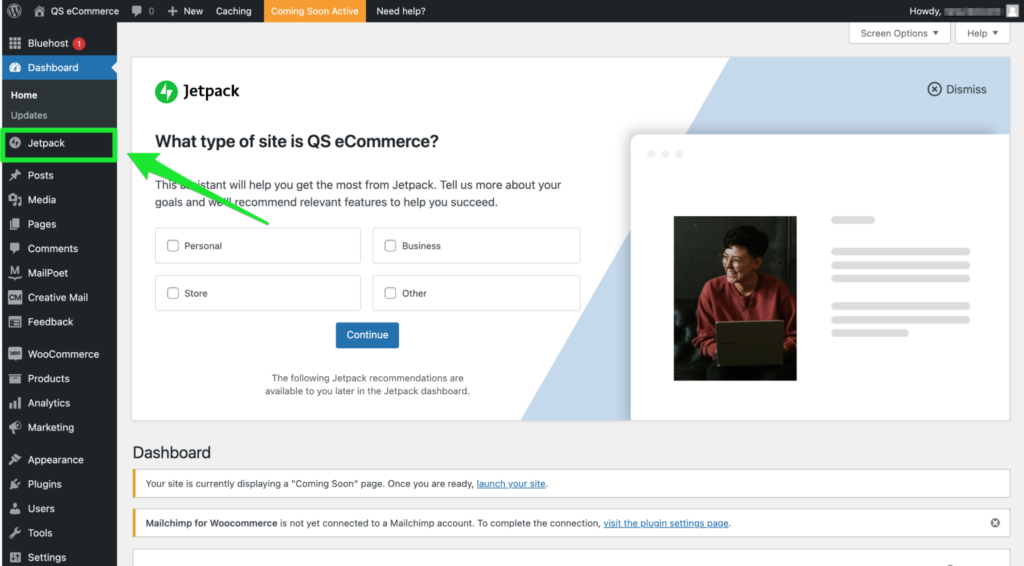
You can activate this plugin, along with several other plugins like Yoast SEO, Securi, and Site Reviews—all of which will work excellently to activate payment setups and automate taxes, implement SEO best practices, enhance security, and add social proof, respectively.
Here’s how you can install and activate plugins:
- Click on Plugins from the side menu bar, followed by Add New.
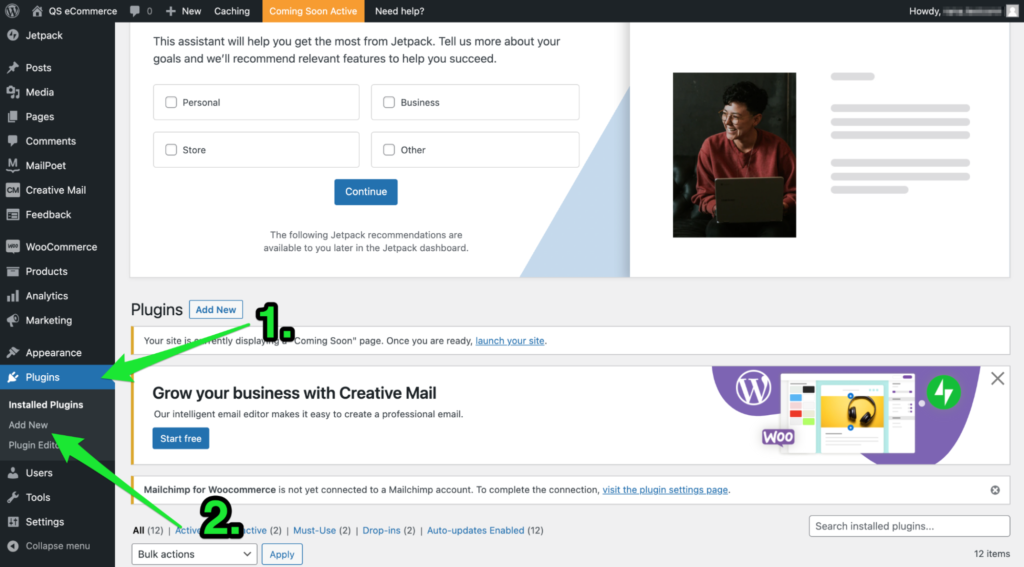
- Enter the name of the plugin you want to install in the search bar and press Enter.

- Click on the Install Now or Activate button to add the plugin to your website.
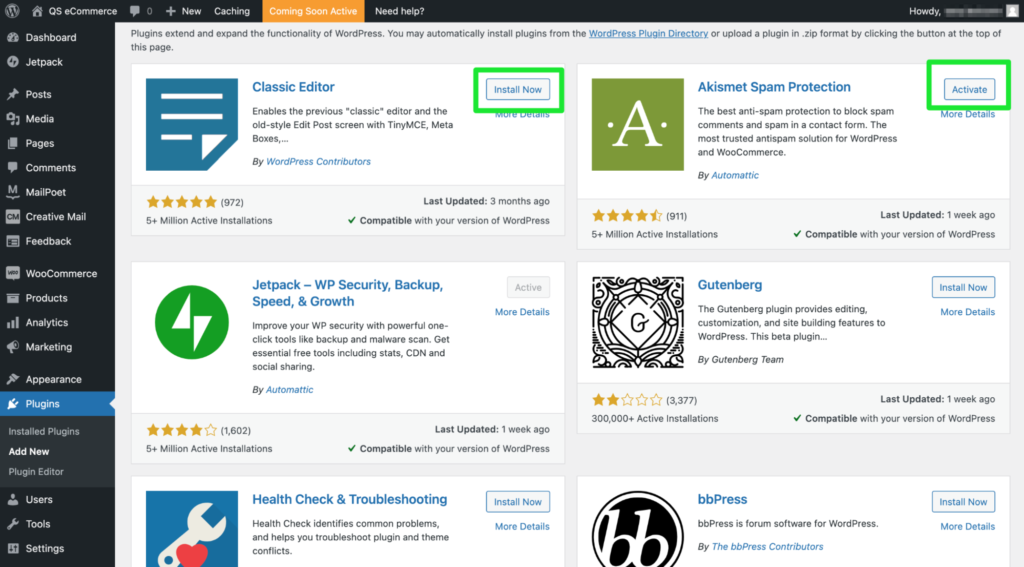
WooCommerce’s setup wizard will then take over from here, guiding you through the rest of the setup process.
Add Necessary Content
With the plugins sorted, your next focus should be on adding relevant copy and content to your ecommerce website. This includes the following:
- UX copy or Microcopy (CTAs, error messages, navigational copy). Every single word matters here, so I recommend taking your time and writing with care. For instance, “Buy Now” can sound too pushy if it’s early in the buying stage. Something more subtle like “Learn More” might be better. It depends on your goals and where the customer is in the purchasing process.
- Product Descriptions. As mentioned, you should take the initiative and write SEO-optimized product descriptions. But in addition to that, you should also structure it correctly and ensure it is descriptive. I highly recommend using bullet points to separate technical information from the prose.
- About Us. Especially as a new site, customers will want to know more about you and the company. Great about us page copy tells the story of you and your business, including your vision. Customers enjoy knowing more about the people behind a brand.
- Contact Page. You absolutely need a contact page where any customer can reach out with questions or if they need support. It can be very simple with fields for a name, email address, and message. You can easily find free contact page plugins or create your own.
Step 7: Make Your Ecommerce Website Public
Are you happy with the way your website looks, works, and feels? Then it’s time to make it public and start selling!
Launch Your Website
Go to Settings from the WordPress sidebar, and click on Privacy.
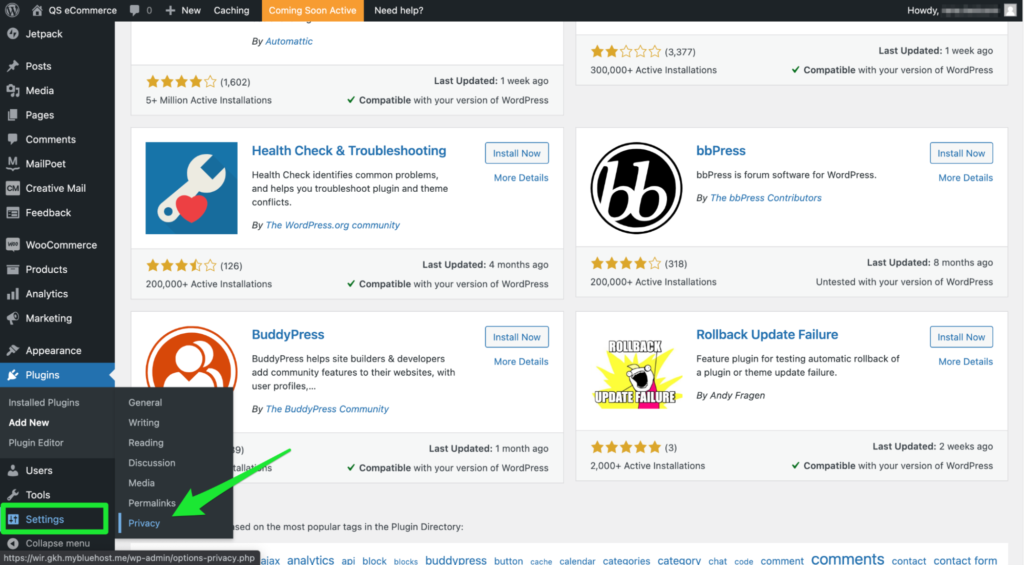
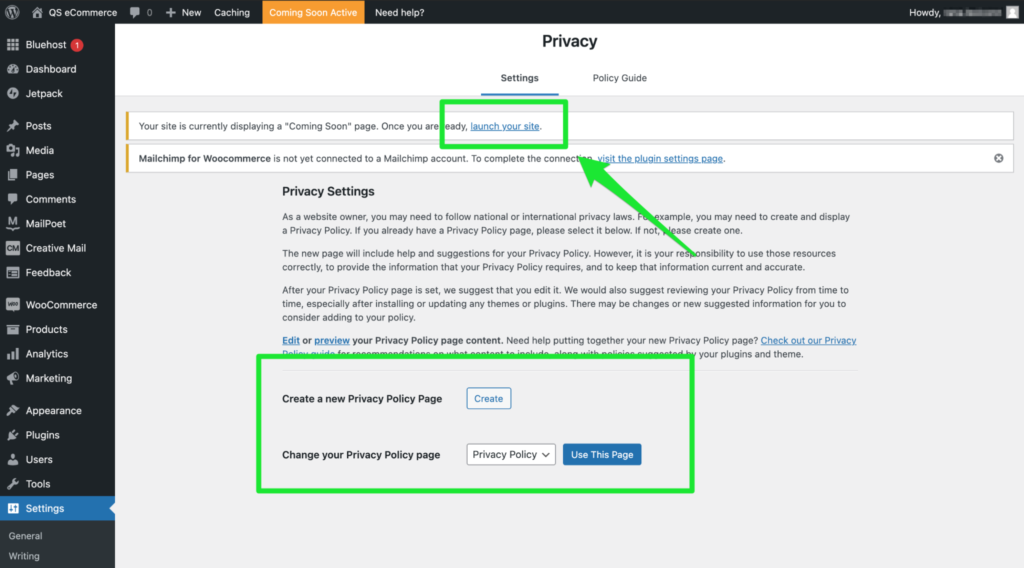
The first thing is to sort out your privacy settings. A privacy policy is a crucial aspect of every website—ecommerce or not. In fact, WordPress won’t let you go public unless you choose a privacy policy page. Luckily, there’s already a template in place, but you can also edit it or write up your own.
Lastly, make sure all your website’s must-haves—homepage, contact page, about page, and any other content—are all set and look the way you want.
Finally, click Launch Your Site.
Congratulations! You have your ecommerce website up and running!


from Quick Sprout https://ift.tt/xwZ0WoO
via IFTTT
