Want to just get started? Click here to sign up for Hostinger and create a website today.
It doesn’t matter if you’re launching a passion project or a business to make your first million dollars. You need a website.
Good news: creating a website today is easier than ever.
You don’t need to know how to code. You don’t need to hire a pricey developer. You just need to follow a few very simple steps to get your website up and running in less than 20 minutes.
Top Web Hosting Providers To Create A Website
If you want to create a website, you’ll need a web hosting provider. Here are the best options.
- Hostinger – Most affordable hosting plans overall
- Bluehost – Best web host for beginners
- DreamHost – Most affordable month-to-month plan
- HostGator – Best for lean or minimal needs
- GreenGeeks – Best eco-friendly hosting
- SiteGround – Best for making your WordPress site speedy & secure
- A2 Hosting – Fast and reliable shared hosting
- InMotion – Best VPS hosting
- WP Engine – Best managed WordPress hosting
- Nexcess – Best for scaling and growth
You can read our full reviews of each web hosting provider here.
But to get your new website going right now, go straight to our Quick Start checklist. It will help you launch your new website in just two simple steps.
Quick Start Checklist To Create A Website
Want to just get your website running as quickly as possible? Follow these two steps to get your own piece of internet real estate up and running in 15 minutes or less.
1. Sign up for Hostinger. Select their Single Shared Web Hosting plan for just $1.99 per month. It’s a four-year contract, but it’s the best deal out there and you get a free domain name, too. Follow the steps to create an account and purchase the plan.
- Best deal for hosting
- Perfect for WordPress sites
- Free domain registration
- Starts at $1.99/month
2. Install WordPress. You can install WordPress as your content management system (CMS) with just one click from your Hostinger control panel. You’ll use your CMS to control the look and feel of your website. It’s also how you’ll upload all your content.
Voila! In less time it takes to watch an episode of your favorite show on Netflix, you can have your new website live. But if you want to create a website that builds an audience and makes you money the right way, there is a bit more to do.
But don’t worry! Everything you need to know is covered in the rest of this post.
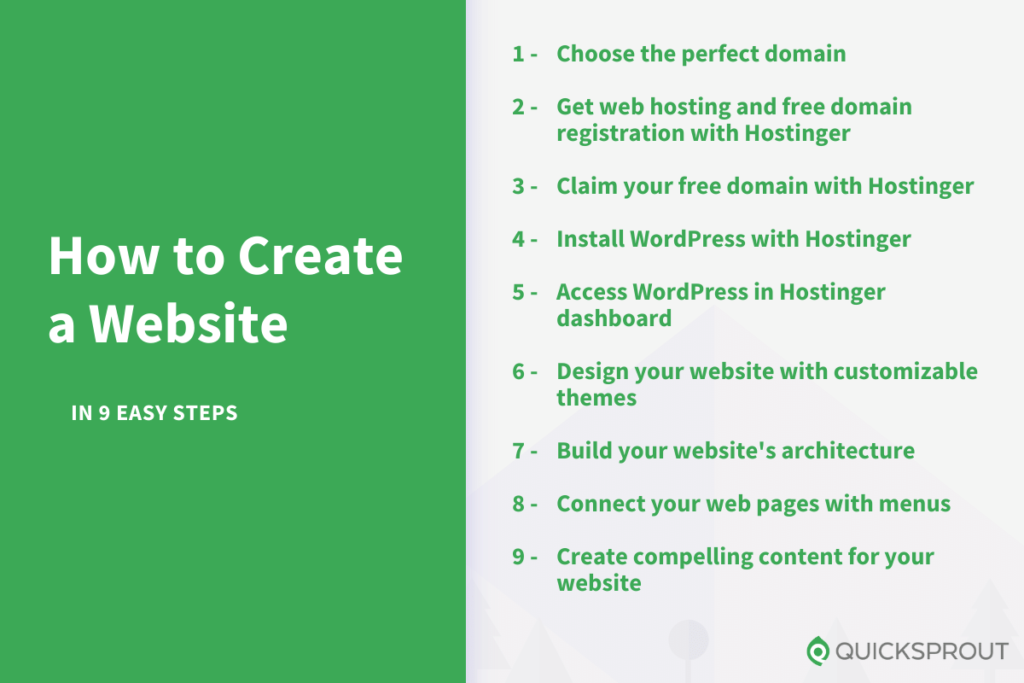
9 Steps to Create a Website
Here’s a summary of the steps to build your website:
- Choose the perfect domain
- Get web hosting and free domain registration with Hostinger
- Claim your free domain with Hostinger
- Install WordPress with Hostinger
- Access WordPress in the Hostinger dashboard
- Design your website with a customizable theme
- Build your website’s architecture
- Connect your web pages with menus
- Create compelling content for your website
Feel free to use these links to jump around to the section you need as you create your website.
Step 1: Choose the Perfect Domain
Choosing a domain is one of the most important decisions you can make for your site. It’s the address for your site and the way people will remember your website.
While many of the best domains are taken, that doesn’t mean you won’t be able to find a perfect domain for your brand.
When brainstorming good domain names, consider the following elements:
- Easy to say and spell. Potential visitors should be able to say your domain name out loud to someone without them having to ask twice how to spell or say it.
- Short and sweet. We recommend no more than 14 characters. You don’t want an overly long domain name that’s hard to remember and say.
- Go with .com, .org, or .net. While there are plenty of domain name systems out there, it’s best to stick with the tried-and-true. You want people to be able to remember it, after all.
- Use your name. A particularly great choice for a personal blog, website, or portfolio.
- Avoid numbers and hyphens. This just makes it look weird in the URL. Plus it makes it harder for people to say your URL to others.
If you want to learn more about this topic, check out our article on how to buy the right domain name.
Come up with a few potential domain names in case your top choice is already taken. The Hostinger Domain Checker is free, and it will let you know if the domain name you want is available.
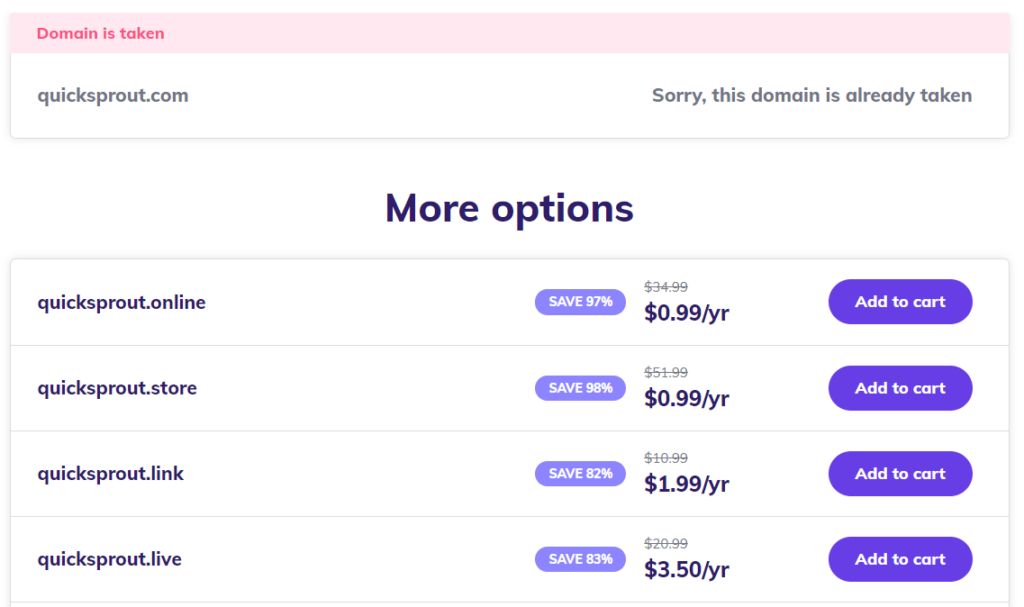
Type your desired name in to the Domain Checker. If it’s available, fantastic. If not, Hostinger will automatically provide a few recommendations that are close to what you are looking for.
Maybe one of the recommendations works for you. Maybe you have to try a different approach.
I recommend you brainstorm ideas and search until you find an available domain you like, rather than taking something that isn’t quite right just because it is available.
It’s possible to buy a domain that’s already taken—but I don’t recommend doing that because it’s very expensive. In fact, quality domains typically cost a few thousand dollars at a minimum. I’ve seen it go as high as six or seven figures for a domain.
My advice is to get scrappy, get creative, and be flexible. You will be able to find one that’s available at a reasonable price.
Don’t add the domain to your cart at this time–you can get a domain for free by signing up for their Premium Shared Hosting service, which is what I recommend.
I’ll walk you through that process next.
Step 2: Get Web Hosting And Free Domain Registration With Hostinger
A website needs just two things to go live: A domain name and a web host.
You just came up with your domain name. Now it’s time to put it to use with a good web host.
We highly recommend you use Hostinger for your website’s host. They offer a fast and reliable web host. Hostinger also allows you to register your domain free of charge.
- Best deal for hosting
- Perfect for WordPress sites
- Free domain registration
- Starts at $1.99/month
You can get Hostinger today for just $1.99/month using our discount link. It’ll give you all you need to get your website up and running.
Start by going to Hostinger’s website. Then click on Start Now.
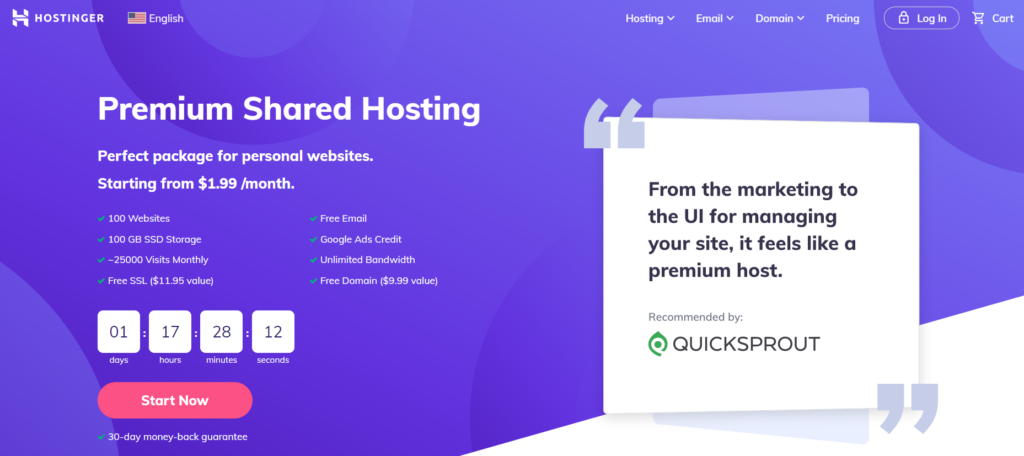
It’ll give you three options for shared hosting, which is the type of hosting most people want to create a new website.
Hostinger offers three options for shared hosting: Single, Premium, and Business:
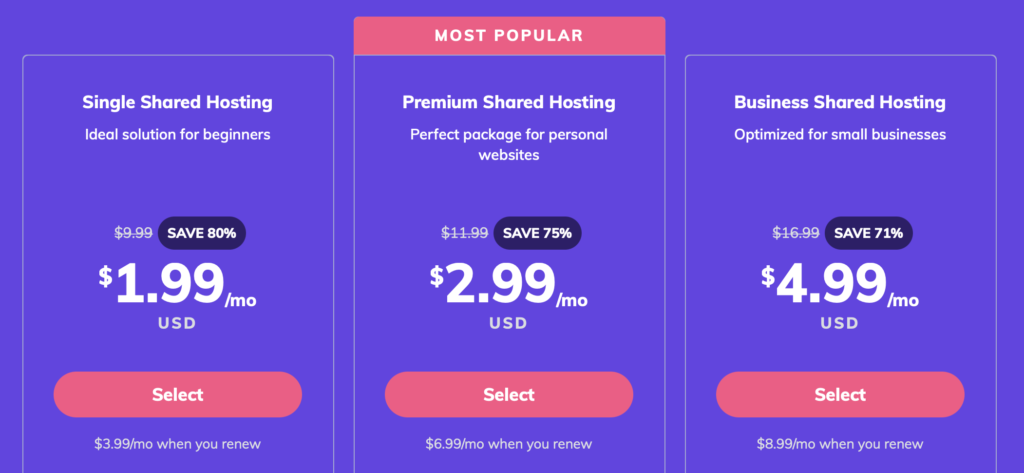
I recommend signing up for Premium unless you already have a domain name.
My reasoning is that the Single Shared Hosting plan does not come with a free domain, whereas Premium and Business plans do. Since you need a domain name in order to have a website, the vast majority of users looking to create a site are going to want both domain + hosting bundled together.
Both Premium and Business plans come with the ability to create 100 websites, 100 email accounts, and other tools to keep your site at top performance.
The Business plan comes with more storage and bandwidth, so your site will be able to handle more traffic than with a Premium plan.
For most new sites, Premium will be more than enough, but if you are expecting a ton of traffic right away, Business might be a better choice. View a complete rundown of everything that’s included with each plan on Hostinger’s homepage.
Once you select the best plan for you, Hostinger will ask you how long you want to sign up. Here’s what that looks like if you choose the Premium plan:
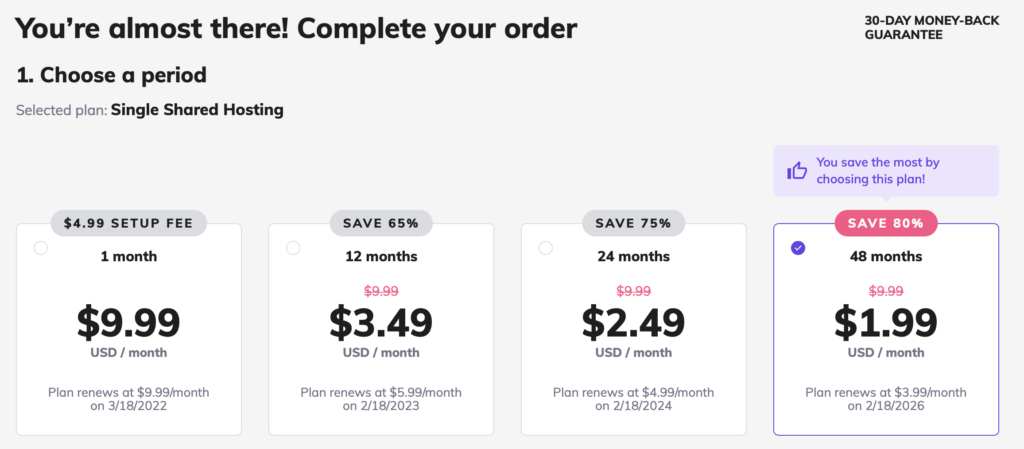
I chose the 48-month period for my Premium plan so that I could max out the discount. As you can see, I’ll wind up paying less than $100 for four years of hosting!
That’s a phenomenal price, especially when you consider that many other hosting providers charge extra for things like SSL certificates, website builders, email accounts, and other critical features that Hostinger bundles in for free.
After selecting the length of your hosting agreement, complete the rest of the information on the page.
- Register an account with Hostinger. You can use an email address, or signup via an existing Google, Facebook, or GitHub account. Whatever you choose, make it an email or account that you check regularly, as this is how Hostinger will communicate with you about any issues that come up.
- Enter payment details. Hostinger accepts all major credit cards and a variety of online payment gateways, such as PayPal, GooglePay, and CoinGate.
- Click “Submit”. Once you submit your payment, you have 30 days to try Hostinger risk-free. If you are not happy with your service, cancel within the first month for a refund.
Once your payment goes through, and you confirm your email address, you’ll be able to begin setting up your site.
Step 3: Claim Your Free Domain
Follow the instructions on the welcome email to log in to Hostinger.
Once you are there, you’ll answer a series of straightforward questions about the website you are trying to create:
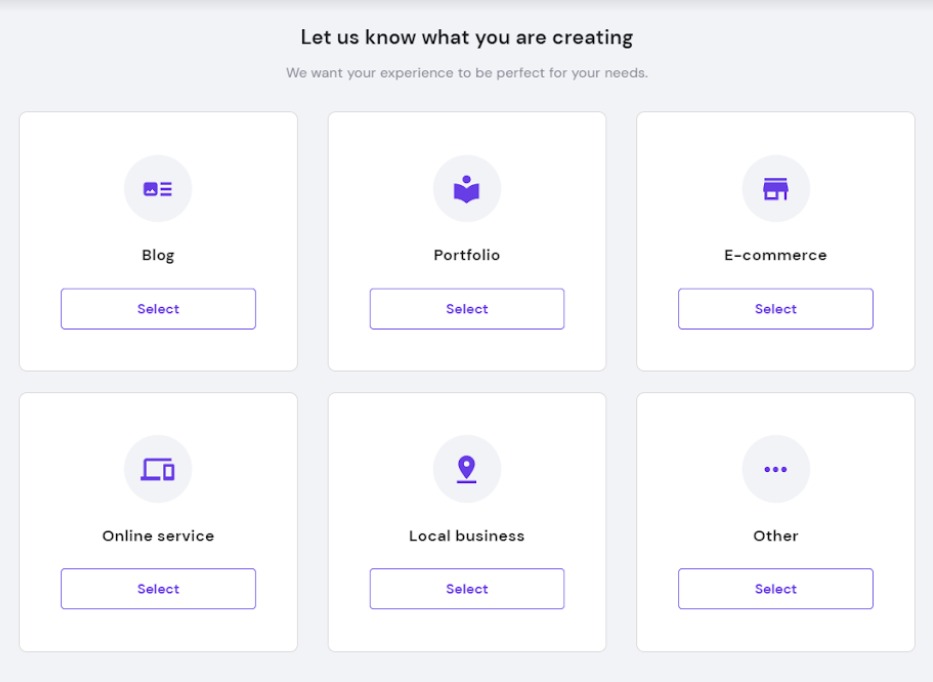
And it’s basically this easy throughout the whole setup, which only takes a few minutes.
You’ll have the option to claim your free domain as long as you signed up with Premium or Business Shared Hosting:
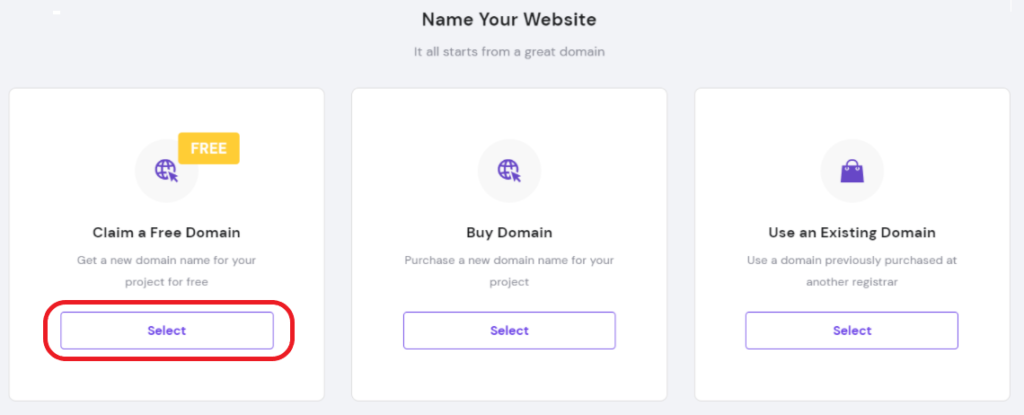
At this time you can also connect domains you already own (the walkthrough is very simple) or buy additional domains.
As you select from free domains, keep an eye on the renewal pricing. Your domain is free for the first year. After that, you have to renew, typically at a higher price. This is no different from any other host, but you don’t want to be surprised about renewal pricing.
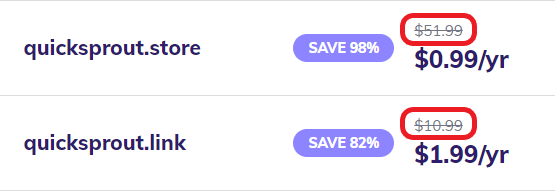
The top example where the renewal price is more than 50 times higher than starting price is unusual. But it happens. The bottom example is much more within the normal range for domain name renewals.
Step 4: Install WordPress with Hostinger
Next, you’ll choose your content management system (CMS). I recommend using WordPress.
Hostinger will give you other CMS options, but unless you have a compelling reason to do otherwise, WordPress is the easiest, cheapest, safest play you can make.
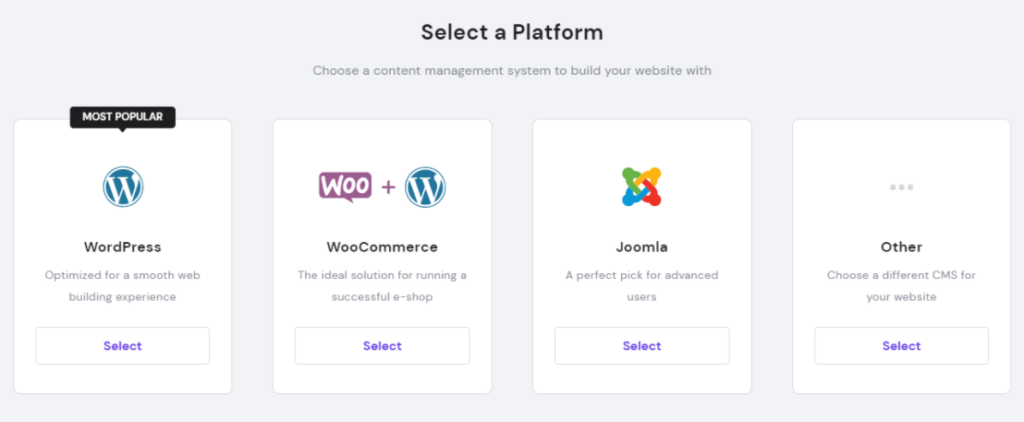
Create a WordPress account with a strong password, and choose from dozens of different layout options for your site. Different layouts are known as WordPress themes.
You just have to make a choice at this time–you’ll be able to change themes and customize the site later. We’ll go into all that in the next steps.
For now, just confirm everything is correct:
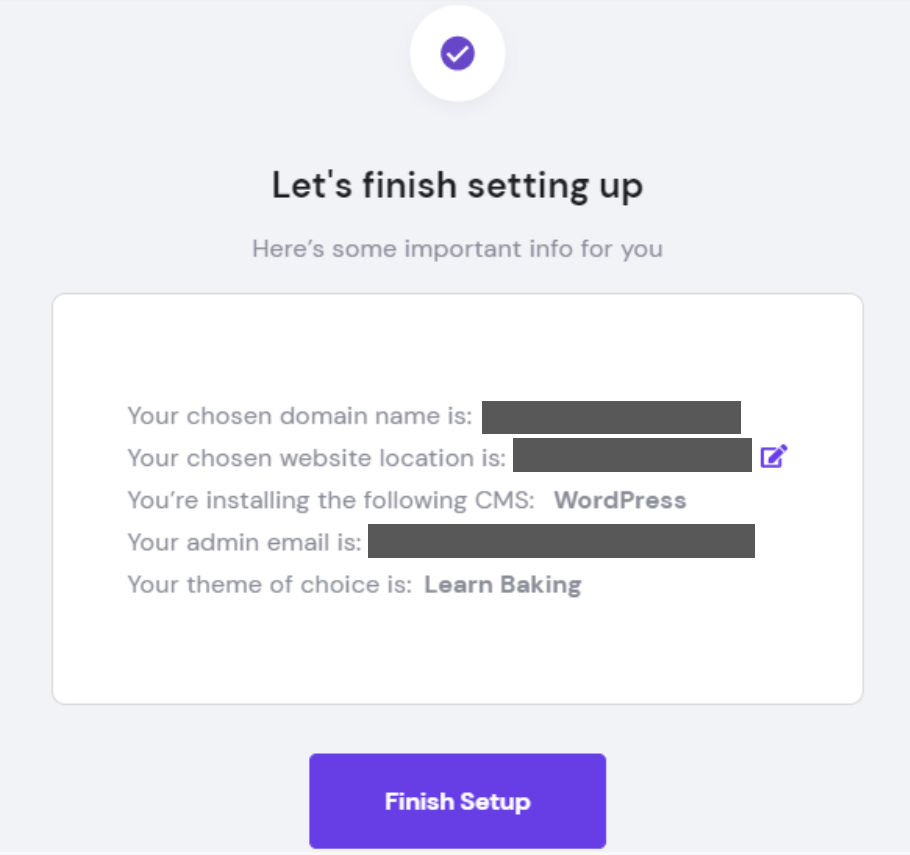
Double-check all this, and if for whatever reason Hostinger has located your website in an incorrect region, adjust that by clicking the purple pencil edit button.
Once you are sure that the information is right, click Finish Setup. This takes less than five minutes.
Congrats! You now own a piece of the internet!
Let’s dive into using WordPress.
Step 5: Access WordPress in Hostinger Dashboard
Hostinger offers a very convenient dashboard for you to manage your site. It’s known as hPanel, and is very welcoming to new users, as far as website control panels go.
And if you have any confusion, Hostinger has tons of support about how to navigate hPanel.
You’ll be prompted to use WordPress to create your site. If you miss the prompts or skip them for any reason, you can always log in to WordPress using the left side dropdown panel in the dashboard:
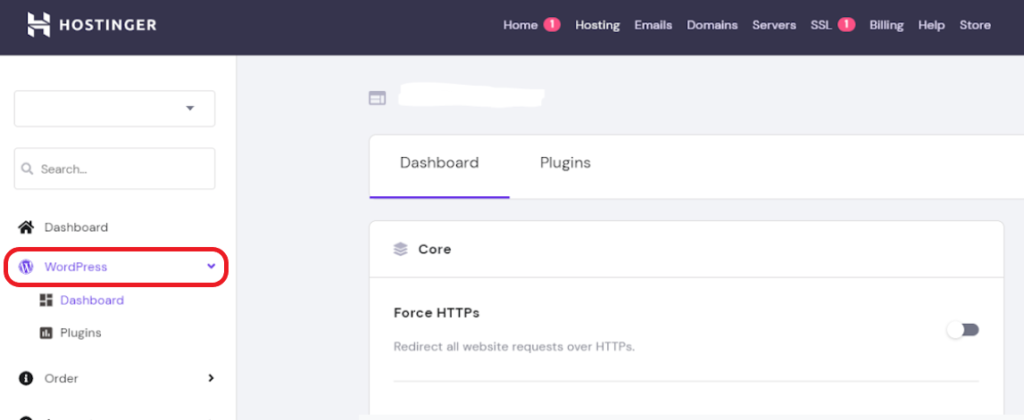
Enter the WordPress account password you created in the last step to log in and start customizing your new website.
Step 6: Design Your Website with Customizable Themes
You already selected a WordPress theme to build your site, and if you are happy with the way it looks, great!
If you want to see what else is out there, you can explore tens of thousands of themes on WordPress.org. A lot of them are free. There are also some you need to pay for.
Pro tip: Don’t worry too much about this section. It’s easy to get caught up with perfectionism and think that you need to get your theme right the first time. That’s not true.
The most important thing you can do is choose a basic theme and go with it. You can always change your theme later.
Go to your WordPress website’s administration dashboard. You can do this through the Hostinger dashboard, or you can use the URL [your website name].com/wp-admin. Then simply use the username and password you got in the previous step.
Once you’re in the admin dashboard, go to your sidebar and click Appearance>Themes>Add New Theme.
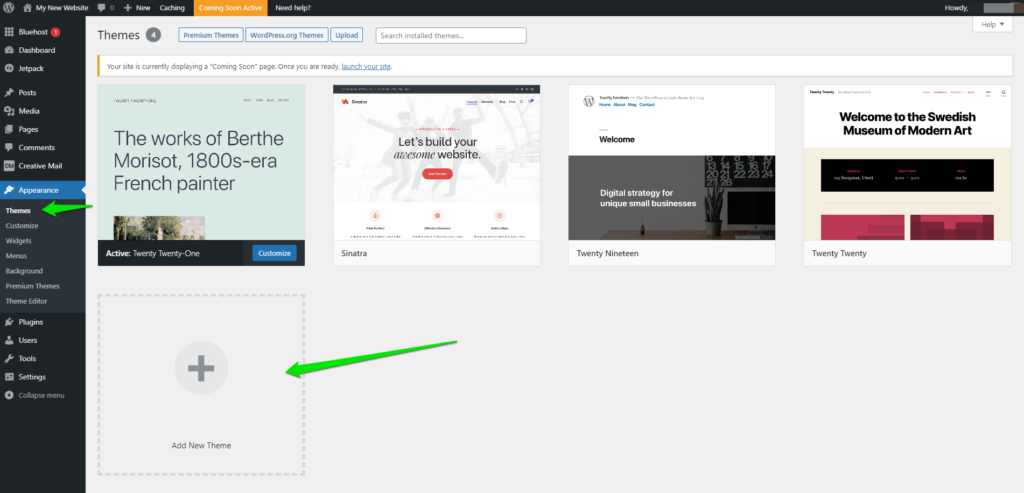
This will allow you to add any theme you want from WordPress’s library. Choose one now.
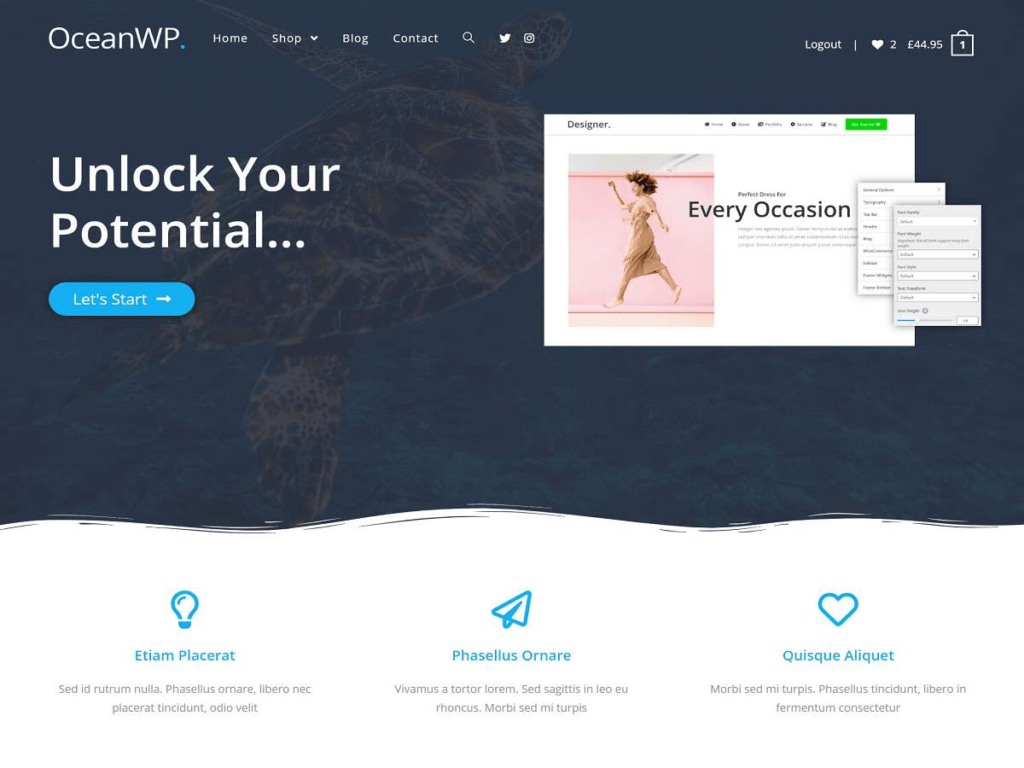
For this article, we’ll be using OceanWP. This is a free theme that’s very flexible. Whether you need a blog, ecommerce store, or whatever else, OceanWP can get it done.
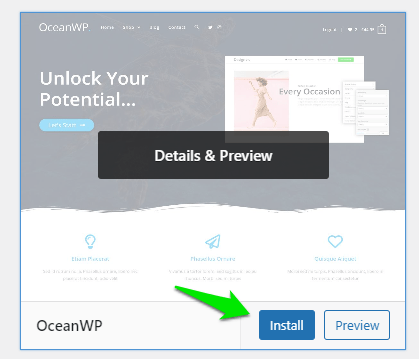
Search for the theme using the search bar. Once you find it, click Install.
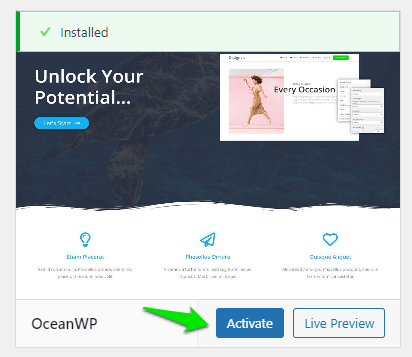
Once it’s finished installing, click on the Activate button. This will implement the theme onto your website.
You can now customize the theme to your liking by clicking on the Customize button.
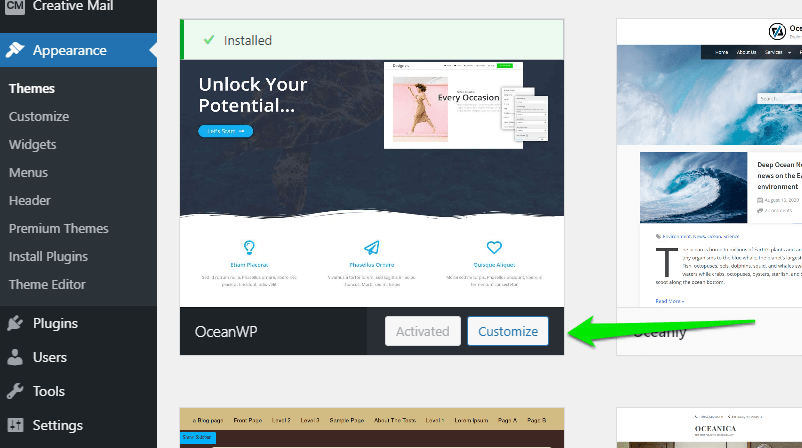
You’ll now be able to change any aspect of your website you want. This includes things like your website’s colors, menu options, header images, and more.
After clicking on customize, you’ll see a look at your website as you customize it as well as a left sidebar with different customization options.
Each theme offers different options, but there’s a lot of overlap between themes. We’re going to go into more detail about what each option does—and whether or not it’s vital:
- Site Identity. Important. This area will allow you to change your site’s title as well as a sub-head or tagline. In most instances, you’ll also be able to upload a site icon as well. This is the image that appears in new browser tabs when people are on your website.
- Colors. Optional. Change your website’s color palette. For OceanWP, this section only allows you to change the color of the title text.
- Menus. Very important. It allows you to create a navigation menu for your website. Your reader will use this menu to discover and navigate to specific pages of your website. You’ll also be able to choose where the menu appears (e.g. top, footer, sidebar).
- Widgets. Optional. These are different tools you can place throughout your website such as archives, calendars, search bars, and more. Completely optional, but can be helpful depending on what website you have.

- Homepage Settings. Optional. This controls whether or not you have a static homepage, or if your website automatically shows your latest blog posts. Again, this is completely optional and dependent on your website’s needs.
- Additional CSS. Optional. This is where you can add further customization options using CSS code. This can be incredibly powerful if you have the right resources and knowledge to change your website.
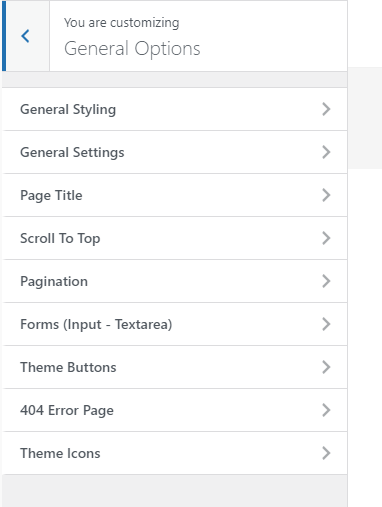
- General Options. Important. This section allows you to customize a ton of different aspects about your website. It includes things like the size of your header, the icons you can use, the titles of your pages, the layouts, and more.
- Typography. Important. This is where you can customize all things font related. That includes the size of the font, what type of font you want to use, and where those fonts will appear. For example, you might want to go with Helvetica for your H2 headers, but you might want to go with Comic Sans for your title (please, don’t actually do this; it is just an example).
- Top Bar. Optional. This edits the top area of your website. You can add social links here, buttons to other pages, and more.
- Header. Important. Allows you to fully customize the header area of your website. Add images or logos, change the font and colors, or whatever else you want to do to make the website yours.
- Blog. Optional. This allows you to change the layout of your blog as well as which posts appear on your website’s main page.
- Sidebar. Optional. You can add a sidebar to your website. This is completely optional since your readers can just use the top navigation bar to get around your site.
- Footer widgets. Optional. Add tools and customize your footer.
- Footer Bottom. Optional. This is that part of the website with the copyright and contact information. It’s potentially important — especially if you’re running a business.
Now, customize your website to your heart’s desire. Once you’re finished, click Publish, and voila! Your website will update automatically to reflect your changes.
Your website’s still going to look a little sparse. We need to create some pages for it.
Step 7: Build Your Website’s Architecture
If your website is a house, it’s currently an empty lot. It has a solid foundation and it’s connected to essential utilities—but it needs the walls and rooms.
To build those, you need to create web pages. These are documents on the internet that readers access through your website.
But you should think of them as the rooms of your house. These are the areas visitors will see and get to know you and your website.
While there are a lot of different types of web pages that exist, the most essential ones are:
- Homepage. This is the main page for your website. It’s what readers see first, so it’s very important.
- Contact page. This page shows how your users can contact you. This can be vitally important, depending on your business.
- About page. This page tells new visitors all about your website and/or business. Typically, businesses will put their “brand story” here about how they came to be.
- Online store. This is where your readers can purchase products and services from you. Again, can be vitally important depending on your business.
- Blog page. This page is where all of your blog posts go. If you plan on publishing articles for readers to read, this will be a very important part of your website taxonomy.
Creating pages on WordPress just takes a few clicks. Let’s jump into how you can create the most important page now for your website.
How to Create a Homepage
OceanWP gives you two different ways to create a homepage:
- Your latest posts. Your homepage showcases your latest blog posts.
- A static page. You create a page to become your home page.
The first option is straightforward: Create blog posts and the homepage will automatically show all your latest blog posts.
That’s why we want to walk you through creating a static page for your website. This can be especially useful for companies that just want a branded page to introduce their audience to the website.
It’s also much more customizable than a page showing your latest blog posts.
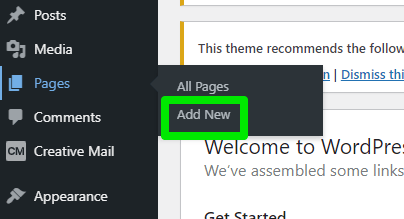
First, head back to your WordPress website dashboard and click on Pages>Add New.
Now, you’ll be in WordPress’s page editor mode. This area allows you to create a page by adding text, images, videos, memes, or whatever else you want to showcase on your homepage (or any other page for that matter).
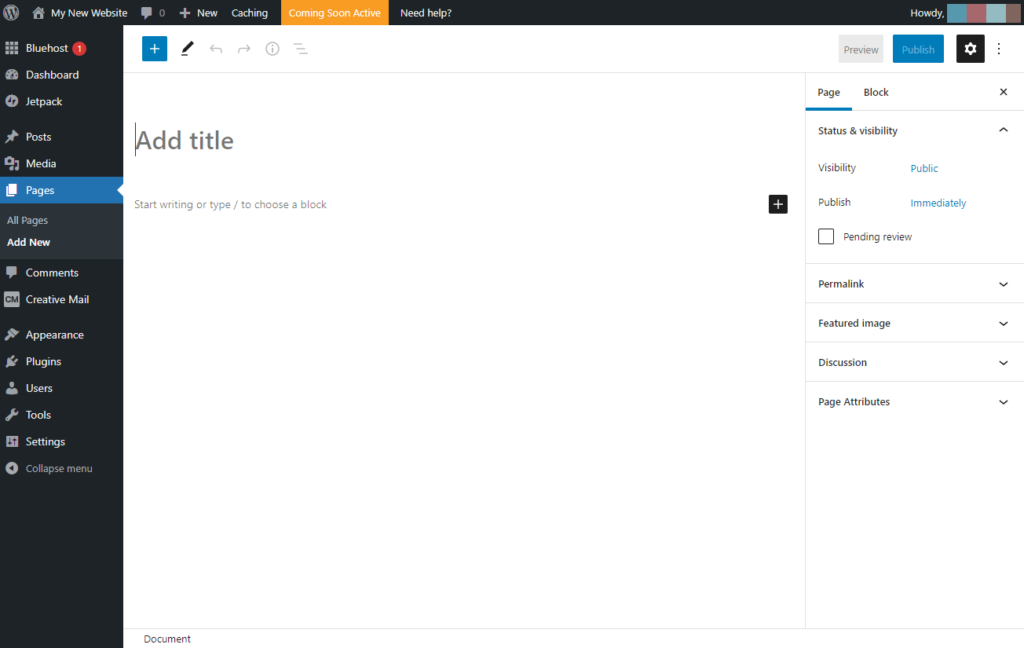
In the Add title box you can create the — you guessed it — title for your home page. This will display a big piece of text at the top. Below that is the content box where you can add text or media.
On the top left, you can click on the + button to add new content blocks.
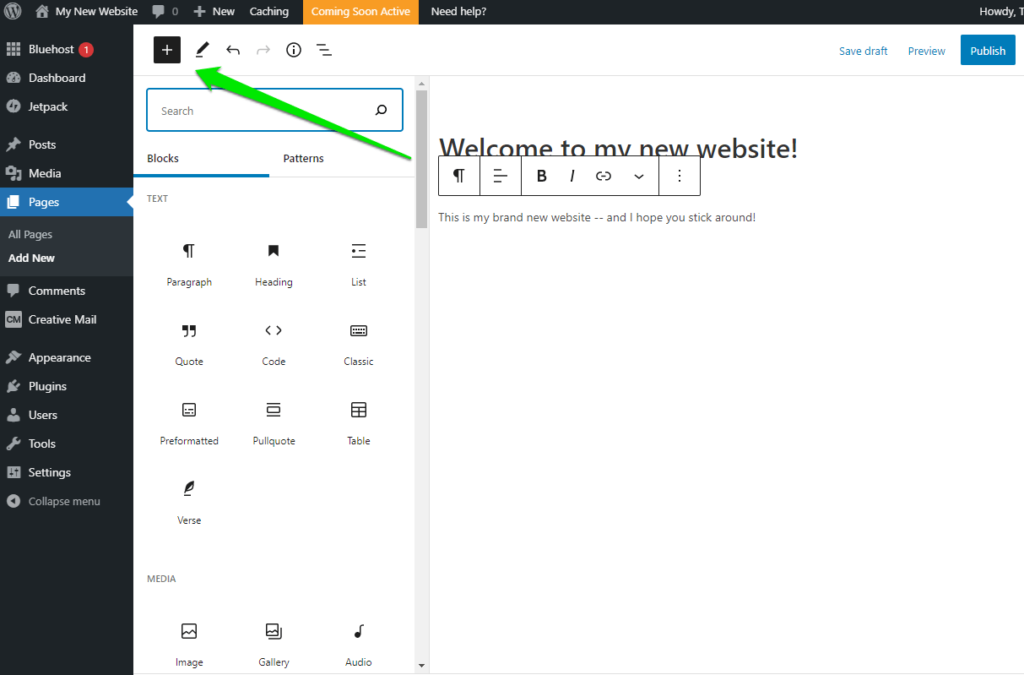
This is a very important area that allows you to easily add media, quotes, pull quotes, new paragraphs, headings, and more.
On the top right, you’ll see five buttons:
- Save Draft. This allows you to save your progress as you edit your homepage.
- Preview. This gives you a look at what your page will look like once you publish it.
- Publish. This actually publishes the draft.
- Settings (Gear Icon). This area allows you to do a number of things including edit the font size for each block (under Block section). You’ll also be able to set the visibility for your homepage, schedule a time to publish the page, change the URL, set the featured image, and allow for comments (under the Page section).
- Extra tools (Three Dots). This menu includes a number of extra tools you can use to change the visualization of your page editor.
Create a basic homepage now by adding a title and content. It doesn’t need to be fancy. We’re just doing this as a test run. You can always change it later.
Once you’ve done that, click Publish in the top right. The website will now be live!
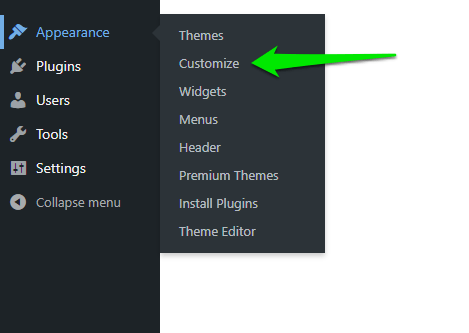
But that doesn’t mean it’s your homepage yet. Go to Appearance>Customize on the sidebar.
Then go to Homepage Settings. You can now click on A static page underneath your homepage displaying settings. This will allow you to select the homepage you just created in the dropdown menu underneath Homepage.
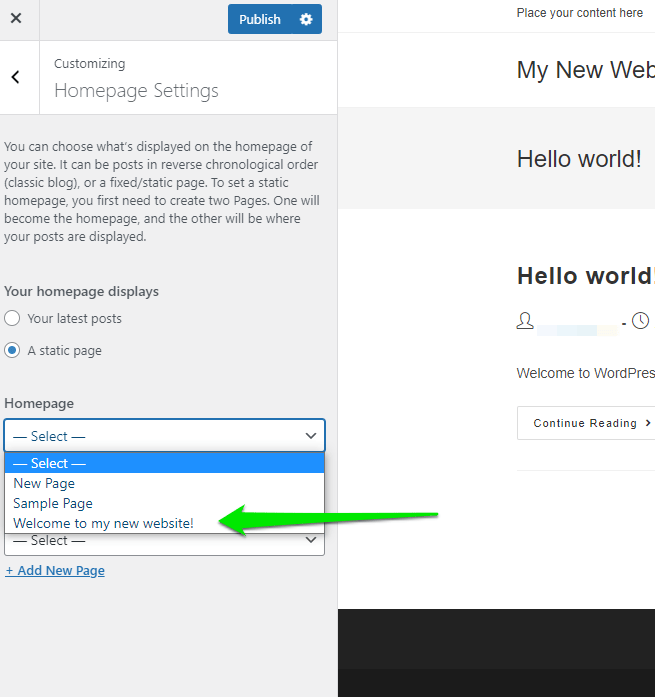
Select that page, then click on Publish at the top.
Congrats!! You just created your very first homepage.
How to Create an About, Contact, Landing, or Any Other Page
Creating any other page for your website will consist mostly of the same steps as your homepage.
First, head back to your WordPress website dashboard and click on Pages>Add New.
And in the page editor create the page you want to create. It’s really as simple as that.
However, if you allow your readers to easily discover that web page, you’ll have to create some navigational elements for them.
Step 8: Connect Your Web Pages with Menus
Creating menus is going to vary from theme to theme. However, in OceanWP it’s fairly simple.
From your WordPress dashboard, click on Appearance>Customize.
Then click on Menu>Create New Menu.
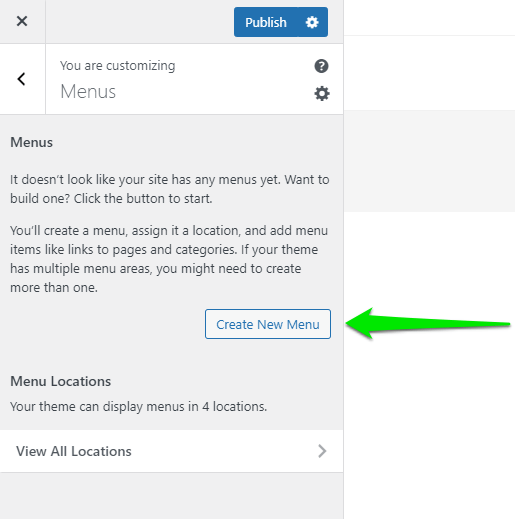
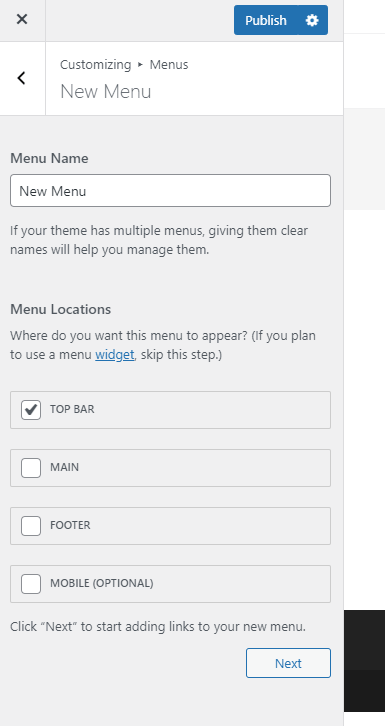
Here you’ll be able to give your menu a name and choose where you’d like it to appear.
For now, we’re going to go with the very creative name “New Menu” and choose Top Bar for the menu location. You can always change this later. Then click Next.
Now it’s time to add some links. Click on + Add Items to start building your menu.
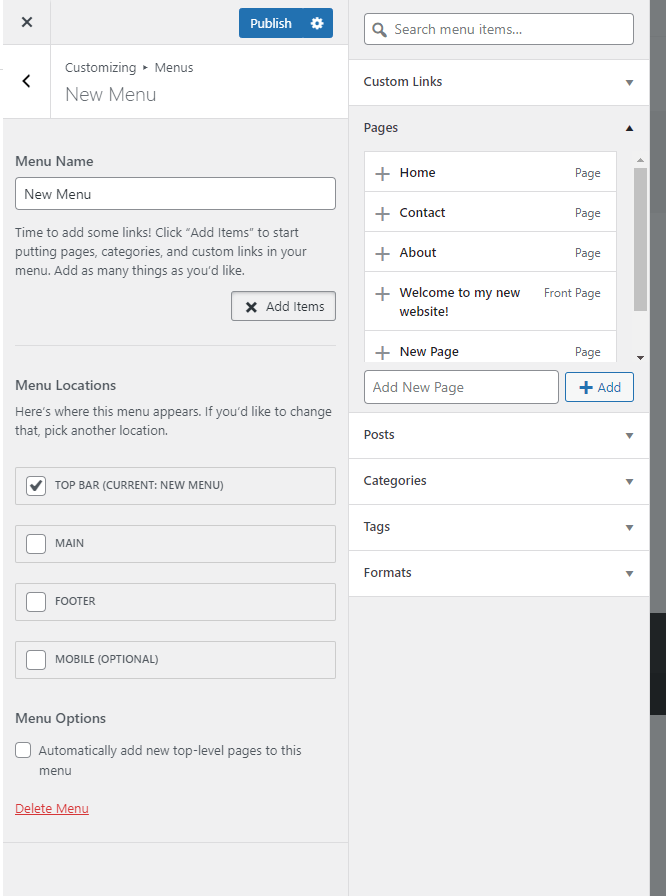
From here you can add pages via the pages that you have already created, custom links to different websites, blog posts, categories, tags, and more.
For now, we’re going to add our Home, Contact, and About page (which we created in the previous parts) onto the menu.
Click on the pages under the Pages section to do so.
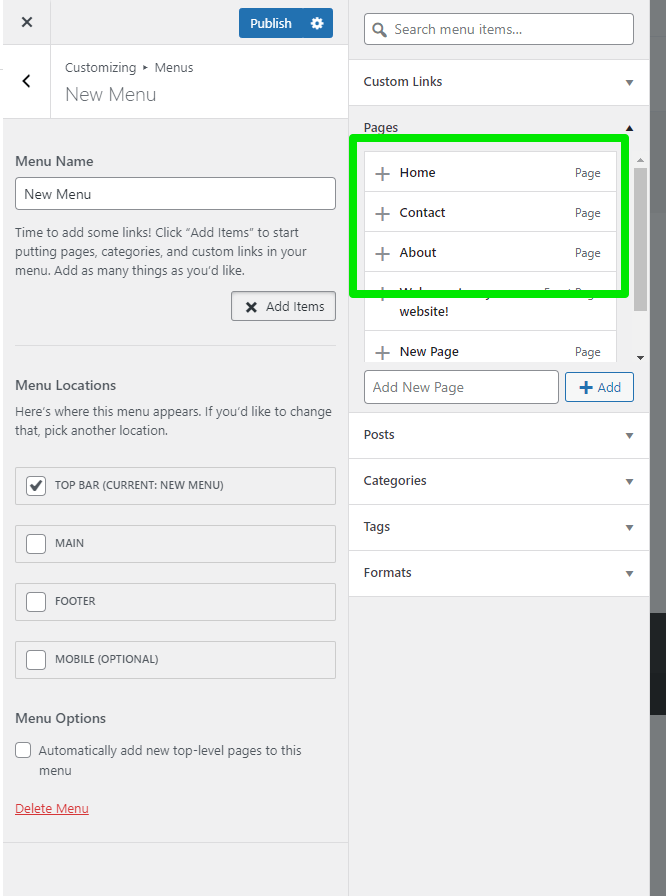
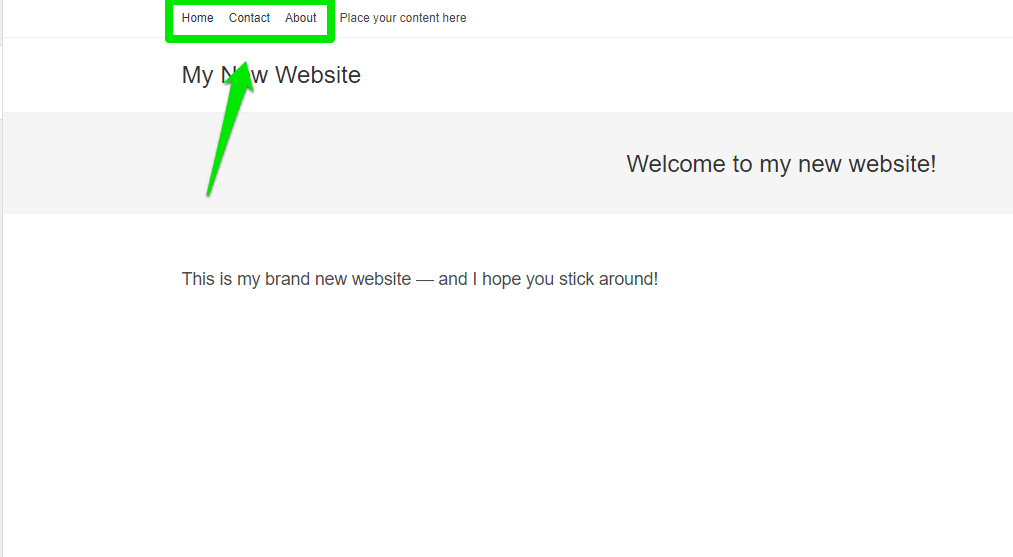
They will now appear in the top bar menu of your main website.
One thing to note is that you can create drop down menus for bigger categories you can think of.
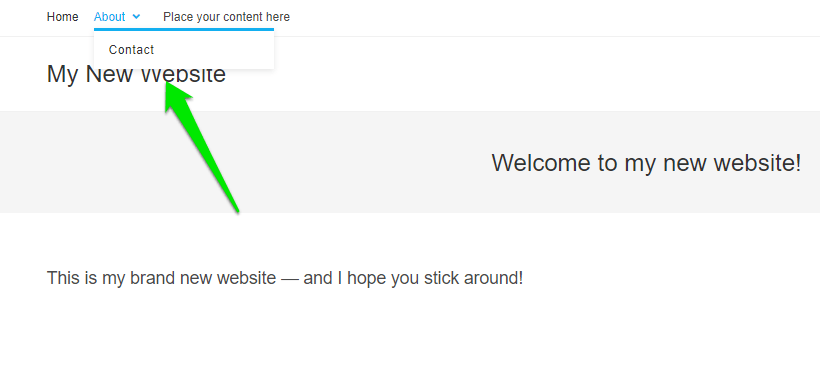
For example, let’s say we want to add our Contact page into our About section. You can do so by dragging the Contact menu underneath the About section when customizing the menu (see below).
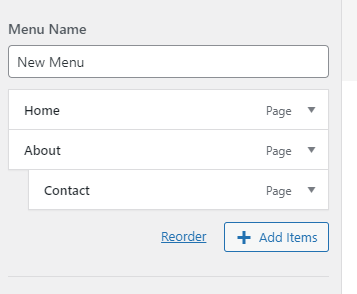
Your About menu will now include a dropdown where visitors can access your Contact page.
Once you’re finished making the menus, click on Publish at the top.
And you’re done! You just created your very first website.
Check out your new website in all its glory:
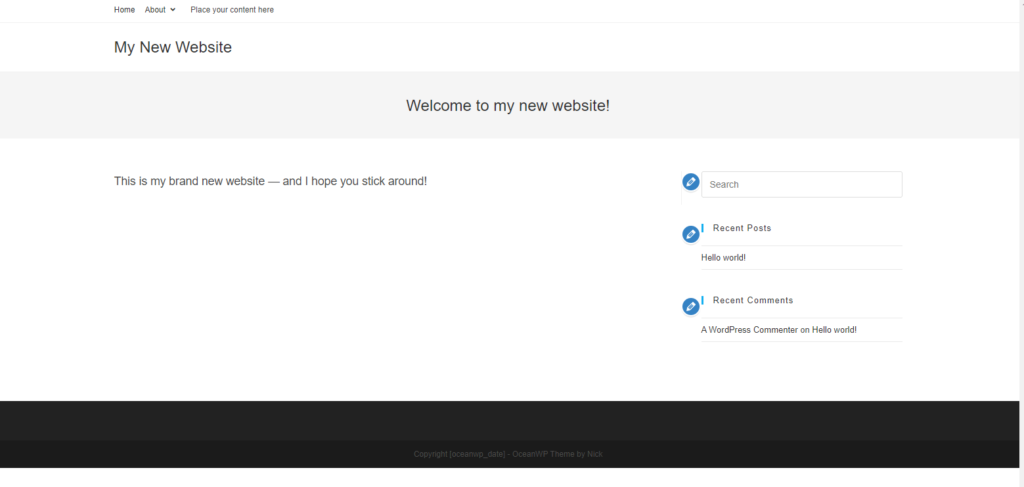
Okay, we admit: It’s a little underwhelming right now—but that’s because you haven’t gone about branding it or adding any real content yet!
We showed you how to get your website up and running. Now it’s YOUR turn to make it with content.
Step 9: Create Compelling Content for Your Website
What you ultimately choose to include in your website for content is entirely up to you.
However, there are two areas that we’ve found to be the most important when it comes to successful websites: design and content.
Below are our best resources for leveling up both:
Designing Your Website
- How to Develop Your First Brand Identity on a Budget
- 10 Trending 2019 Website Color Schemes
- 9 Places To Get Website Images (Paid and Free)
- The Best Website Fonts That Go Together in 2019
- 13 Website Design Best Practices
- Website Usability
- Website Mobile Friendliness
- 5 Easy Steps to Creating a Sitemap For a Website
Writing On Your Website
- How Much Copy Should You Write on Your Homepage?
- 10 Contact Page Techniques That Make People Contact You
- How To Create an About Page That Matters
- Everything About Copywriting
- Complete Guide to Copywriting
- 19 Copywriting Strategies to Persuade Your Readers
- How to Combine Copy and Design for Optimal Results
- How to Close the Deal with Your Copy
You Just Made Your First Website! What Next?
- Best deal for hosting
- Perfect for WordPress sites
- Free domain registration
- Starts at $1.99/month
Let’s recap:
First, you came up with some excellent domain names using our guide.
Then you signed up for Hostinger web hosting and domain registration.
After that, you easily installed WordPress as your CMS. You chose a theme, created web pages, then connected them all with menus.
Then you learned how to create the best content for your needs.
That’s AWESOME. Seriously, you should pat yourself on the back.
But your journey is just getting started. You need to continually tweak and adjust your website to changing trends and your audience’s needs to truly make it great.
And if you want to put your website to work for you (and pay for that extra vacation this year), here are a few resources of ours to help you make money from your site:
- How to Make Money Blogging
- How to Start a Blog That Makes Money (Lessons Learned)
- How to Make Money from a Website
- When to Use WordPress for Ecommerce and When to Avoid It
Keep coming back to Quick Sprout for more ways to start a business.


from Quick Sprout https://ift.tt/GTOI8h9
via IFTTT
