Project management software is a vital piece of the puzzle when it comes to helping your team stay productive, organized, and on schedule with any project.
But, finding the perfect software for the job can also be timely, costly, and downright frustrating. Especially when you’re already utilizing different Google apps to get the job done (for the most part).
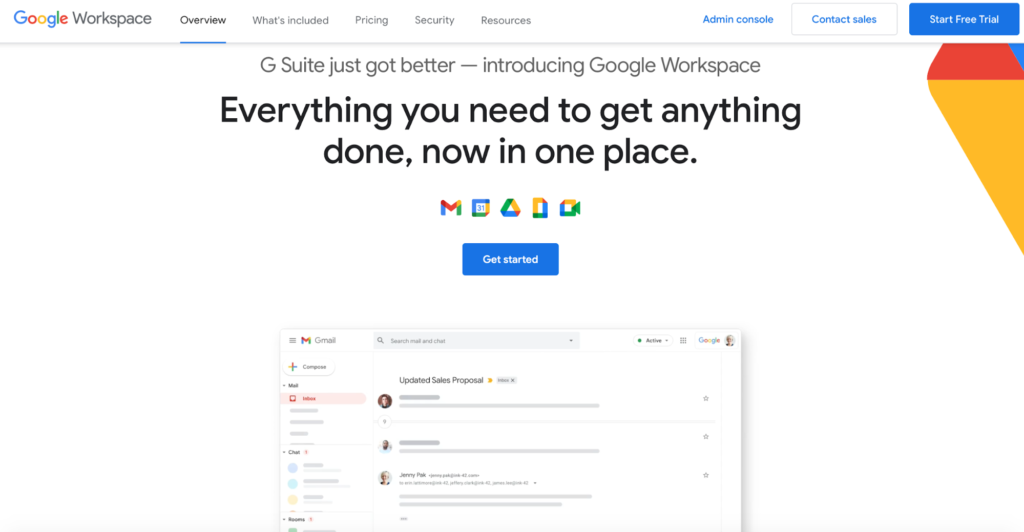
What if we told you that you could manage your projects entirely using Google Workspace?
You don’t have to steer away from what you know to run a successful project. Instead, we can use these skills to optimize Google Workspace for easy and consistent project management.
We’ve taken the time to play around with all the different apps that Google has created to make project management easier for your business and we approve. So today, we are going to share with you exactly how you can manage projects with Google Workspace.
What to Expect When Managing Projects with Google Workspace
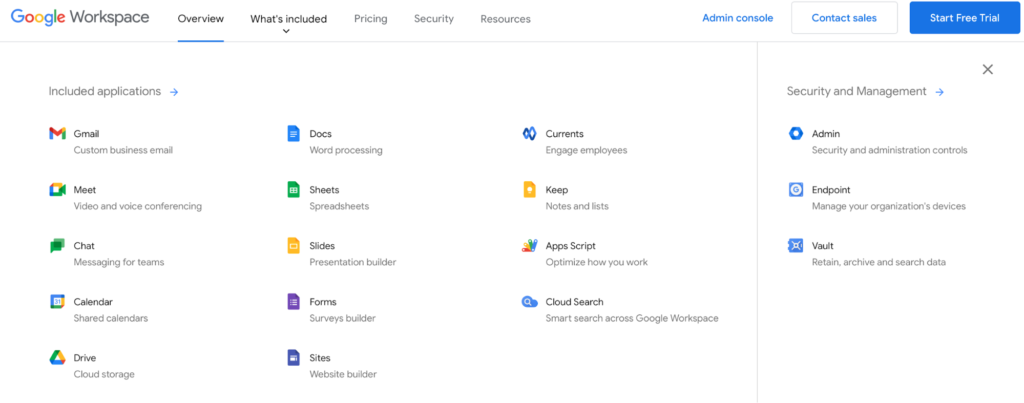
You may not have heard of Google Workspace (previously known as Google Suite or G Suite) as a project management tool before.
But, we think that after reading this post you’ll be able to clearly see how you can successfully manage your project from start to finish because there’s an app for just about everything! Here are the steps we’ll walk you through in this post:
- Sign up for Google Workspace
- Migrate existing data to Google Workspace
- Create users
- Create group email lists
- Engage and collaborate with Currents
- Manage your team and project schedule with Calendars
- Store and share digital material securely
While we think it will do the trick for most, if you’re looking for a dedicated project management software, check out our post on the best project management software.
The Good
There are so many benefits to using Google Workspace to manage your projects. It’s perfect for remote teams and really easy to set up (albeit tedious for the managers in some areas).
Most users undoubtedly have experience with Google products meaning the learning curve is much smaller than that of a foreign project management software. Google has also cleverly designed their Docs, Sheets, and Slides so that there is virtually no learning curve between Microsoft Office and Google Workspace.
Finally, having the ability to meet via video chat and screen share within the Workspace is a great asset to this option, and something many project management software options struggle with.
The Bad
We need to be honest. There is not much about Google Workspace that we don’t like. However, there are a few things that we’d love to see improved, given the opportunity.
Google Workspace is a completely online project management solution – there are no desktop tools. You can still work offline with some of the tools, but being able to simply access software tools directly from your desktop is a key advantage for some users.
If you’ve got a larger organization, you’ll likely find the step of adding users into the system very laborious and time-consuming, as each user needs to be added manually.
Finally, although all the apps you will need can be accessed from one area, you will end up with multiple tabs open as you access each app. This may not bother some people, but for us, we’d like to be able to jump around between the different apps and systems more fluidly, without having one million tabs open.
Alas, we still think that the good outweighs the bad, so let’s dig into the steps you’ll need to take to start using Google Workspace to manage projects.
Step 1 – Sign Up for Google Workspace
The first step is one of the most obvious and important steps and that is to sign up for Google Workspace. It’s a very simple process and will give you access to all the apps you need to get started with project management right away.
Choose Your Business Edition
Google Workspace has a range of different options to choose from. Your choice will be dictated by how many users you need, as well as, storage capacity, video meeting capacity, and security requirements, among other things.
One of the things we love most about Google Workspace is that no matter which edition you choose, you’ll have access to all the same apps. Which means if you’re only a small business with a few users, you won’t be disadvantaged at all for choosing the cheapest plan.
Available editions include:
- Business Starter – $6 per user, per month
- Business Standard – $12 per user, per month
- Business Plus – $18 per user, per month
- Enterprise – For organizations over 300 members, contact Google sales for pricing
You’ll also be able to undertake a 14-day free trial to make sure the edition you choose is the right one for you. Once you’ve decided, simply click ‘Get Started’ to start the process.
Add Your Business and Domain Details
After clicking ‘Get Started’, you’ll then be asked to enter a bunch of details about your business, the number of employees you have, and your existing domain details.
If you don’t have an existing domain, you can purchase one through Google Workspace or get started quickly with a free .page domain.
Add Your Personal Username
As the creator of the Google Workspace account for your business, you’ll need to create a username and domain-specific email address for your new account. These are the details that you’ll use to log in to your Google Workspace each day.
Enter Your Payment Details and Finalise Sign Up
The final step involved in the sign-up process is of course – payment. Even though you will have access to a 14-day free trial, you’ll still be asked to enter your payment details for ongoing monthly debits (once your free trial is over).
Don’t worry though. The trial is commitment-free and no payments will be debited until the end of your trial period. You’ll be able to make changes to your plan or cancel at any time within the 14 days, no questions asked.
Step 2 – Migrate Existing Data to Google Workspace
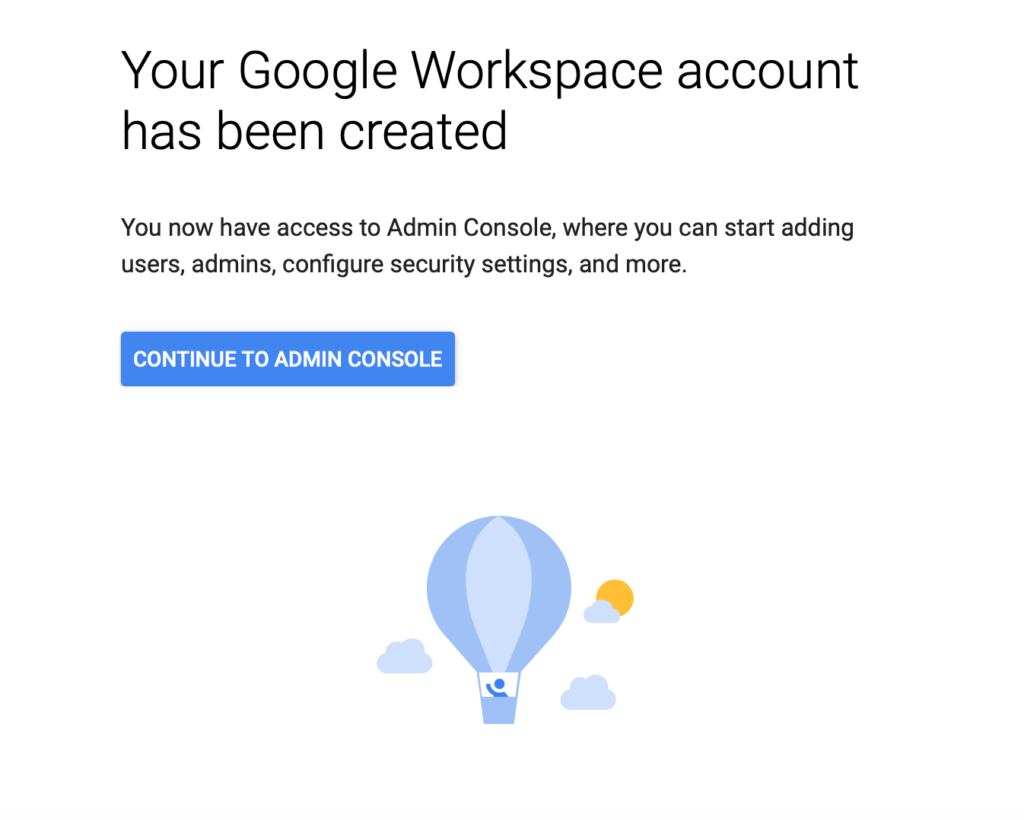
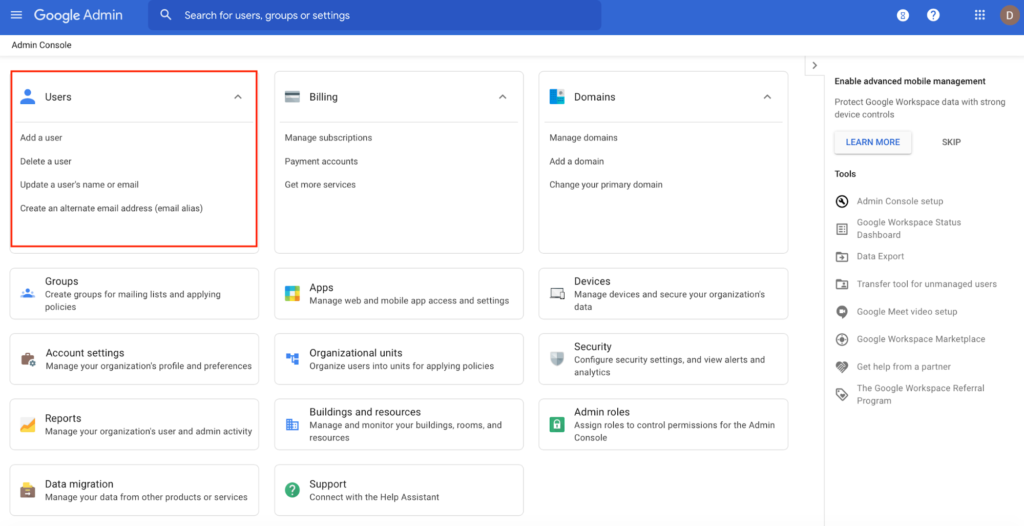
When you’ve finished signing up for your Google Workspace plan, you’ll be able to go straight to your ‘Admin Console’. We are going to work within the admin console for the next few steps.
A great advantage of using Google Workspace to manage projects is that you can migrate any existing email, contact, or calendar data over to your new system quickly and easily. Not only will this save you a lot of time and hassle, it means one of the biggest concerns in switching to Google Workspace for project management purposes (losing data) is taken care of.
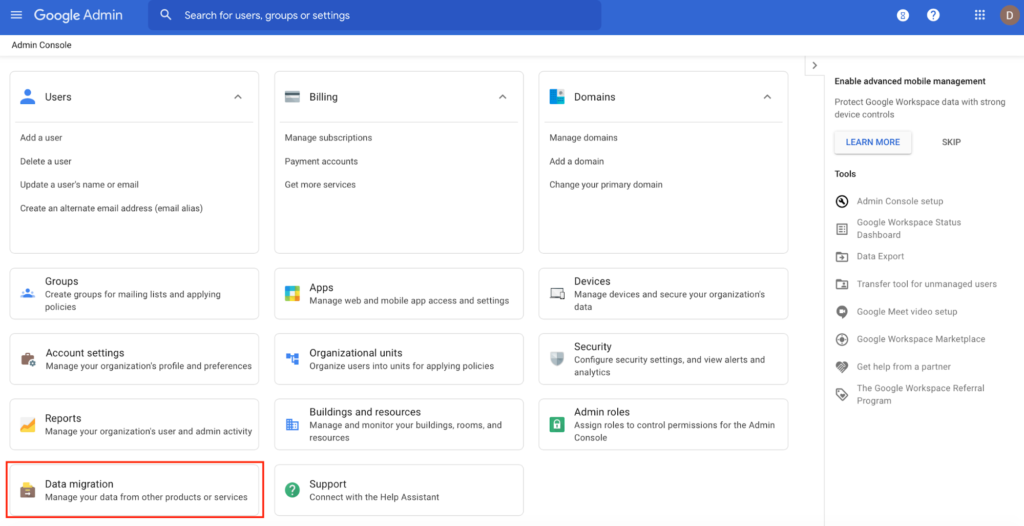
Configure Data Migration Service
When you’re ready to start the process, jump into ‘Data Migration’ in the bottom left-hand corner of your admin console. The following steps are extremely straightforward and require you to enter the details of the service from which you want to migrate your data.
First, you’ll select a migration source such as another existing Gmail account, Microsoft Office or Exchange account, or GoDaddy IMAP for example.
Then, you’ll select the data type such as calendar, existing contacts, or email data.
Finally, you’ll enter a connection protocol and account details. Essentially, this step is to allow Google Workspace to make sure that you have the permission to migrate the data, instead of just taking your word for it.
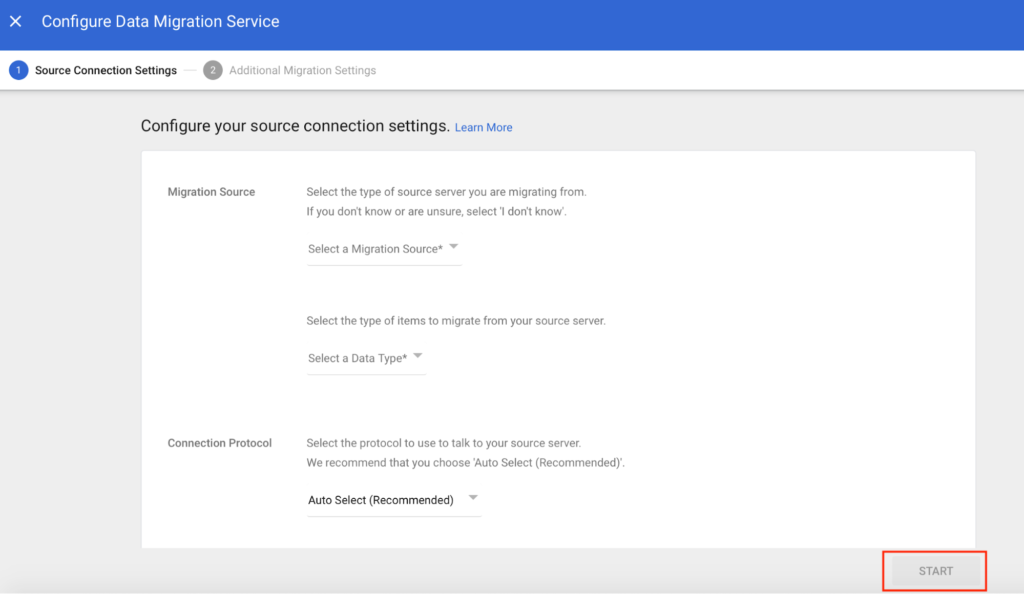
Start Migration
Once you’ve entered all the details above, you’ll be able to click Start to start the migration.
The duration of the migration will be determined by how much data you need to pull across to your Google Workspace account. But, if the migration is successful, you’ll be able to pick up exactly where you left off with all your contacts, emails, and calendar information.
Step 3 – Create Google Workspace Users
The next step is arguably one of the most important steps. You see, for your entire team to take advantage of Google Workspace’s project management capabilities, you’ll need to create accounts for them and add them as users to your Google Workspace.
You may already be thinking that this is going to be a slow and tedious process if your organization has even a hundred employees. And it is. But the upside of this step is that you’ll be able to create each and every user a name, password, and domain-specific email address to work with moving forward.
To complete this step, first we need to navigate to the admin homepage. In the top left corner, you’ll see Users. Click on Add User.
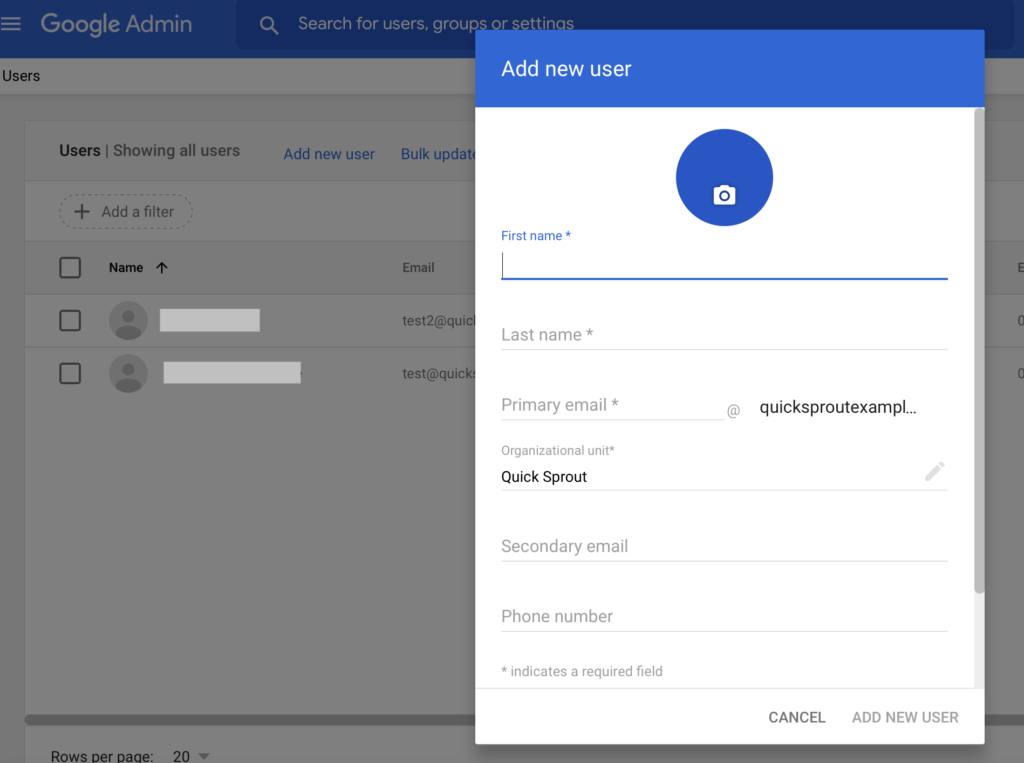
Add New User
For each new user, you’ll need to enter their personal details such as first name and last name, create a primary (organizational) email address for them, and identify which unit they belong to.
You can also add a secondary email address and phone number into their profile if you wish, but this is not compulsory.
Manage Users Accordingly
You’ll repeat this process for as many users as you need (within the bounds of your plan, of course).
If you make an error when creating users or need to update a user’s details at any time along the way, you’ll be able to do this through the Admin Console underneath the User section. You can also delete users who are no longer applicable to your Workspace too.
Step 4 – Create Group Email Lists
Now we are really getting down to the project management business.
We know that communication is paramount when it comes to project management. With this in mind, we want the project management software we choose to have tons of great communication tools included.
Luckily for us, Google Workspace ticks this box.
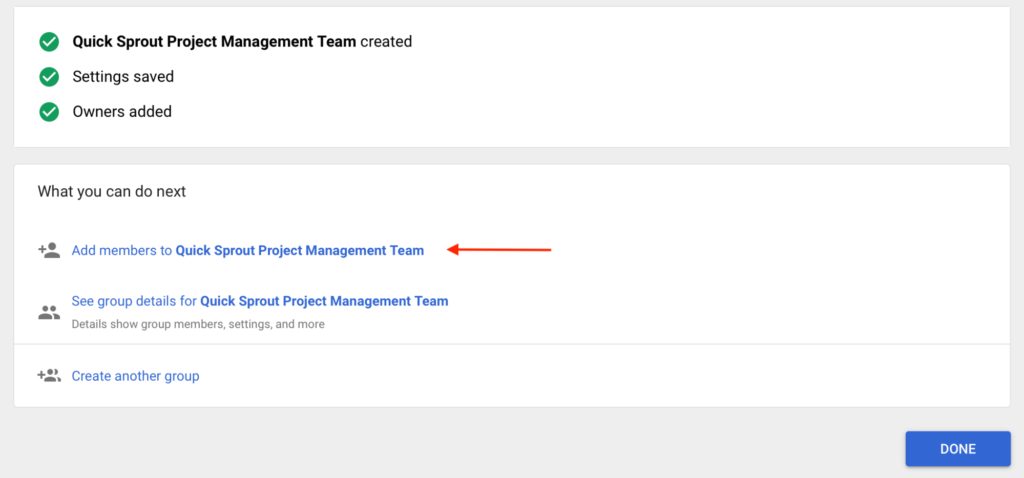
Create a Group
Once you’ve added all users to the workspace, it’s time to delegate them into project teams. To do this, navigate to Groups in the Admin Console, and click Create Group.
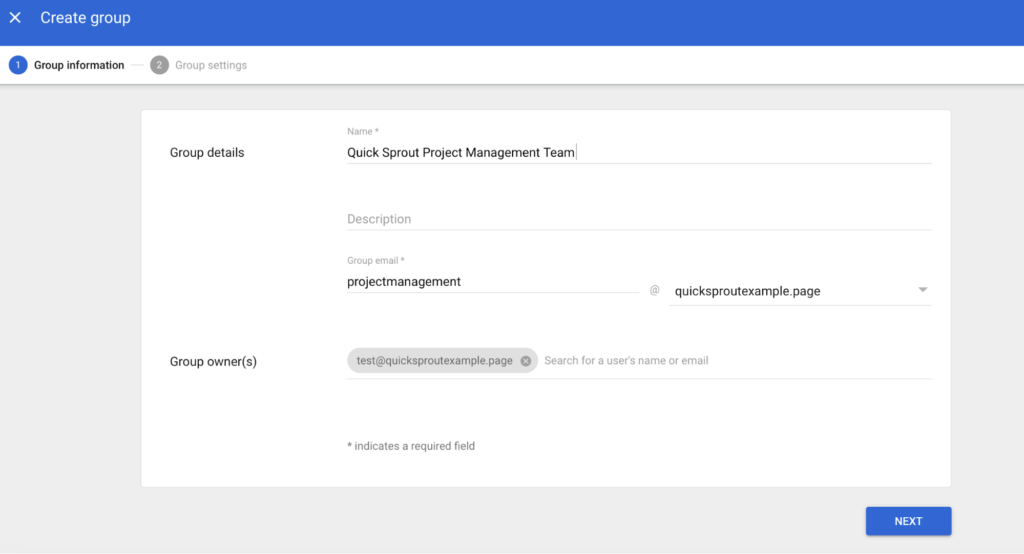
In this area, you’ll be able to create as many different groups as you like. In each group, you’ll need to nominate a group owner, create a group email address, and name the group. On the next page, you’ll be able to add the applicable group members.
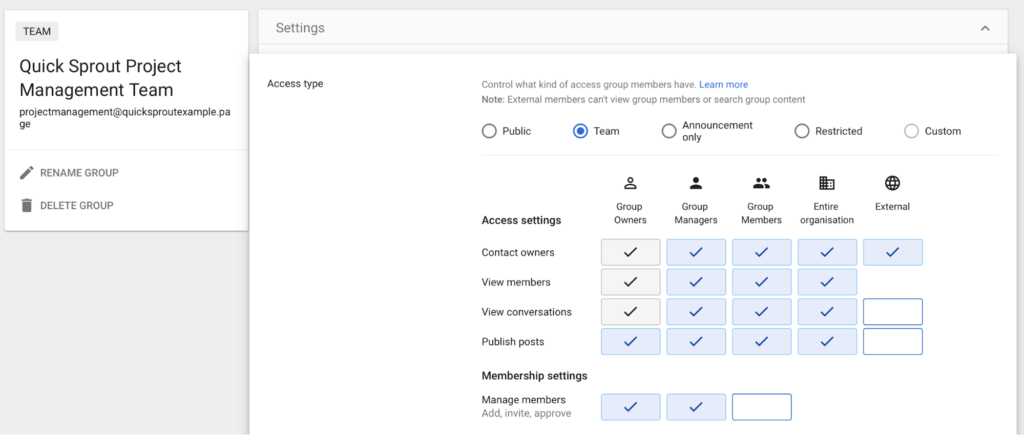
Adjust Privacy Settings of the Group
This is an important step especially if you have elements of your project that are highly classified or the details are on a need-to-know basis only.
When you adjust the privacy settings of the group, you’ll be able to include the entire organization or restrict access to certain people only. You’ll also be able to manage who can view or add members, and who can start conversations, publish posts, and invite other members.
To do this, hover over the team in the Groups dashboard and click Edit settings.
Repeat for Multiple Groups
If you have a large team and need to create multiple groups based on the stages of the project, simply repeat the above steps for as many groups as required.
Don’t forget to update your privacy and security settings and have a trusted team member test access to ensure everything is working correctly.
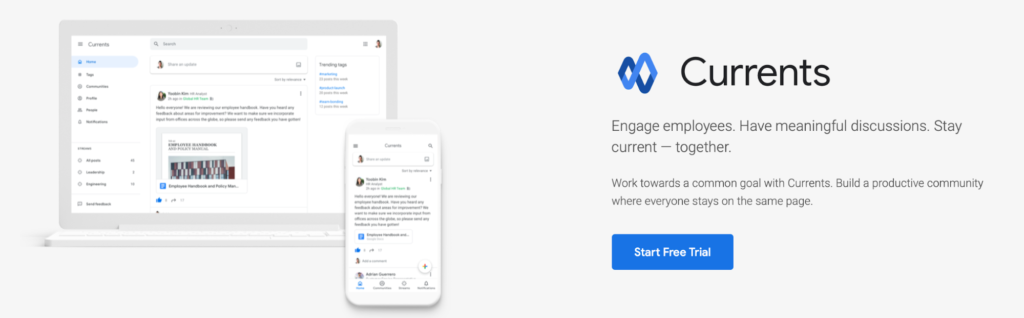
Step 5 – Engage and Collaborate with Currents
Currents is the Google Workspace app designed to provide you a platform for project management magic. You’ll be able to engage your team, collaborate on projects together in real time, and personalize your content using group hashtags.
Everything you do in Currents is automatically saved so you’ll have no problem referring back to posts or comments for clarity in the future. You can also share links, documents, and drives through Currents to ensure the entire team stays up to date.
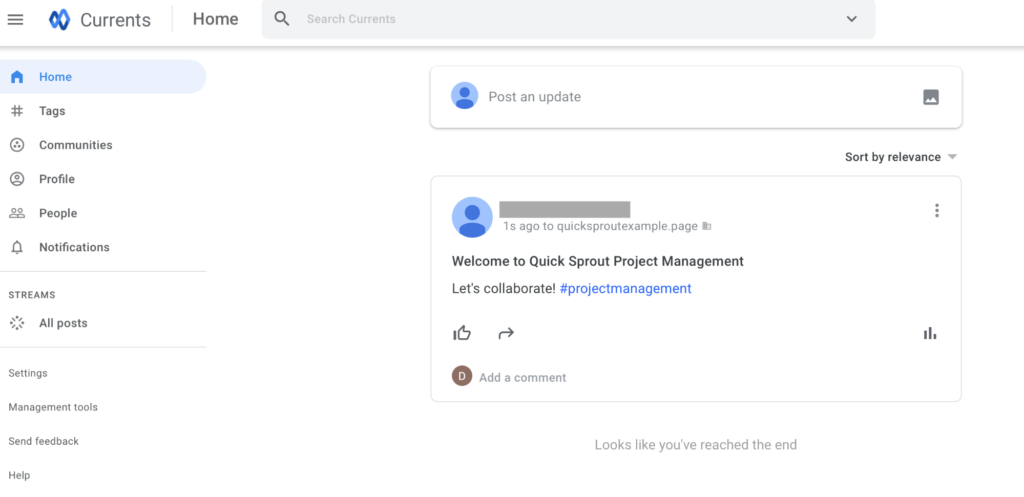
Discuss Key Topics
Start the conversation on your next project straight away by posting an update on the Currents dashboard. Everyone in your organization will see these posts, but you can add a hashtag to your content for easy finding or reference if it’s targeted specifically to one team.
Build Targeted Group Areas
The process is very similar to how you created group email lists earlier on. You may be wondering why you need to repeat this process if you’ve already created a group for your individual teams.
We hear you. However, Currents is far more collaborative and engaging than using email to communicate with your team allowing for real-time feedback instead of emails crossing over one another. With this in mind, it’s definitely worth creating this community here too.
Click on Communities and start creating your next project management team.
Follow Tags Relevant to Your Project
This feature is great if you are operating a large organization or one that has multiple projects going on at one time. When users publish a post or make a comment, they have the opportunity to include a specific tag. When they do this, it will live in that tags library for future reference.
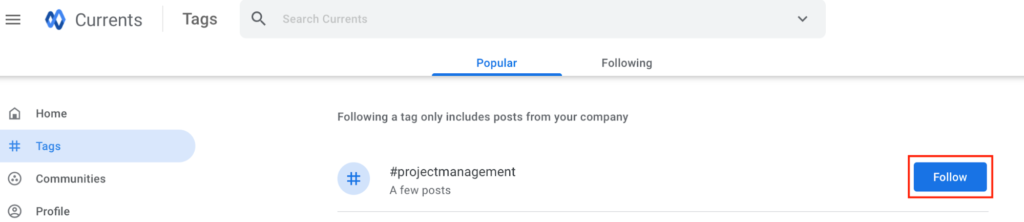
So, whether you’re a manager or just a part of many different projects, you can take the opportunity to follow tags to easily stay up to date with any information that is relevant to your role.
Step 6 – Manage Your Team and Project Schedule with Calendars
Managing multiple teams and projects at one time can be tricky, but Google Workspace aims to alleviate this pressure with the Google Calendar app.
You’ll be able to manage schedules for collaboration purposes and note key project dates for the entire team to see. You’ll also be able to schedule and organize team meetings over the Google Meet app.
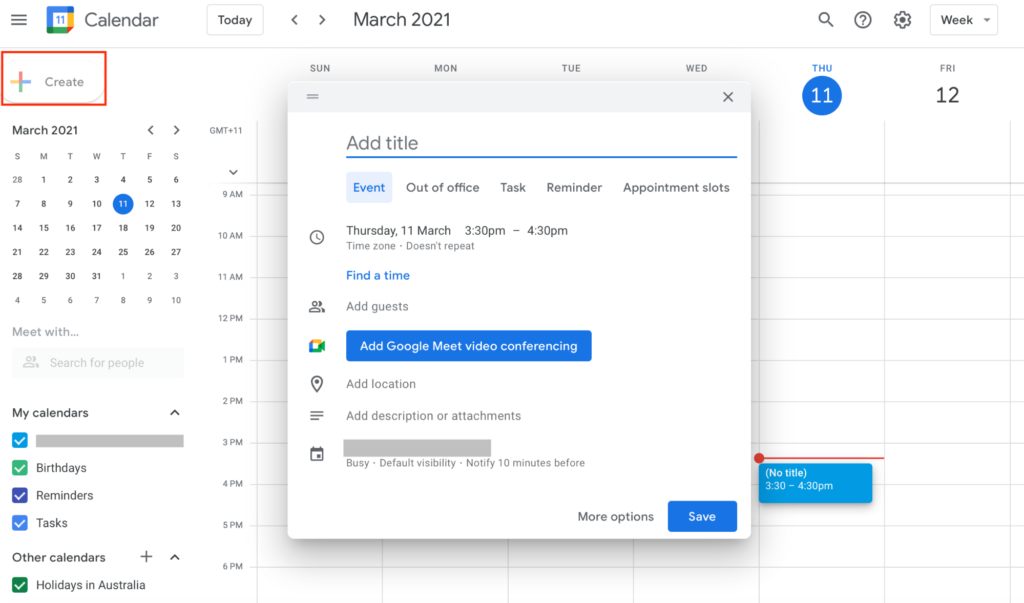
Create Calendar Event
First, go to your Calendar in Google Workspace and click + Create. A little box will pop up and allow you to enter all the relevant details for this calendar event.
These details can be for a meeting or event, a task or reminder, or an appointment.
In this first step, we’d recommend starting with all the important project deadlines as this will help you to narrow down further on when you’ll need your team to deliver on certain tasks.
Repeat this step for as many deadlines or reminders as you need.
Add Google Meet Video Conferencing Event
Once you’ve entered all the important project deadlines and perhaps even allocated tasks to certain teams, it’s time to set up a Google Meet video conferencing event.
Of course, you can jump onto Google Meet with your team at any time along the way, without pre-organizing it. But, we assume there will be set times along the way that you want to get the entire team together to go over project progression.
The benefit of doing it through your Google Calendar is that you’ll be able to send team members an invite and attach presentations, spreadsheets, documents, or any other relevant items you want them to be up to date with when it comes time for the meeting. These features allow for maximum collaboration and productivity during your project meetings.
To add these documents, simply click More Options in the + Create section of your calendar.
Share Calendar Events with Respective Teams
Finally and most importantly, don’t forget to share these calendar events with your respective teams. You won’t need to do this on every single task you enter into your calendar, as some project milestones won’t apply to your team.
However, for the tasks that you do need their input on, you need to add them as a guest so that they will be notified and can include the event in their own calendar for reference.
Step 7 – Share and Store Digital Material Securely
The final major step involved in successfully using Google Workspace to manage projects is to create a safe and secure method to storing and sharing all digital material relating to your project. To do this, we are going to use Google Drive.
Create Google Drive Folders
Navigate to your Google Drive using the Google apps menu in the top right-hand corner of your Admin console. When the page loads, you’ll automatically be loaded into your personal drive.
On the left, you’ll see a bunch of different places where you can store your content.
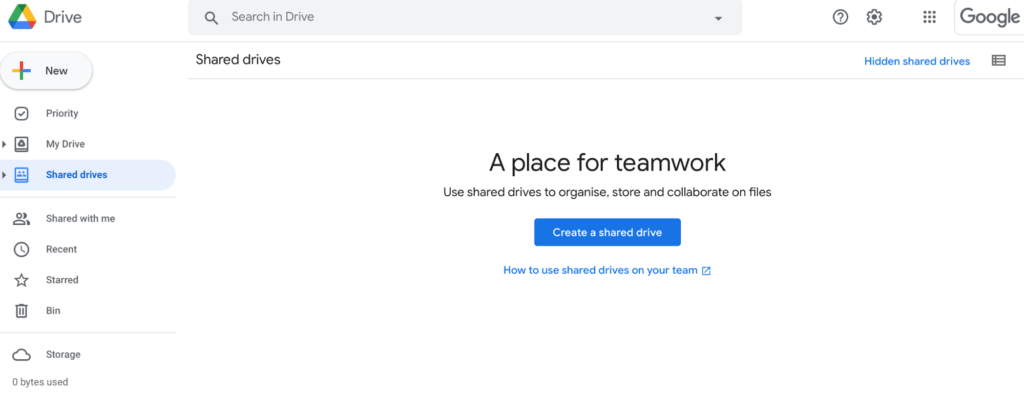
For the purpose of project management, we are going to focus on the ‘Shared Drives’ area. Go ahead and click on Shared Drives and then + New. Enter the name of your shared drive and create.
Repeat this step for as many shared drives as you would like, bearing in mind that in a moment, we will talk about how you can manage the settings of each drive to suit access levels.
Upload Relevant Documents
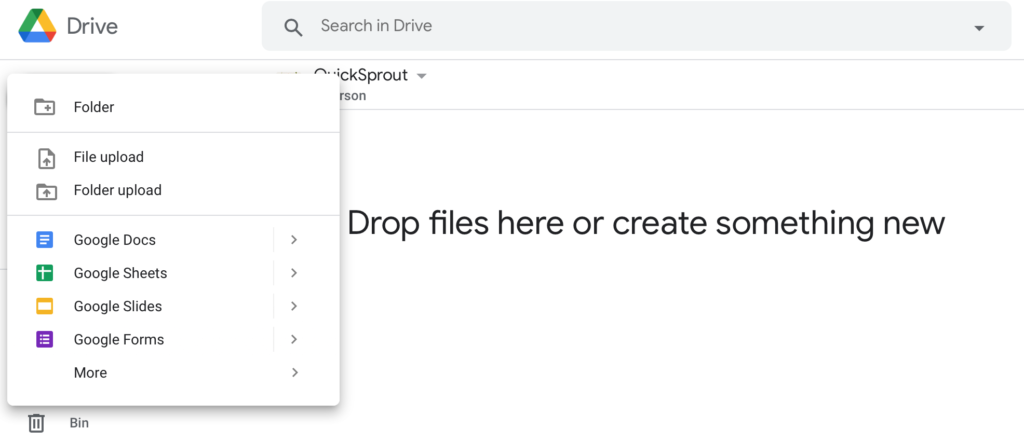
Upload any and all relevant documents to each of the shared drives that you’ve just created. To do this within a specific shared drive, double click into the drive you want to add to, and then click the + New button again.
You’ll be able to choose whether you want to upload a file, a folder, or draw something from your existing Google Docs, Sheets, or Slides.
Set Access Settings of Each Drive
Once again, the security level and permissions settings surrounding each Shared Drive is important. We don’t want any old team member to be able to access highly sensitive files so it’s important to take the time to adjust the settings accordingly.
To do this, once inside the Drive you want to adjust, click on the arrow next to the drive heading and then Shared Drive Settings. You’ll also be able to manage shared drive members and their contributor levels in this area too.
Google Drive also works from mobile devices meaning you are always able to share and store files on your Drive, even on the go, to maximize your team’s efficiency.


from Quick Sprout https://ift.tt/2QhejE3
via IFTTT
