Earning a six-figure passive income is the ultimate dream for WordPress website owners. But you need affiliate marketing, ads, or ecommerce to achieve this—for which you need Google AdSense.
As the name suggests, AdSense is a Google-run program that lets you sell your website real estate to advertisers in exchange for money. In fact, it’s one of the easiest ways to make money online.
But before you start making money, you should know how to use AdSense on your WordPress site.
In this guide, I’ll show you how you can monetize your website through Google AdSense easily and effectively.
What to Expect When Adding Google Adsense to Your WordPress Website?
Wondering how to get started now that you’ve decided to run ads on your WordPress site? I got you.
Here’s how to go about it:
- Step 1 – Sign Up for Google AdSense and Link Your Account to WordPress
- Step 2 – Create Ads in Google AdSense
- Step 3 – Implement/Embed AdSense Ads on Your Website
The Good
Google AdSense is a free program, where your ads are created by Google. So not only is it time-saving, but you can also save lots of money. Additionally, irrespective of your skillset, everyone can use AdSense since it’s incredibly easy to use.
If you have a WordPress website run by a reliable provider and have implemented AdSense ads nicely along with your content, you’re already off on the right path to make passive income.
There’s also lots of flexibility when it comes to making ads through Google AdSense. You can customize the way your ad looks, and how you want to display them. For example, you have the option to choose between having plain text ads or image-rich ads.
The other advantage is that you can place ads on multiple sites from a single account. This is useful for people who own multiple websites and want to monetize them all with ads.
Using Google AdSense is also a super effective way to earn a considerable sum of money— provided you’re able to drive traffic to your website. Try to look for ads relevant to your niche and your brand, and then place them carefully on your website, so it appeals to and piques the interest of your visitors.
The Bad
The benefits of Google AdSense do have their fair share of contingencies.
Firstly, you can only get paid through AdSense after you’ve earned at least $100. You also can’t use any other ad network other than Google for AdSense to work.
While there’s no doubt making ads is incredibly easy with Google AdSense, you need to drive a lot of traffic to your website to actually earn money. And saying that boosting traffic isn’t a cakewalk is putting it lightly.
Your website should rank highly on the SERPs, have SEO-optimized and valuable content, and should also have good domain authority. It’s only when you draw an adequate amount of visitors will you start saying returns.
What makes matters trickier is your visitor’s attitudes. Some of them may see ads as unprofessional or annoying. This is why you have to be very careful when placing and implementing ads on your website.
However, the scariest aspect of AdSense is the unpredictability of your account. According to AdSense policy, your account can be shut down at any time for reasons ranging from click fraud to policy violations. This can be a huge income loss for people who don’t have any other source of income, not to mention a huge frustration after putting in a ton of work on ads. Clearly, this won’t happen to everyone or even most people, but it’s still difficult to have so little control over your own account.
Step 1 – Sign Up for Google AdSense and Link Your Account to WordPress
I’m going to assume you already have a Google account. If not, you’ll have to make one.
You have to create a Google AdSense account and connect your WordPress website to AdSense.
This is done by adding a code snippet to your blog. Once you’ve added the code, Google AdSense will review your application to join the AdSense program, which might I add, is a different ball game altogether, but more on that later.
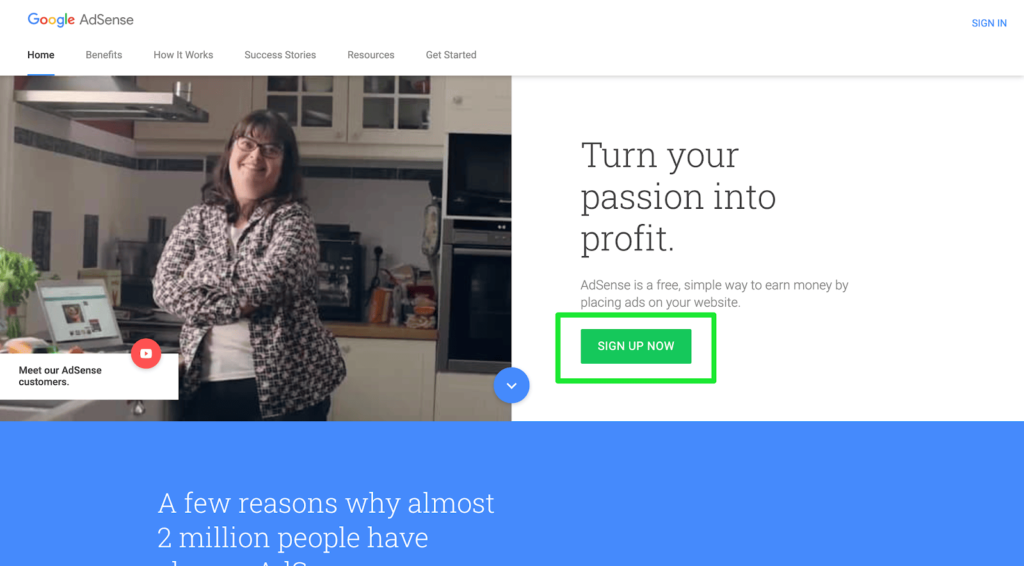
Sign Up With Google AdSense
Head over to the Google AdSense website, and click on the green Sign Up Now button.
In the signup form, type in the URL of your WordPress website, along with other relevant credentials. Click on Save and Continue when done.
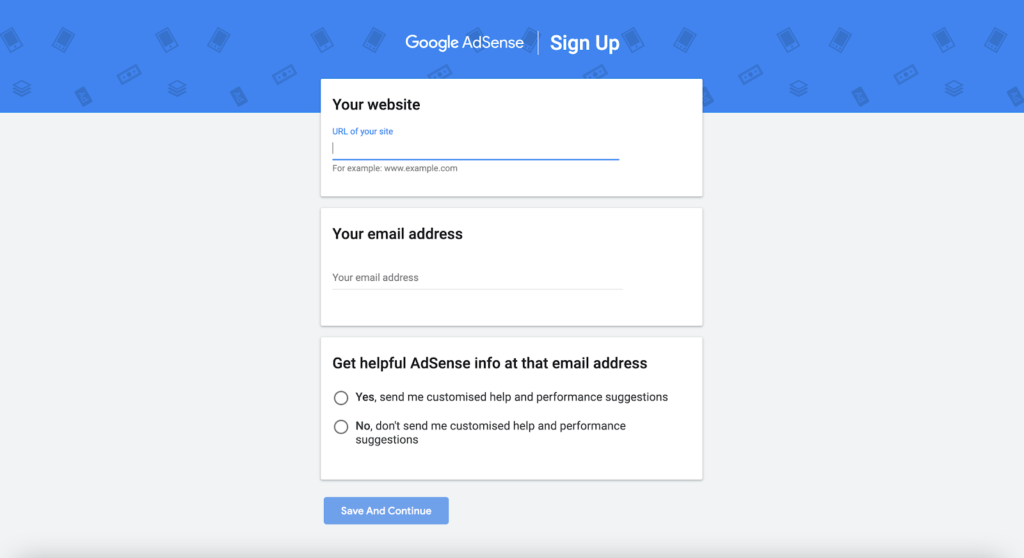
Next, select your home country and check the Terms and Conditions box to proceed. Finally, select the Create Account button.
Activate Your Google AdSense Account
You should be able to see your Google AdSense homepage.
There, you’ll find two tasks to complete your AdSense account activation. They are:
- Providing your payment details
- Connecting your WordPress site to AdSense
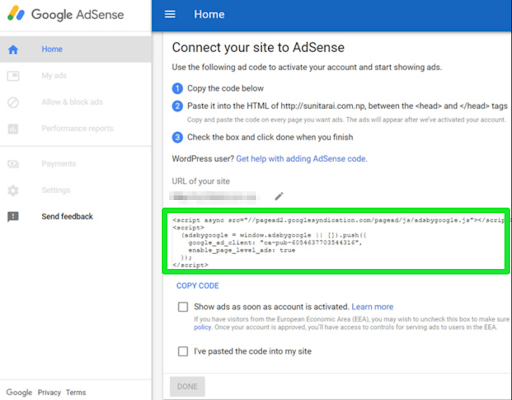
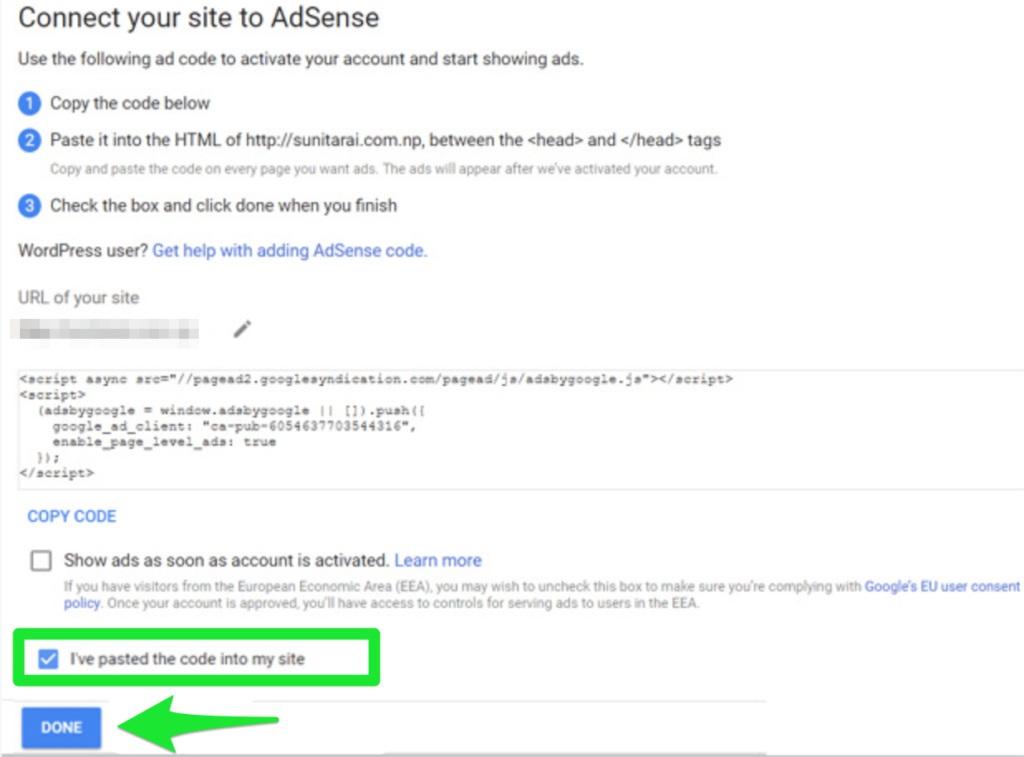
You need a snippet of HTML code to add to your WordPress site’s header. It’s how you connect your website to AdSense. You’ll find this code on your AdSense homepage. Copy it.
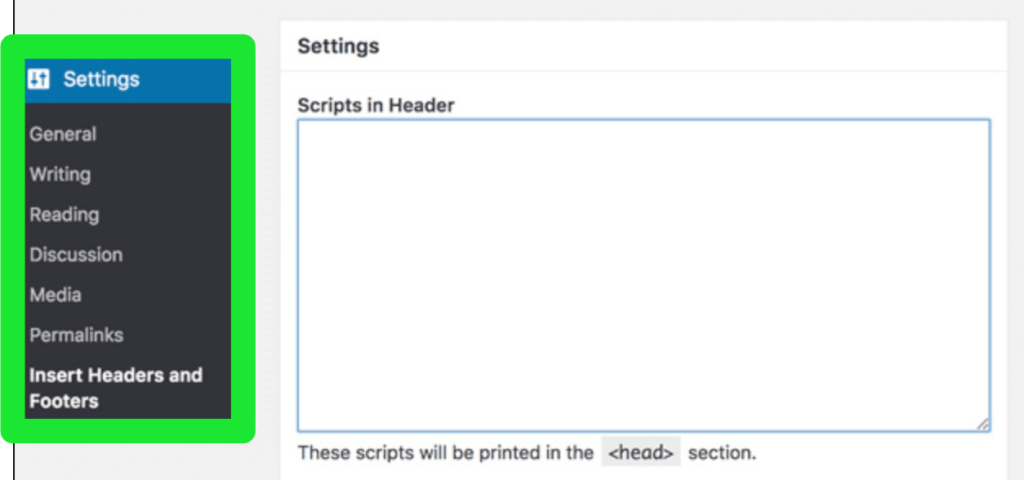
Log in to your WordPress dashboard, and install the Insert Headers and Footers WordPress plugin.
Once you’re done, go to Settings on the main dashboard, and select Insert Headers and Footers from the list of displayed options. Paste the code in the header section.
After adding the code to your site’s header, go back to the Google AdSense account homepage, and check the I’ve pasted the code into my site box. Click on Done.
Wait for Approval
Google AdSense will review your application to join the AdSense program. Don’t worry, it’s completely normal!
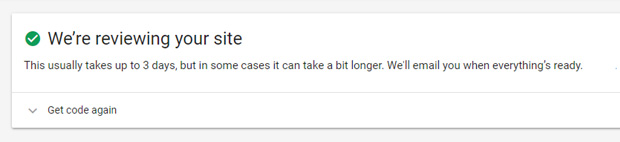
The activation process typically takes a day to complete, but it can also take a couple of weeks for some sites.
Once your application is approved, proceed to the next step.
Disclaimer: Google won’t activate your AdSense account if your website fails to comply with the AdSense program policies. While getting approval isn’t rocket science, you must do everything right.
Go through AdSense program policies, create some valuable content on your blog that attracts people, and provide a good user experience. These tips can considerably increase your chances of account approval.
Step 2 – Create Ads in Google AdSense
With the account signup and activation done, you now have the go-ahead to start creating your AdSense ads. And while this may sound daunting, it’s actually super simple.
AdSense has introduced a new feature that automatically adds AdSense ads to your website. After using this code, the program automatically figures out the best location, ad size, and ad type for your WordPress website.
Prefer having more control? You can always create and place AdSense units manually.
Let’s now take a look at how you can create ads in Google AdSense.
Choose Between Auto Ads and Manual Ads
As mentioned before, auto ads are a relatively new AdSense feature.
Instead of you doing all the hard work, it’s AdSense that creates individual ad units and places them on your blog. All you have to do is add one piece of code to your blog, and AdSense will make ad placement decisions on your behalf.
Your ads will be placed on the most optimal locations within a specific web page, like your sidebar, within your content, after the content section, and so on. This obviously saves a lot of time on your part which would’ve otherwise be spent on analyzing optimal ad placement sections as the auto ads feature uses machine learning to make these smart decisions.
Despite this, manual ads haven’t lost their appeal for some users.
You see, auto ads take away all control when it comes to deciding the location of your ads within a page. The biggest downside of this approach is that the automatic placement can change how your theme looks, and not in a good way. It may also negatively affect the user experience.
Opt for auto ads if you want to save time and focus on the other aspects of your business or if you’re a beginner and don’t have the expertise at the moment. That said, manual ads would be more suitable for you if you prefer having full control of ad placement.
Creating Auto Ads
Log in to your AdSense account. Select the Ads tab from the side menu, and click on the Get Code button.
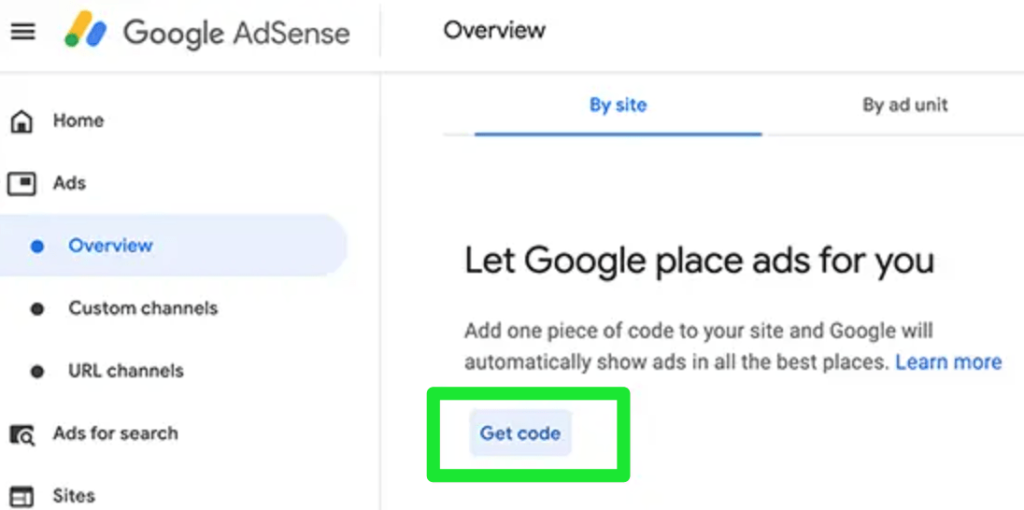
AdSense will automatically generate a code for your WordPress website. Copy this code.
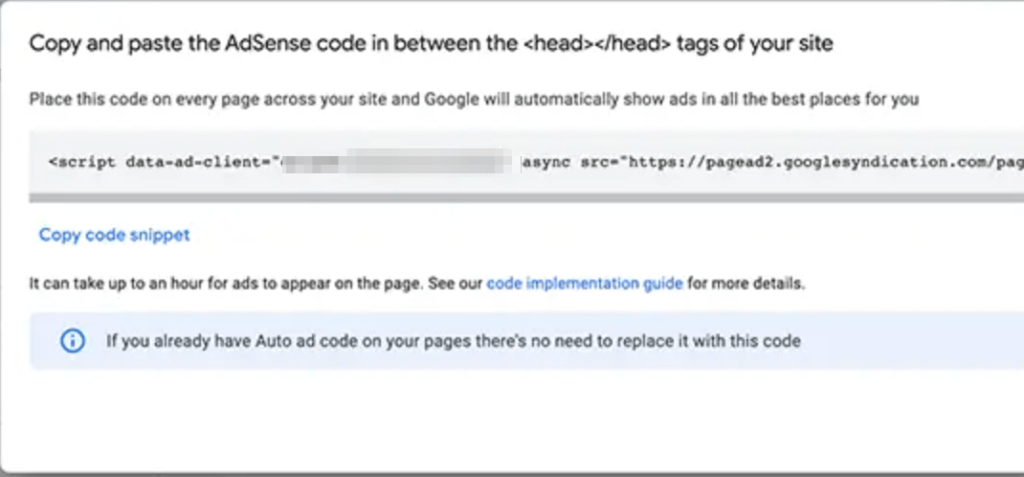
Head over to your main WordPress dashboard, and click on Settings, followed by the Insert Headers and Footers plugin. Paste the AdSense-generated code in the header section.

Alternatively, you can also add the code manually into the header section of your WordPress theme. Keep in mind that if you update or change your theme down the line, your AdSense code will disappear, so you’ll have to add it again.
Creating Manual Ads
Log in to your Google AdSense account, and go to the Tabs. Click on Overview, followed by By ad unit.
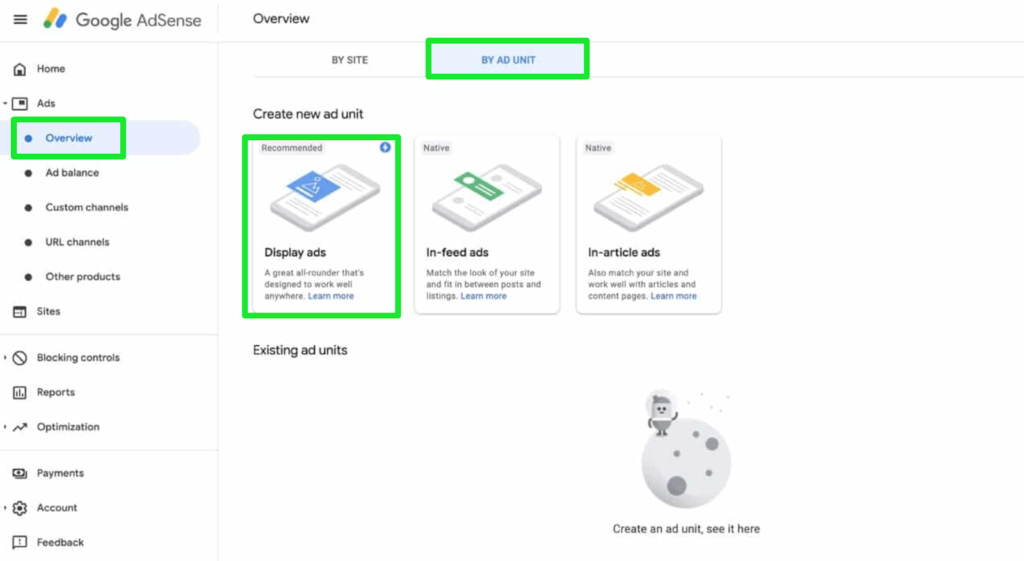
Next, click on Create new ad unit. You’ll see a list of options that show the different types of ads. Click on Display ads.
Name your ad unit, and select the ad size you want. Again, you’ll find three options: square, horizontal, and vertical. For ad size, you can select Responsive or Fixed. I recommend choosing Responsive as this ensures your ads work properly on all devices.
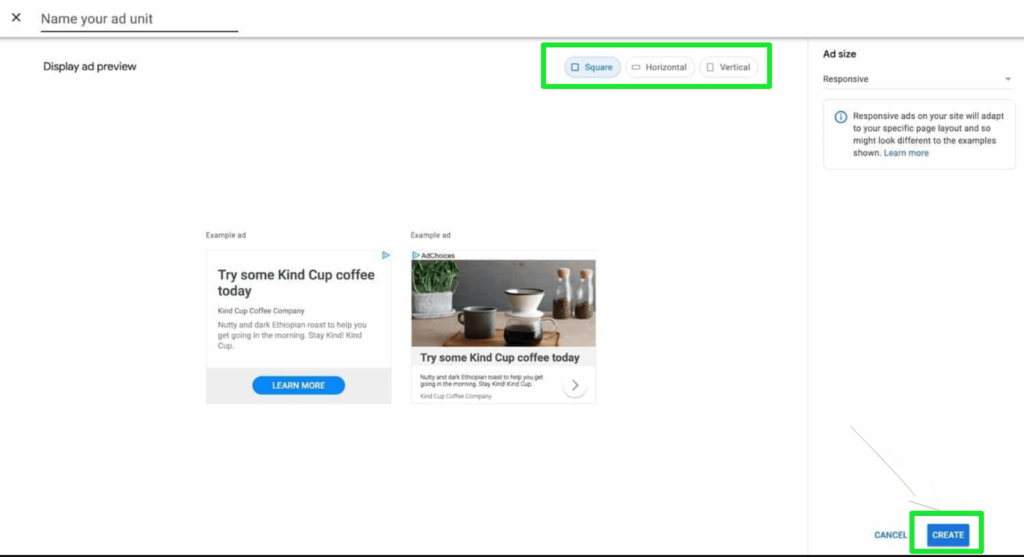
Click on Create once you’ve selected all your settings. AdSense will then generate a code that you can add to your WordPress website. Copy it.
Now you have to choose where you want to place your ad on your website. Typically, sidebars and other widget areas are great options. You have to use the custom HTML widget to add other widget areas.
But how do you add the Google AdSense code? Move on to Step 3.
Step 3 – Implement/Embed AdSense Ads on Your Website
I’ll discuss the three best ways to add Google AdSense ads to your WordPress site. You’ll find other methods too, but they aren’t very efficient in comparison to the following three:
Method #1: Copy-Paste Your Google AdSense Code into a Widget
Several Google AdSense experts prefer to copy and paste the Google AdSense code into a widget. It’s primarily because of the simplicity of the method, which appeals to beginners and experts alike.
You must follow all steps diligently for this to work, though. Here’s what you need to do:
- Go to your WordPress site, and click on Appearance, followed by Widgets on the dashboard.
- Drag and drop the custom HTML widget to your selected area (for example, your website’s right sidebar).
- Paste the AdSense code that you copied in the earlier step into the box. Click on Save.
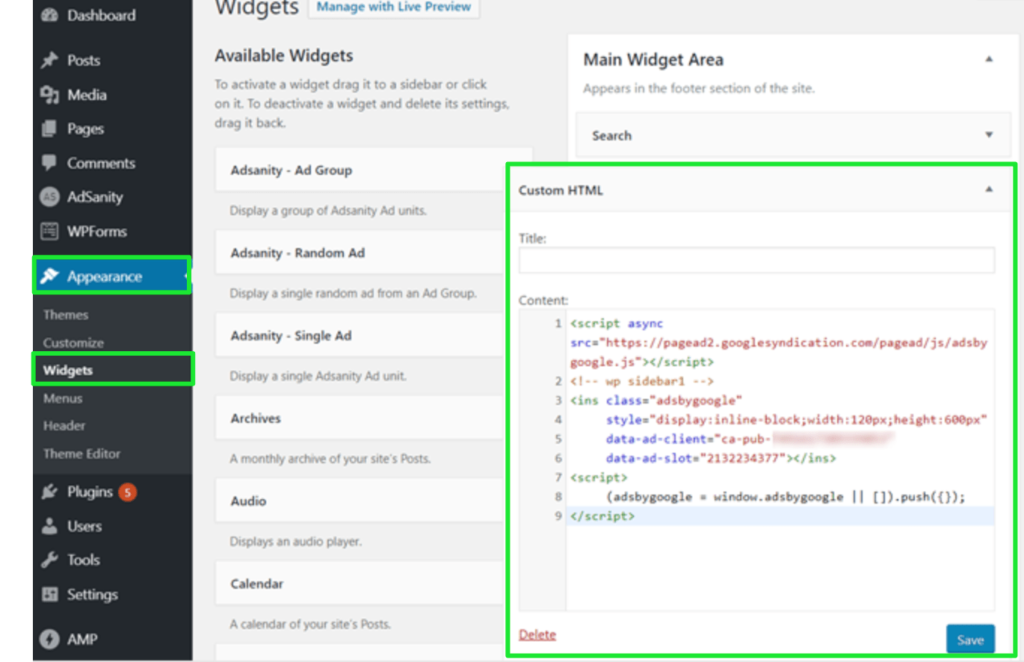
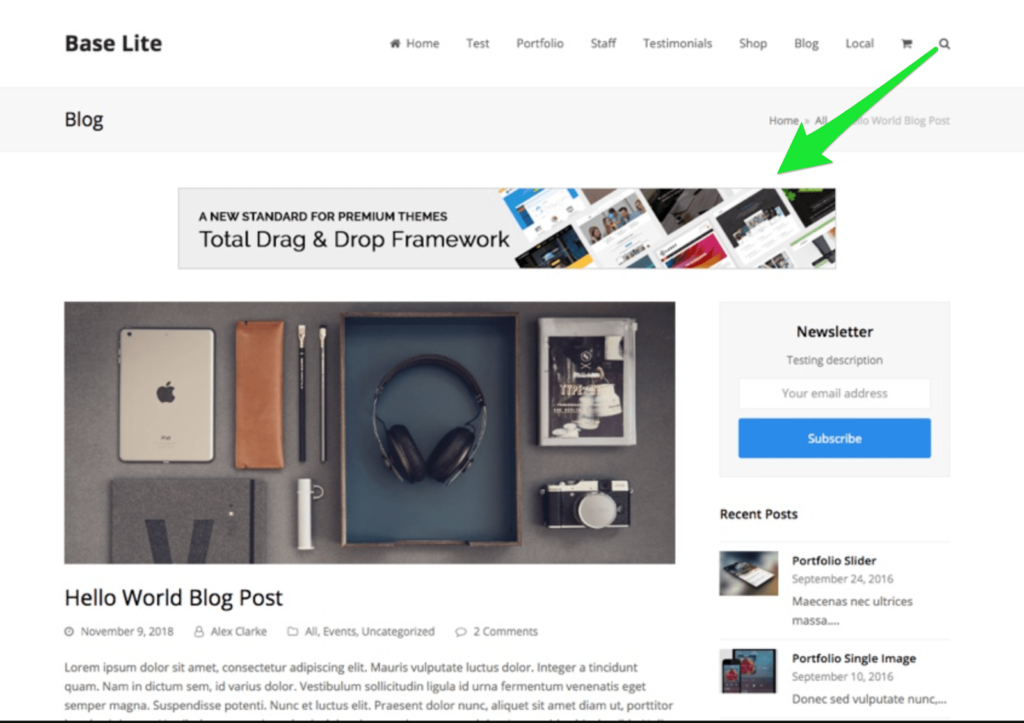
You’ve now added the code. Visit your website front-end to see how the ad looks.
Method #2: Use a Theme with AdSense Areas
You’ll find all kinds of specific themes for adding AdSense ads. I, however, recommend visiting ThemeForest and searching “AdSense WordPress themes” in the search bar to find the best fit.
Other than ThemeForest, you can also try StudioPress, MHThemes, and MyThemeShop.
Method #3: Install a Google AdSense Plugin
Plugins are a better option since using a widget for AdSense is basic and themes provide you with limited flexibility.
Installing a Google AdSense plugin will give you several additional features for your advertisements. For instance, you won’t have to copy-paste code anymore, you’ll be able to generate reports related to your ad campaigns and even enjoy time period selection.
Ads Pro, Advanced Ads, and WP Pro Adning System are some of the more promising plugins available on the market, but you can install any one you like.
Try to opt for a method that you feel would suit your requirements and preferences the best. Each method has its own pros and cons, so keep that in mind when deciding between widgets, themes, and plugins.


from Quick Sprout https://ift.tt/2QQAKAw
via IFTTT
